By default, Windows saves all Microsoft Store apps to the system drive (usually the C: drive). As you install and use more apps, they can take up a significant amount of storage space, leading to potential storage constraints on your system drive. Moving some of your apps to another drive on Windows may be necessary.

This feature allows you to free up valuable space on your system drive. This guide will walk you through the steps for moving apps to another drive on Windows and what to do if you encounter any problems.
How to Move Apps to Another Drive in Windows
Windows includes the option to move installed apps from one drive to another in the Settings app. Here’s how you can access and use it.
Step 1: Press the Windows + I keyboard shortcut to open the Settings app. Switch to the Apps tab and click on Installed apps.

Step 2: Scroll through the list to locate the app you want to move. Click the three horizontal dots menu icon next to it and select Move.

Step 3: Use the drop-down menu to select your preferred drive and click the Move button.

Windows will transfer the app to the specified drive. The above method even lets you move your Microsoft Store apps to a USB drive or SD card.
If you do not want to move apps to a different drive repeatedly, you can change the default installation location for Microsoft Store apps to a drive of your choice.
What to Do if You Can’t Move Apps to Another Drive in Windows
While Windows allows you to move installed apps to another drive in simple steps, the process may not always go smoothly. If you can’t move apps on Windows, here are some tips that may help.
1. The App May Not Be Movable
Windows does not allow you to move every app on your PC. Apps that come pre-installed are deeply integrated with the operating system and must remain on the system drive. This is because apps rely on specific dependencies or components located on the system drive, and moving them could break these dependencies. For such apps, the Move button will be grayed out on Windows.

Additionally, the Windows Settings app can’t move traditional desktop programs to another drive. If you want to move them, your best option is to uninstall the program and reinstall it on the other drive.
2. Configure the Encrypting File System Service
The Encrypting File System service on Windows encrypts files and folders on your PC. This service can sometimes interfere with Windows’ ability to move apps and cause errors. Here’s what you can do to fix that.
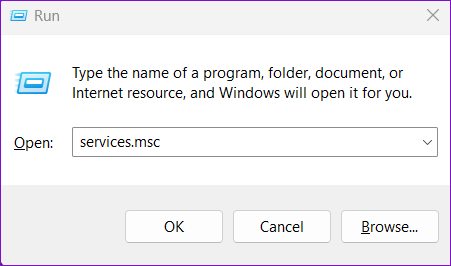
Step 1: Press the Windows + R keyboard shortcut to open the Run dialog box. Type services.msc in the box and press Enter.
Step 2: In the Services window, locate and double-click the Encrypting File System (EFS) service.

Step 3: Click the drop-down menu next to Startup type to select Manual and hit Apply followed by OK.

Restart your PC after this and try moving your apps again.
3. Modify Drive Properties
Are you having trouble moving apps to a specific drive on Windows? That could happen if the drive is configured to compress the files and folders to save disk space. Here’s how to change that.
Step 1: Press the Windows + E keyboard shortcut to open File Explorer. Navigate to This PC, right-click on the drive to which you want to move apps, and select Properties.

Step 2: Under the General tab, clear the ‘Compress this drive to save disk space’ checkbox. Then, hit Apply followed by OK.

After completing the above steps, try moving your apps to the drive and see if it works.
4. Re-Register Store Apps
Another thing you can do to fix issues related to the Microsoft Store apps is to re-register them on your system. Here are the steps for the same.
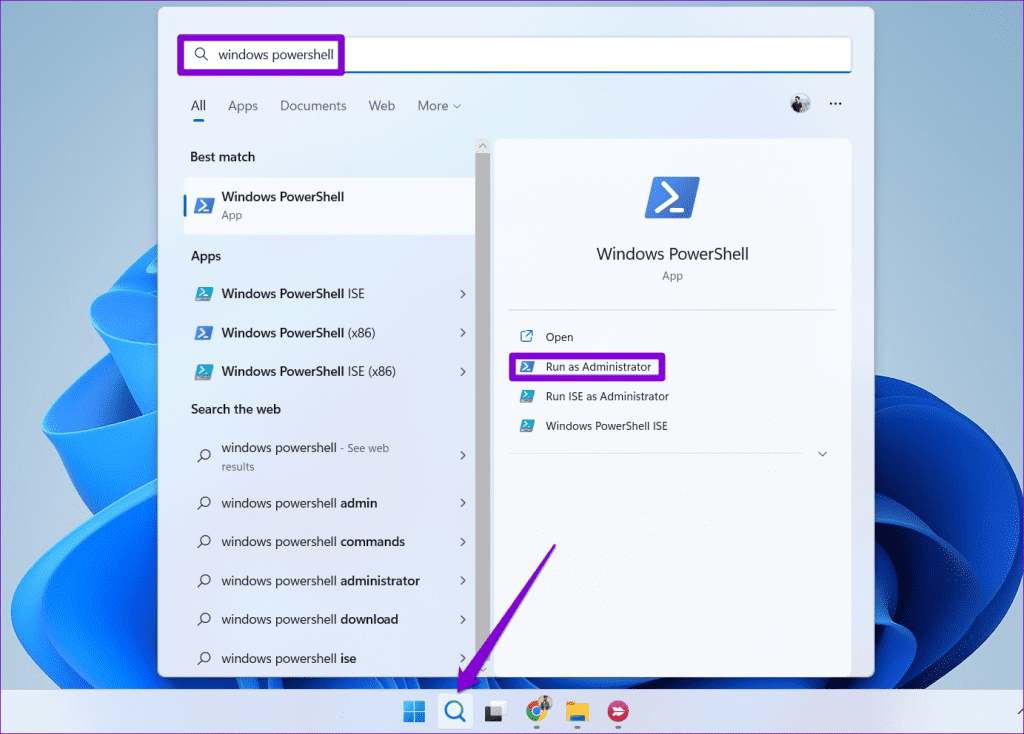
Step 1: Click the search icon on the taskbar, type in Windows PowerShell, and select Run as Administrator.
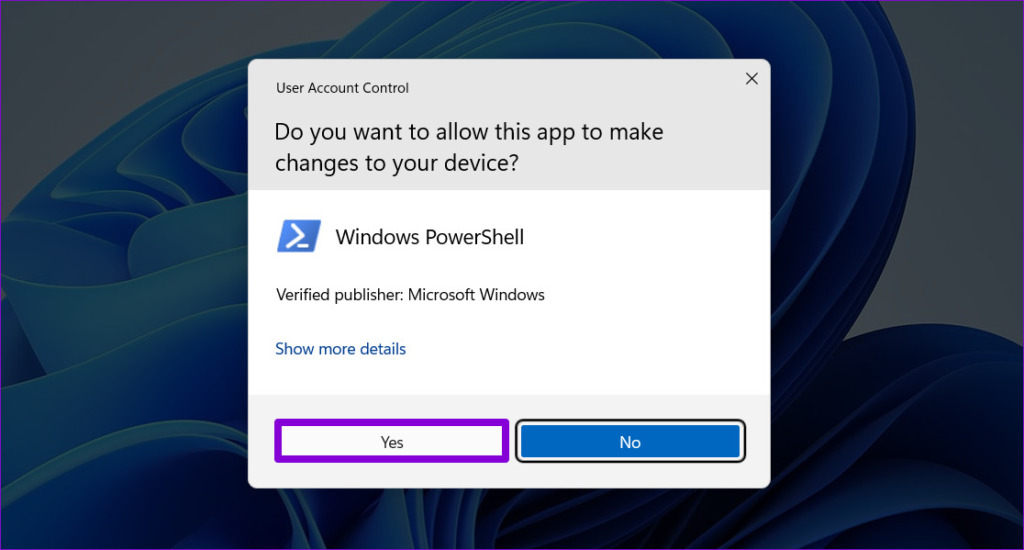
Step 2: Select Yes when the User Account Control (UAC) prompt appears.
Step 3: Paste the following command in the PowerShell window and hit Enter.
Get-AppXPackage *Microsoft.WindowsStore* | Foreach {Add-AppxPackage -DisableDevelopmentMode -Register "$($_.InstallLocation)\AppXManifest.xml"}

5. Clear Microsoft Store Cache
A corrupt or outdated Microsoft Store cache can prevent you from moving installed apps to another drive. To fix this, clear the existing store cache using these steps.
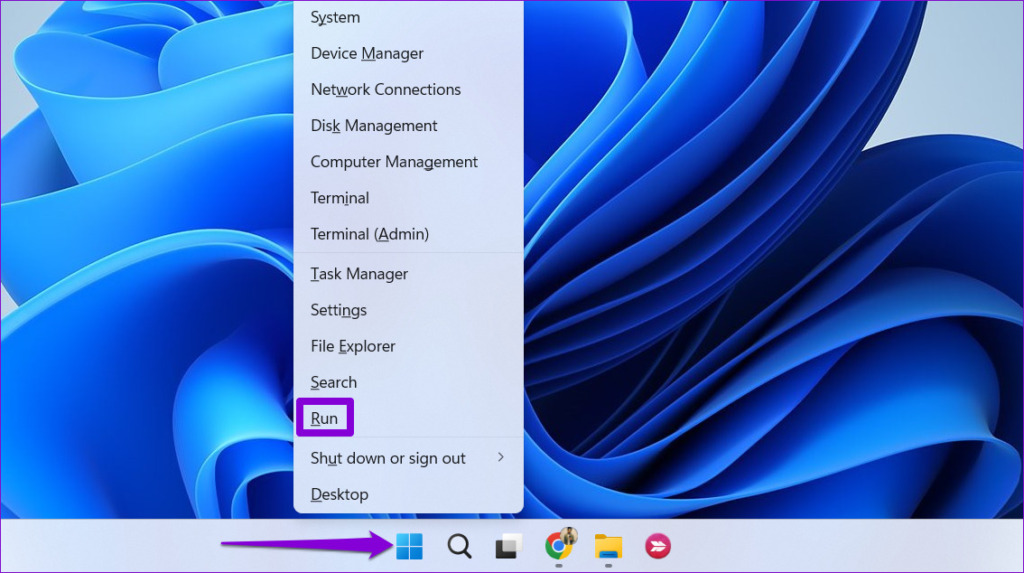
Step 1: Right-click the Start icon and select Run from the list.
Step 2: Type wsreset.exe in the box and press Enter.
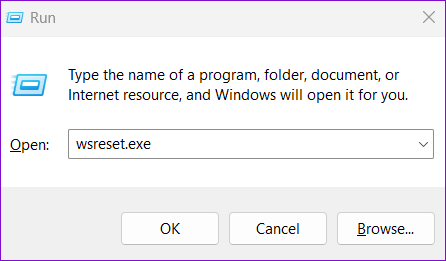
A Command Prompt window will appear and then disappear automatically once the cache is cleared. After that, you should be able to move apps.
Move With Purpose
Moving your installed apps to another drive is one of the many ways to free up space on your system drive. Additionally, you can also run Disk Cleanup and move large files from your system drive to another drive to manage storage efficiently.
Last updated on 01 November, 2023
The above article may contain affiliate links which help support Guiding Tech. However, it does not affect our editorial integrity. The content remains unbiased and authentic.
Read Next
 How to Move from an Android to an iPhone using Move to iOS
Every phone manufacturer these days is coming up with tools that help their users transfer from an old device to a new one.
How to Move from an Android to an iPhone using Move to iOS
Every phone manufacturer these days is coming up with tools that help their users transfer from an old device to a new one.
 5 Android Apps to Sell Photos on the Move
Smartphone cameras have come a long way.
5 Android Apps to Sell Photos on the Move
Smartphone cameras have come a long way.
 How to Move or Rearrange Apps on iPhone
Have you ever misplaced or accidentally removed an app on your iPhone and wondered how to get it back?
How to Move or Rearrange Apps on iPhone
Have you ever misplaced or accidentally removed an app on your iPhone and wondered how to get it back?
 SuperCopier: Best Alternative For Windows Copy, Move Tool
Last month we wrote about TeraCopy, an amazing application to replace the sluggish Windows copy/move tool.
SuperCopier: Best Alternative For Windows Copy, Move Tool
Last month we wrote about TeraCopy, an amazing application to replace the sluggish Windows copy/move tool.
 How to Create Folders and Move Emails in Outlook on Mac and Windows
Microsoft Outlook app for Mac and Windows lets you manage email conversations and calendar events.
How to Create Folders and Move Emails in Outlook on Mac and Windows
Microsoft Outlook app for Mac and Windows lets you manage email conversations and calendar events.
 How to Easily Move and Organize Files by Type In Windows
The Command Prompt is so useful that it’s hard to not want to use it all the time.
How to Easily Move and Organize Files by Type In Windows
The Command Prompt is so useful that it’s hard to not want to use it all the time.
 Automatically Move Mouse Pointer to Default Button On Dialog
All of us have experienced the popping of dialog boxes and confirmation messages while working on various applications and tools on our machines.
Automatically Move Mouse Pointer to Default Button On Dialog
All of us have experienced the popping of dialog boxes and confirmation messages while working on various applications and tools on our machines.
 How to Move Images Freely in Word Without Limitations
Microsoft Word has long been the default champion of the document editing world, that is until Google Docs came along.
How to Move Images Freely in Word Without Limitations
Microsoft Word has long been the default champion of the document editing world, that is until Google Docs came along.