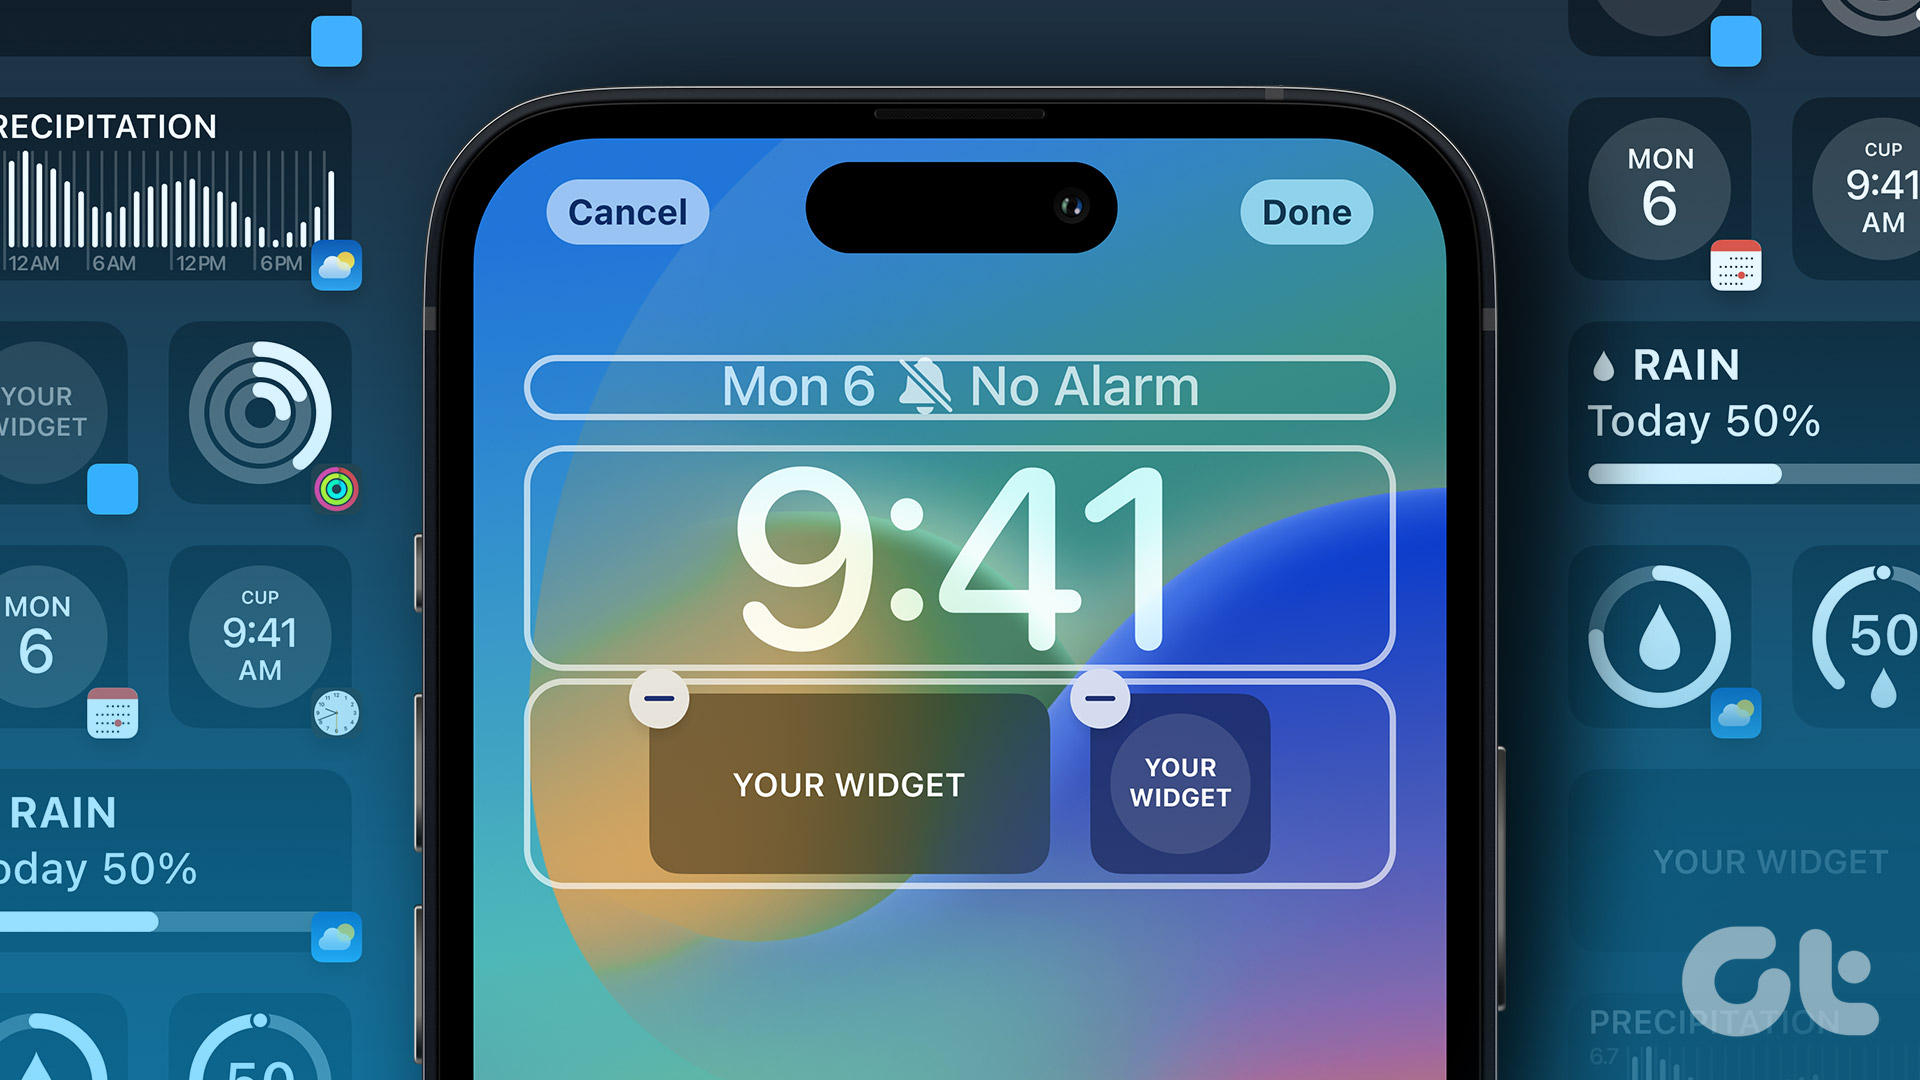
After years of waiting, the iPhone finally got the ability to add widgets to the Home screen with iOS 14 in 2020. These widgets come in various sizes and despite not sporting any interactive elements relay lots of useful information. However, Apple added a cherry on top called a Smart Stack of Widgets. Here’s how you can add or edit Smart Stack widgets on your iPhone home screen.
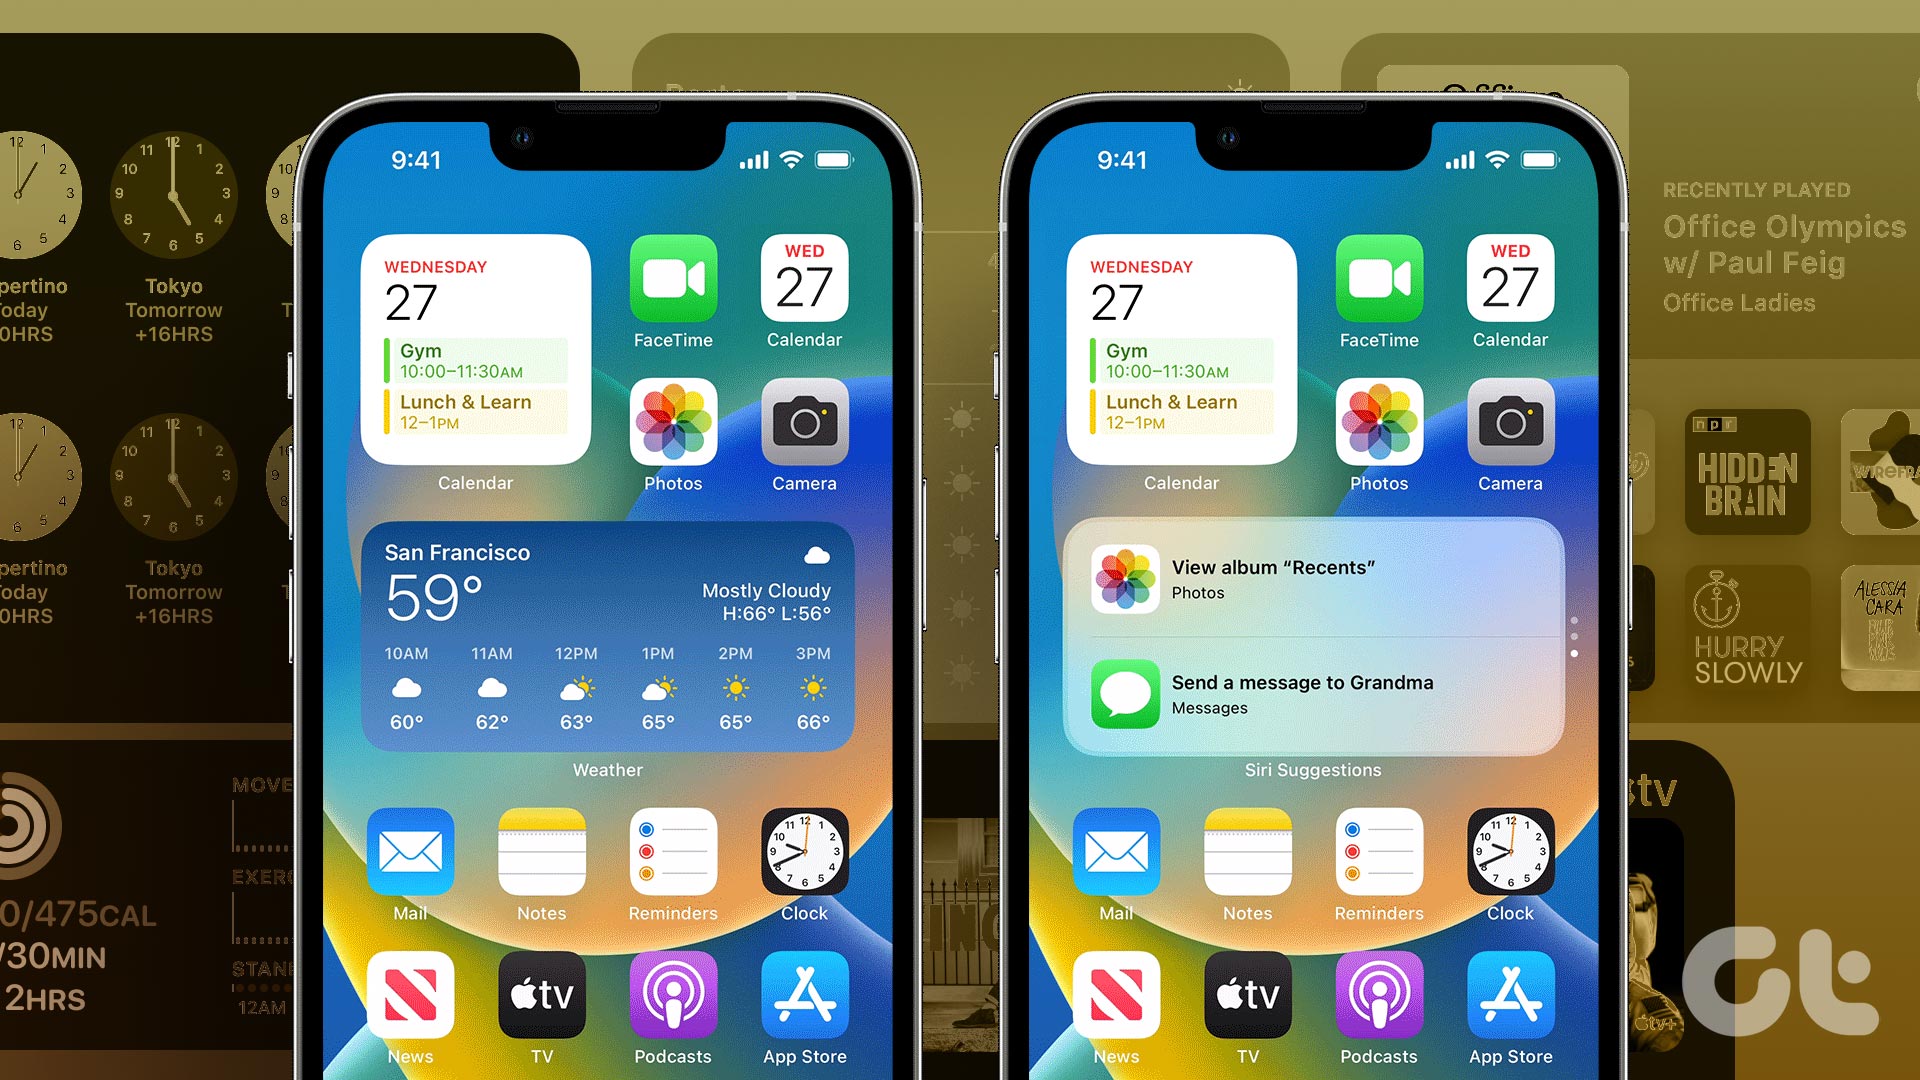
To make things even better, you can use the Smart Stack to maximize the iPhone’s Home screen experience. If you are wondering how to add or edit the Smart Stack of widgets, then you’ve come to the right place. We’ll show you how to add a Smart Stack of Widgets on iPhone. But first, let’s understand what they are.
What is a Smart Stack of Widgets on iPhone
In case you’re wondering, a Smart Stack ‘smartly’ switches between widgets based on past activity. For instance, you may have made it a habit to open the Reminders app in the morning—with a Smart Stack, expect the Reminders widgets to pop up right around that time. Your iPhone uses machine learning to power the Smart Stack, so don’t be amazed to see the right widget at the right time.
Furthermore, a Smart Stack helps cut down the clutter of multiple widgets since you can also manually swipe up or down a stack to get to the widget that you want. Let’s check out how you should go about adding and editing Smart Stacks on the iPhone. We will also show you how to create your very own custom widget stacks from scratch.
How to Add a Smart Stack of Widgets on iPhone
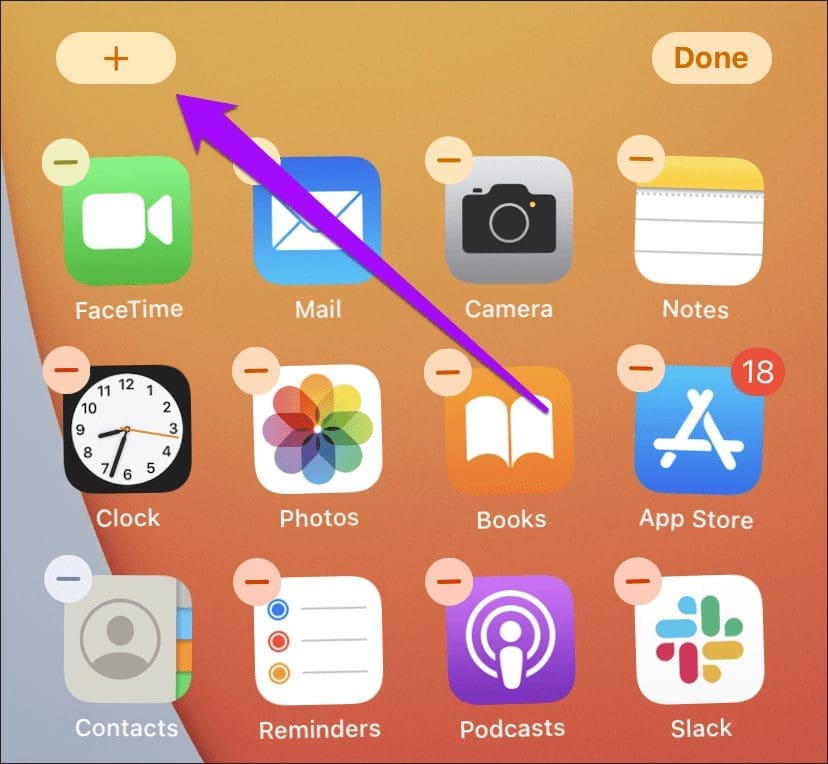
Step 1: Start by long-pressing a vacant area of the Home screen to jiggle all app icons. Then, tap the plus-shaped icon in the upper-left corner of the screen.
Step 2: You should see the widgets gallery. Tap the Smart Stack, which you should see at the very top.

Step 3: Pick a size (small or medium), and then tap Insert Widget to add the Smart Stack to the Home screen.
Step 4: After inserting the Smart Stack, feel free to move it around the Home screen or onto a different page altogether.
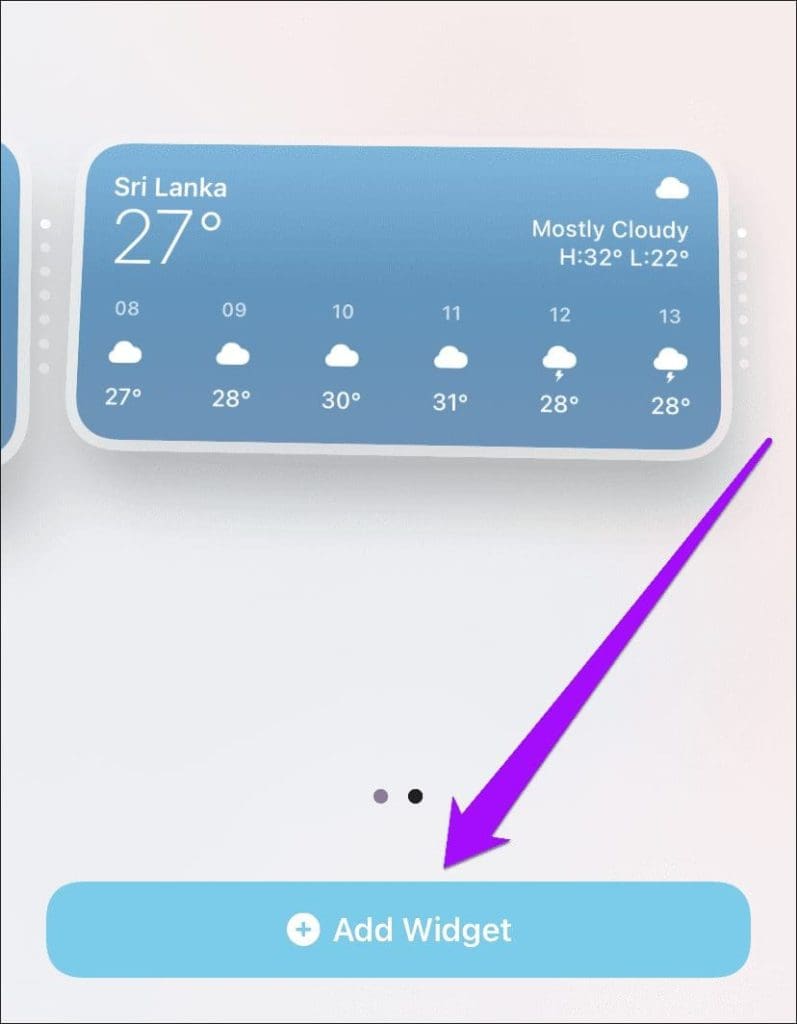

You can also add multiple Smart Stacks, which is ideal if you want to have them on different Home screen pages.
Bring up the widgets gallery—since you’ve already added a Smart Stack, you won’t see it listed at the top of the gallery anymore. Therefore, type in ‘smart stack’ into the Search Widgets field to get it to show up. Then, select a size and tap Add Widget.
Note: You can also add a Smart Stack of widgets in Today View (if it already doesn’t have one)—jiggle the screen, bring up the widgets list, select Smart Stack, and then tap Add Widget. Today View is also the only way to add and use Smart Stacks on the iPad, where you can’t add widgets to the Home screen.
How to Remove Widgets From Smart Stack
Smart Stacks that you add to the Home screen contain lots of widgets. You may not use some of them at all. In that case, you can remove such widgets, that you don’t plan to use, quite easily.
Step 1: Long tap on the stack and select the Edit Stack option within the long-press context menu.
Step 2: On the list of widgets that then shows up, tap on the remove icon to remove widgets from the stack.
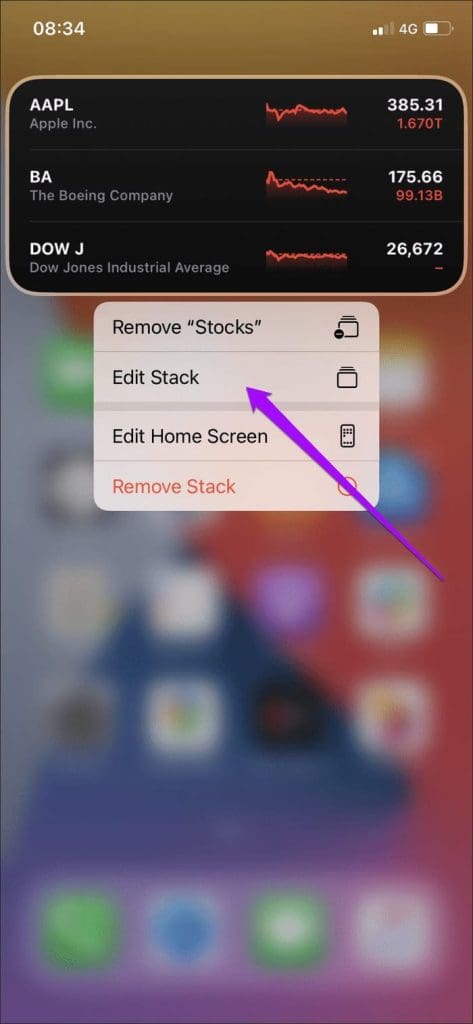
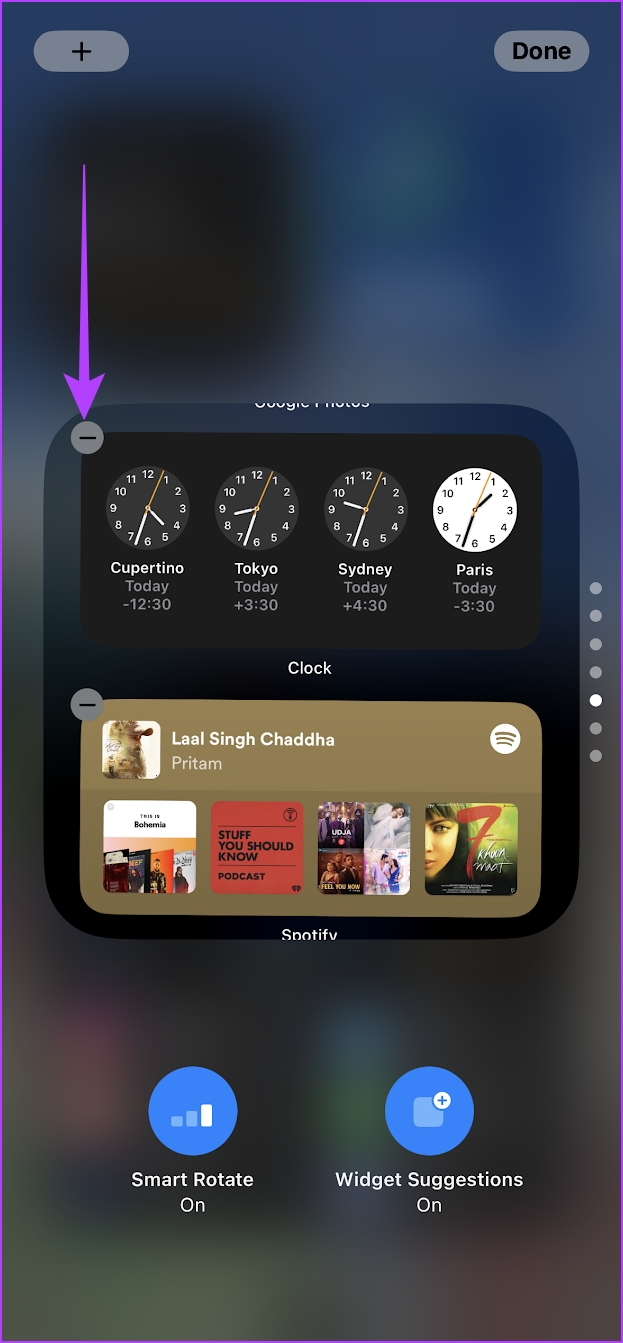
Once you’ve finished removing unwanted widgets, swipe down to exit the Home screen.
How to Edit a Smart Stack of Widgets on iPhone
When manually swiping through a Smart Stack, you may not like the order in which each widget appears. Thankfully, you can change the default ordering.
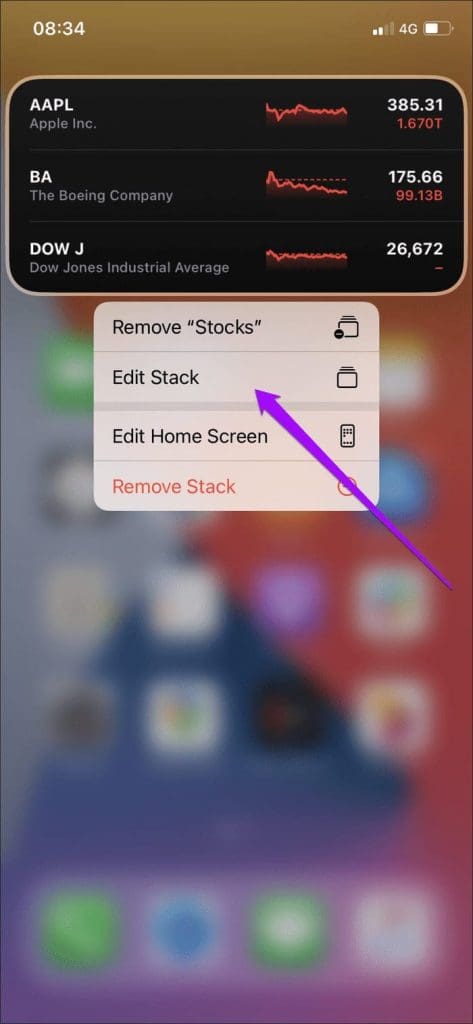
Step 1: Start by long-pressing the stack—on the context menu that shows up, tap Edit Stack.
Step 2: Then, tap and hold the widgets to drag them around in any order. Swipe down to exit the Home screen.

How to Disable Smart Rotate Widget on Smart Stack
You may prefer to swipe through a Smart Stack instead of letting widgets rotate automatically. In that case, you can disable the ‘smart’ functionality of a widget.
Long-press the Smart Stack, select Edit Stack, and then turn off the switch next to Smart Rotate.
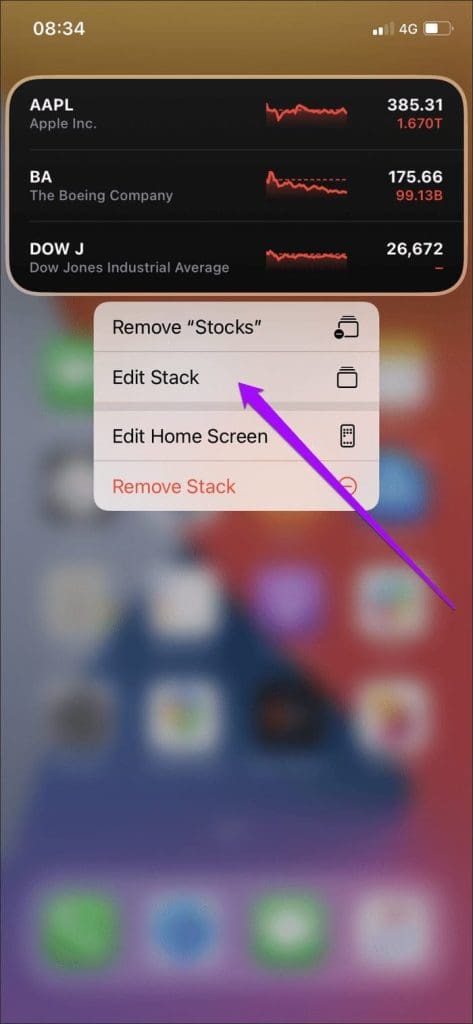

Exit to the Home screen and the Smart Stack won’t display useful widgets on its own anymore. If you want the functionality back, head back into the widget editing screen and turn on Smart Rotate.
How to Create Custom Smart Stack on iPhone
Rather than insert a Smart Stack from the widgets gallery, you can create your own custom ‘smart’ stack. Here’s how to do it.
Step 1: If your iPhone’s Home screen already has widgets within it, drag and drop a widget over another similarly-sized widget to start stacking.


Step 2: Repeat the process to build up the stack with the widgets that you want. You can also drag and drop widgets over others of the same size while adding them to the Home screen via the widgets gallery.
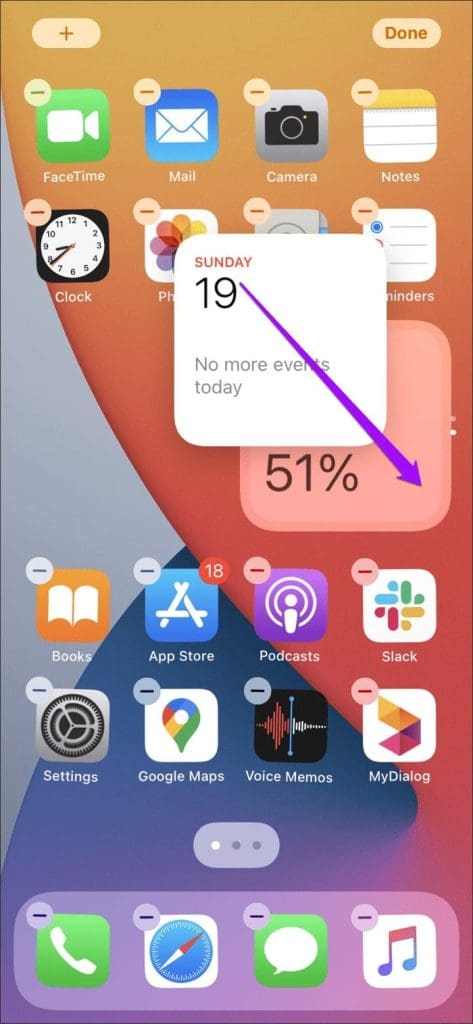

That’s how you build your own ‘smart’ widget stack. Feel free to build as many as you want. Custom-built widget stacks work just like the Smart Stacks that you insert via the widgets sheet.

You can change the order, delete widgets, and even disable the Smart Rotate functionality as well in a custom widget stack.
How to Delete a Smart Stack Widget on iPhone
If you have no use for a Smart Stack anymore, you can quickly get rid of it. Here’s how to do it.
Step 1: Long tap on the Smart Stack.
Step 2: Tap on Remove Stack.
Step 3: Tap on Remove to confirm.
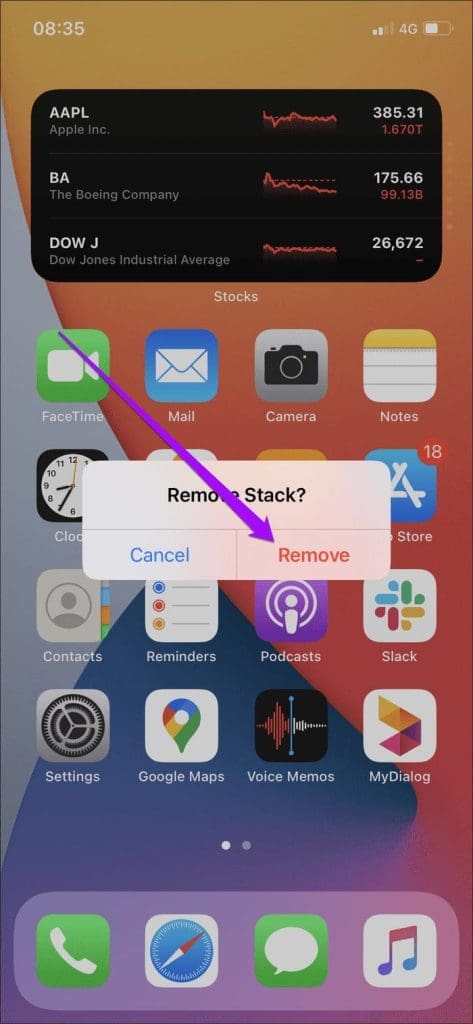

There you go – that is everything you need to know on how to add or edit the Smart Stack widgets on iPhone. If you have any further questions, you can take a look at the FAQ section below.
FAQs on Smart Stack Widgets on iPhone
You can add up to ten widgets on a Smart Stack on iPhone.
Yes. You can have multiple Smart Stack widgets on an iPhone home screen.
No. You cannot have Smart Stack widgets on the lock screen on an iPhone.
There is currently no way to add a specific photo as a widget on iPhone.
Use Widgets the Smarter Way on iPhone
Rather than scattering multiple widgets around the Home screen and having them distract you all the time, opting for a Smart Stack helps you both cut down the clutter and focus your attention on the widgets that matter the most. If you love the widgets feature on iPhone, you can also take a look at how to use the lockscreen widgets feature on iOS 16.
Last updated on 21 November, 2023
The above article may contain affiliate links which help support Guiding Tech. However, it does not affect our editorial integrity. The content remains unbiased and authentic.


