Following Screen Time’s inclusion in iOS, Apple quietly brought the Screen Time feature in the macOS 10.15 Catalina. Screen Time enables users to track their usage and place self-imposed limits on their time using Mac. With long working hours, it’s necessary to take regular breaks from work. Using Screen Time on Mac, you can track how your previous week went in terms of productivity and plan accordingly for the next one.

Additionally, Screen Time also serves as a parental control system since it can place restrictions on what your children can access, who they can contact, and how long they spend on apps, websites, and more. This post will help you understand how to make maximum out of Screen Time on Mac. Let’s begin.
Note: If you can’t access Screen Time, ensure your Mac is running macOS Cataline or later.
How to Enable Screen Time on Mac
Depending on the macOS version, the methods differ for enabling Screen Time on Mac. We have highlighted the steps below.
On macOS Monterey or Earlier
Step 1: Launch System Preferences from your Mac’s Dock, Applications folder, or from the Apple menu bar.
Step 2: Select Screen Time in the preference panel.
Step 3: Click the Options button in the bottom-left corner.
Step 4: Click the Turn On button in the top-right corner.

On macOS Venture or Later
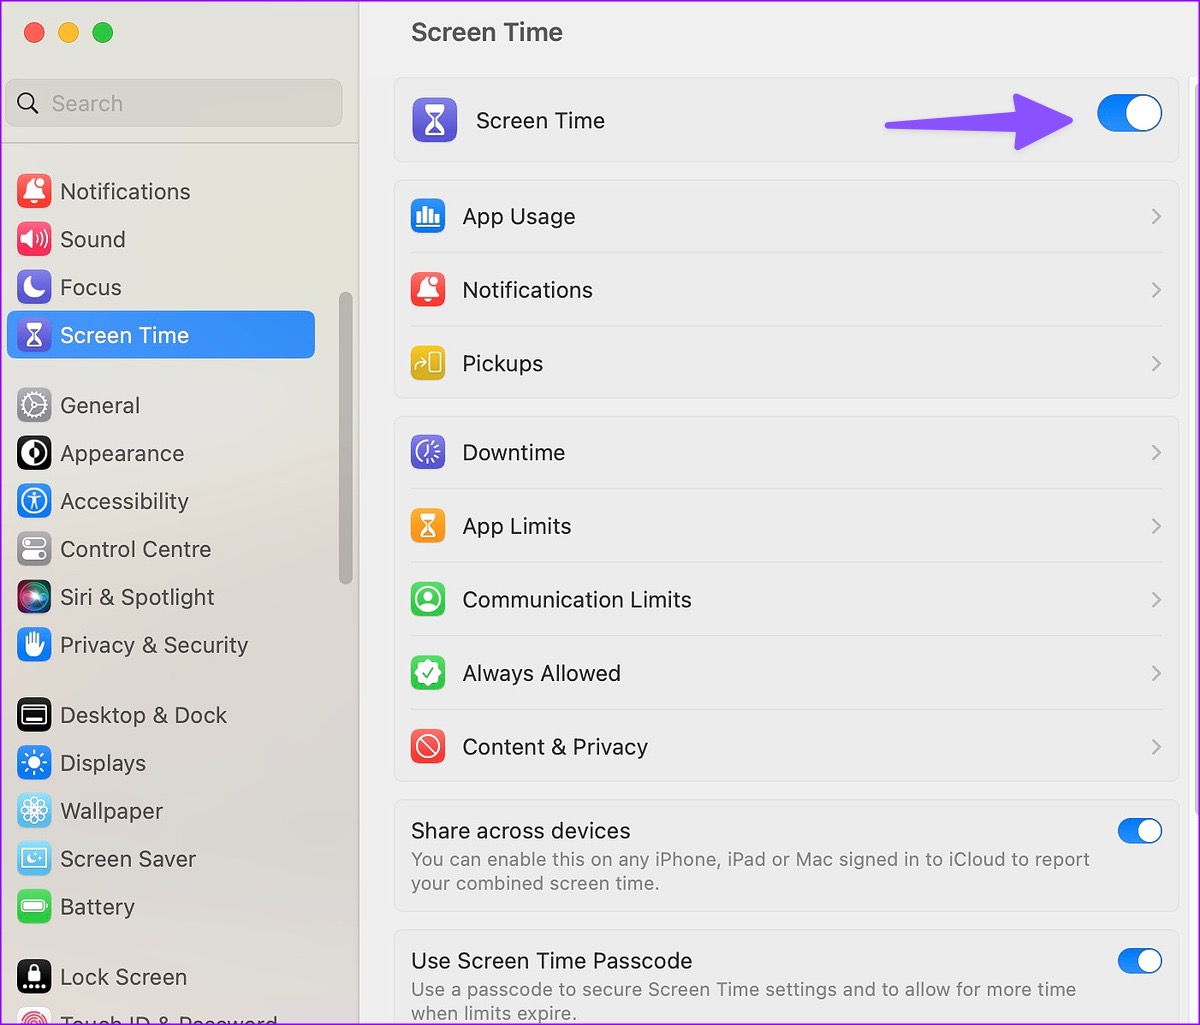
Step 1: Click the Apple icon in the top left corner and open System Settings.

Step 2: Select Screen Time from the sidebar and on the right, toggle on Screen Time.
You can turn off screen time on Mac from the same menu.
How to Share Screen Time Across All Mac Devices
If you are constantly juggling multiple Mac devices, enable the share Screen Time option for more accurate data. Go through the steps below to make the necessary changes.
On macOS Monterey or Earlier
Step 1: Open System Preferences and click Screen Time in System Preferences.
Step 2: Select the Options button at the bottom left.
Step 3: Check the Share across devices box.

On macOS Ventura or Later
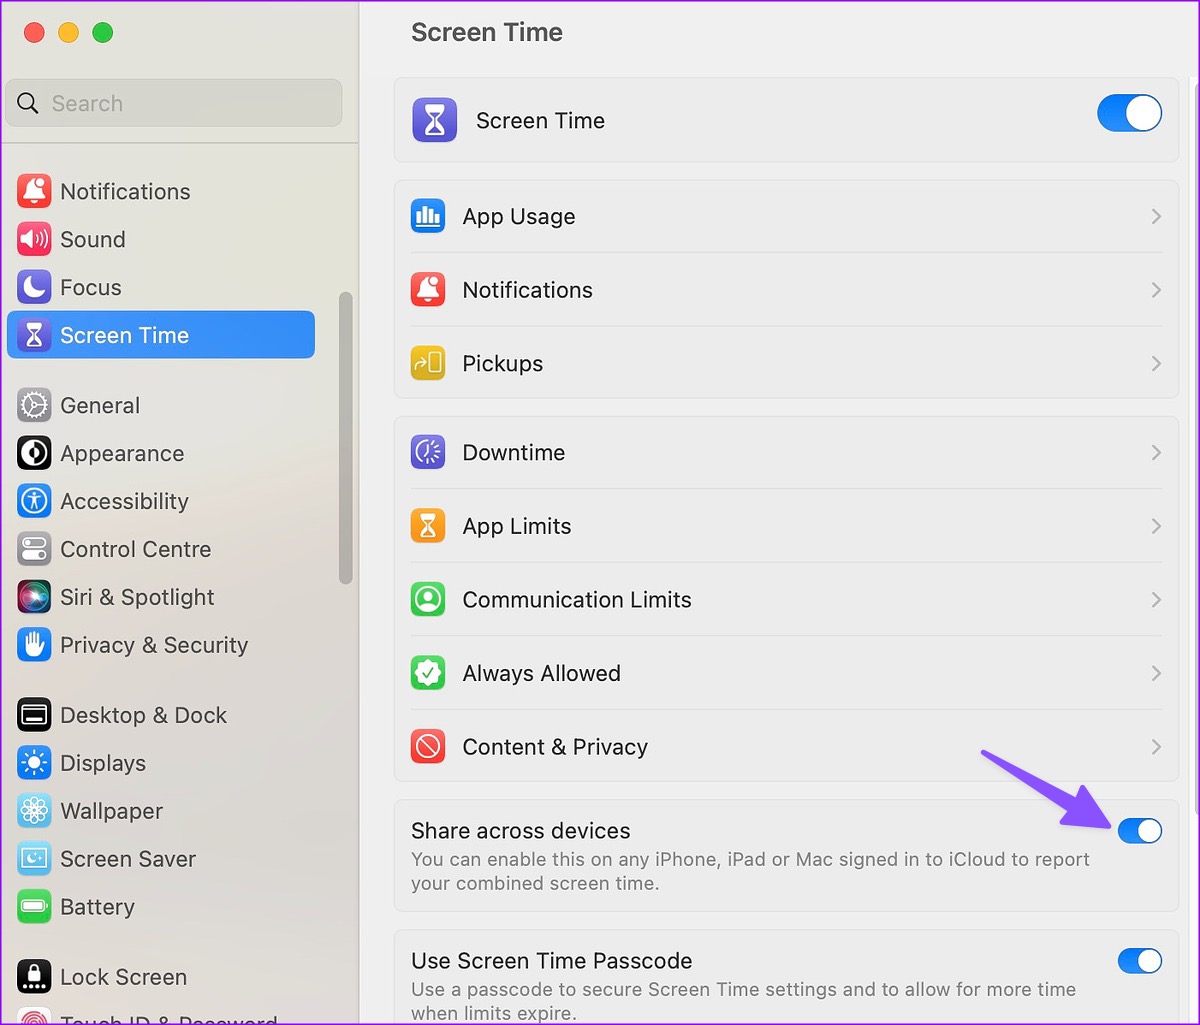
Step 1: Open System Settings and go to Screen Time.
Step 2: Enable the Share across devices toggle on the right.
Now that you have enabled the Screen Time option, it’s time to explore all the functions available to users.
How to See App Usage in Screen Time on Mac
You can check details about all the apps you’ve used daily or weekly using Screen Time on Mac. Additionally, you can glance over screen time usage by installed apps and categories. Here’s how:
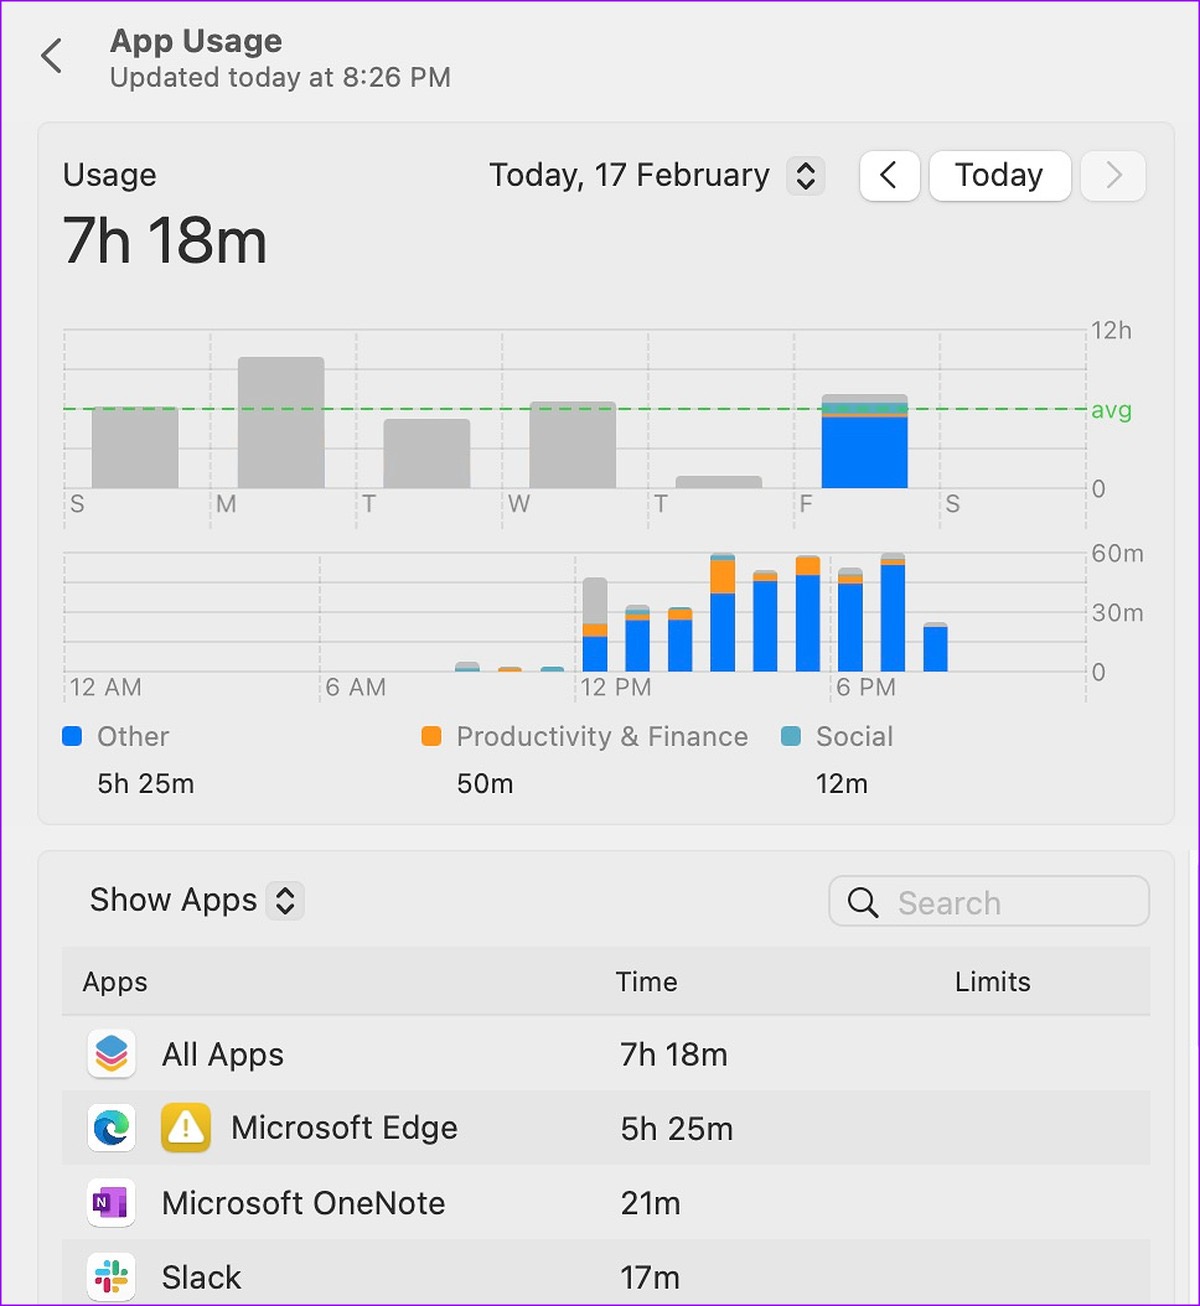
Step 1: Open Screen Time in System Settings and select App Usage.

Step 2: Now, simply see the detailed graph to get an idea.
How to View Notifications Sent in Screen Time on Mac
You can find out the number of notifications you received on your Mac on a particular day and time frame. Here’s how:
Step 1: Head to Screen Time in System Settings and select Notifications.

Step 2: Screen Time shows how many alerts you received today, last week and a breakdown by all apps.

How to Check Pickups in Screen Time on Mac
When you share Screen Time info across all Apple devices, you can check the number of times you pick up your devices throughout the day or week using the Pickups feature. Here’s how to enable it.
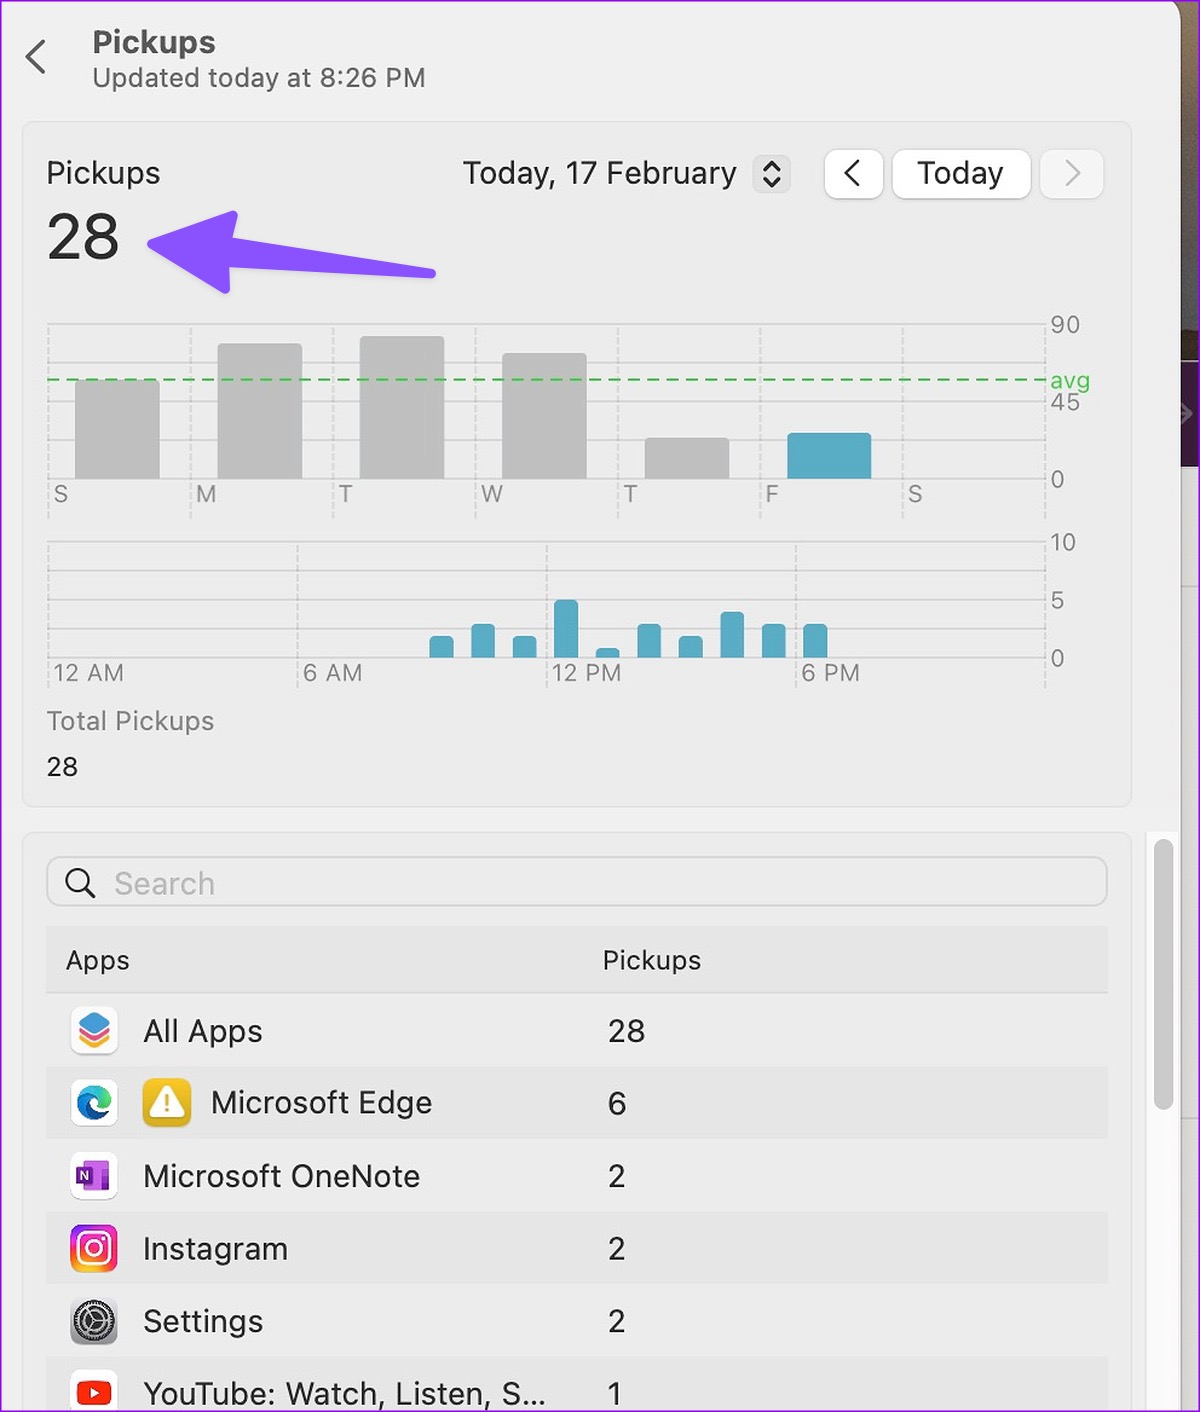
Step 1: Go to Screen Time in System Settings and select Pickups.
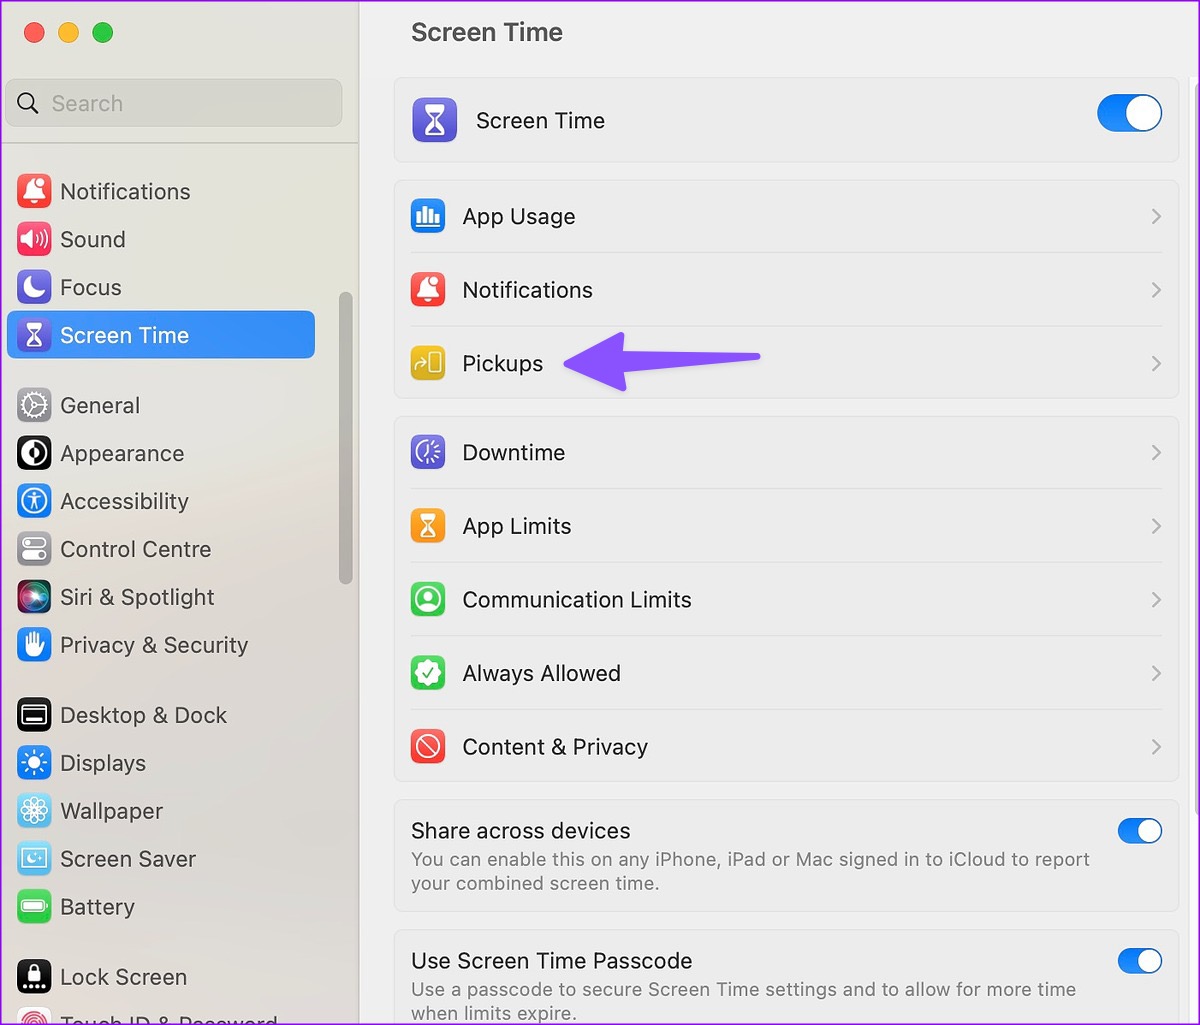
Step 2: Now, check the pickups data.
How to Set Up Downtime Using Screen Time on Mac
You can set a schedule to allow only specific apps for usage. You’ll get a reminder exactly 5 minutes before the downtime starts. Here’s how to set up downtime on Mac.
Step 1: Open Screen Time in System Settings.
Step 2: Select Downtime from the right screen.

Step 3: Enable the Downtime toggle and enter a 4-digit passcode.
Step 4: You can also schedule to enable downtime for the time period you select.

How to Allow Apps and Contacts During Downtime on Mac
You might have a list of apps that you always want to allow during downtime. Here’s how to set them up.
Step 1: Open Screen Time on Mac Settings.
Step 2: Select Always Allowed.
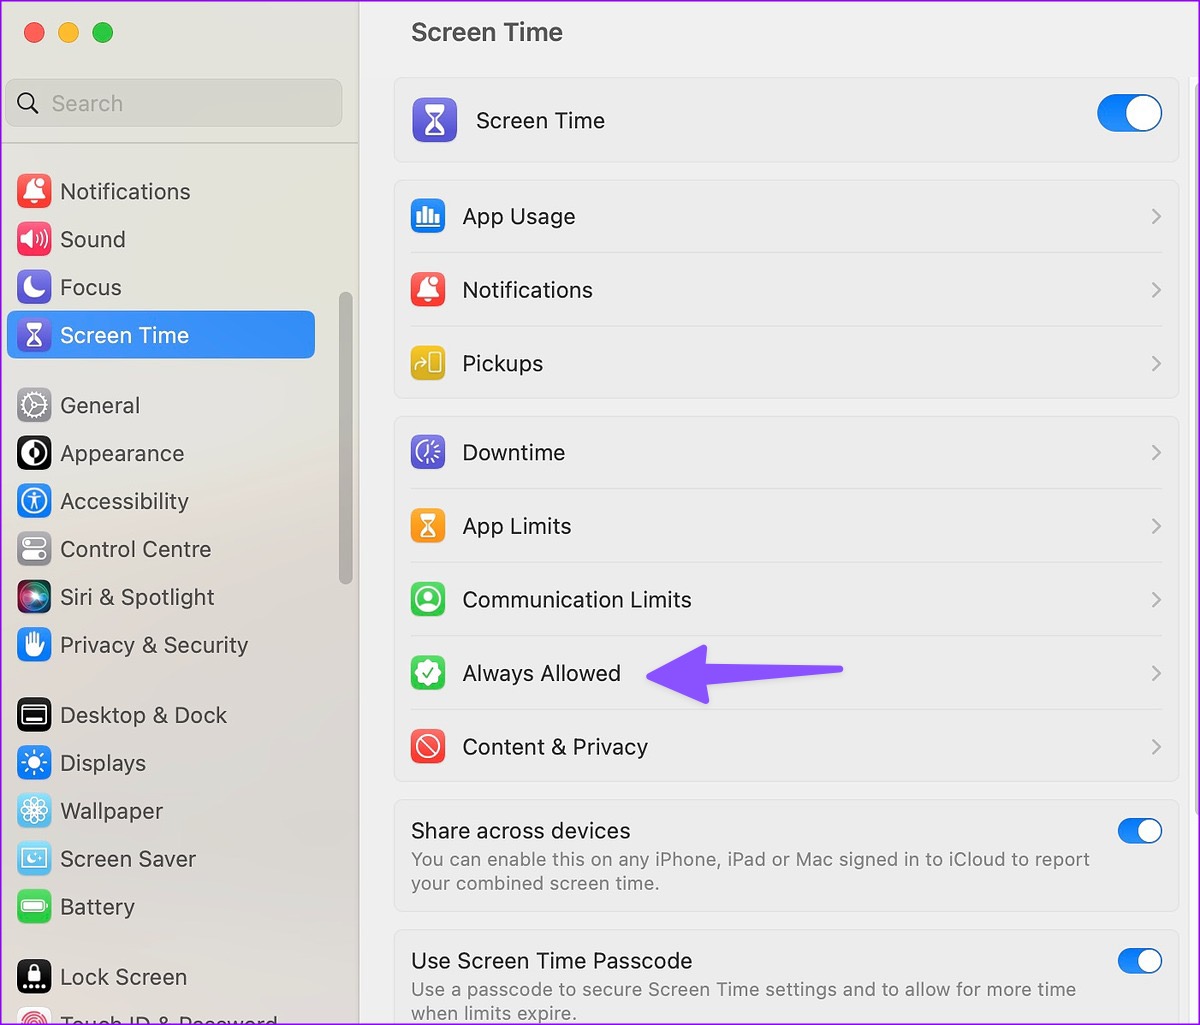
Step 3: Now, toggle on the apps you want to allow during downtime.
Step 4: Once done, click the radio button for Specific contacts.

Step 5: Click + and add contacts that can reach you during downtime on Mac.

Step 6: Allow apps during downtime from the same menu.
How to Set App Limits Using Screen Time on Mac
You could set usage time limits for different apps and app categories to reduce your usage of those specific apps. Here’s how to do it.
Step 1: Head to Screen Time in Mac System Settings.
Step 2: Select App Limits.

Step 3: Enable App Limits and select Add Limit. Click an app category or app name. Set a time limit for every day or specific days.
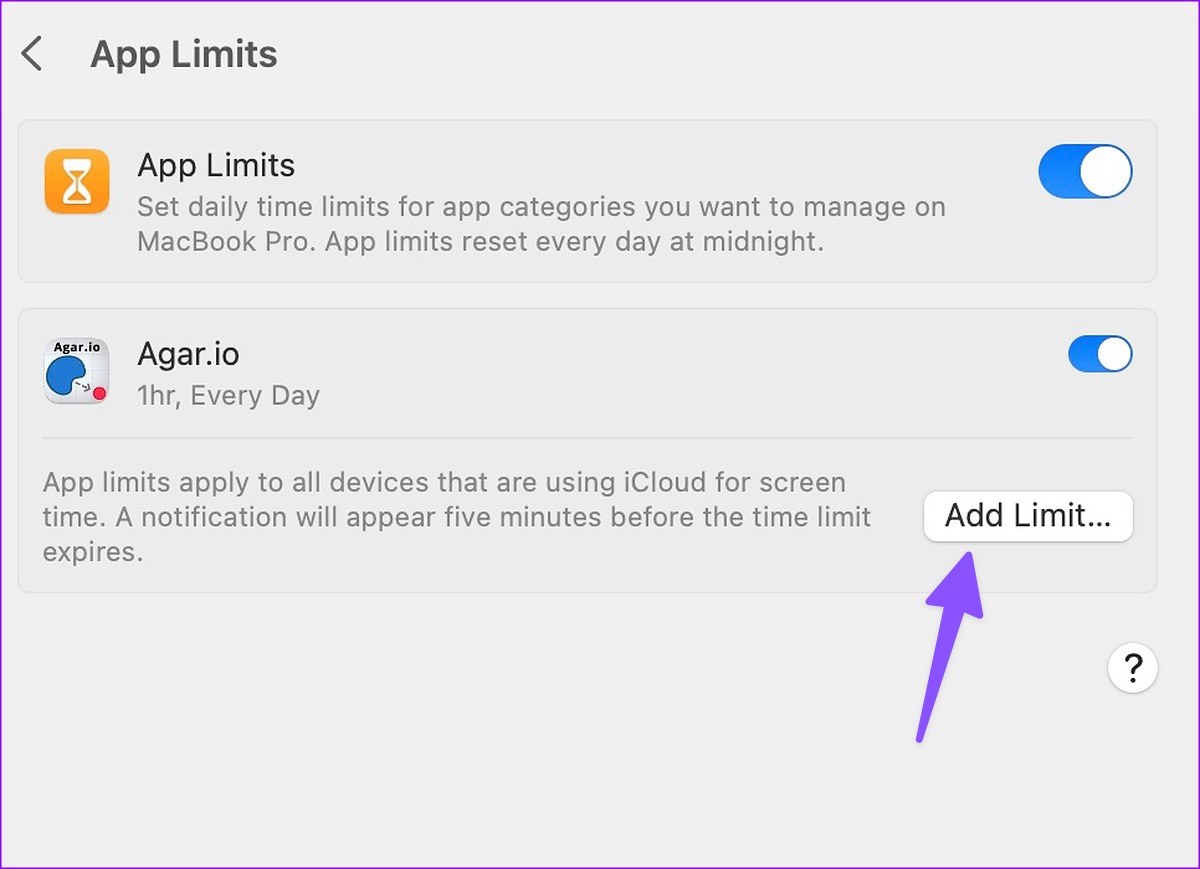
Step 4: Hit Done. Now, repeat the same for all the apps you’re addicted to.

How to Set Contact and Privacy in Screen Time
It replaces the Parental Controls in earlier versions of macOS. You can enable or disable content by type, Apple online store, or specific app, as well as allow or disallow passcode changes, account changes, and other options for which you may want to restrict changes.
Step 1: Open Screen Time in System Settings on Mac.
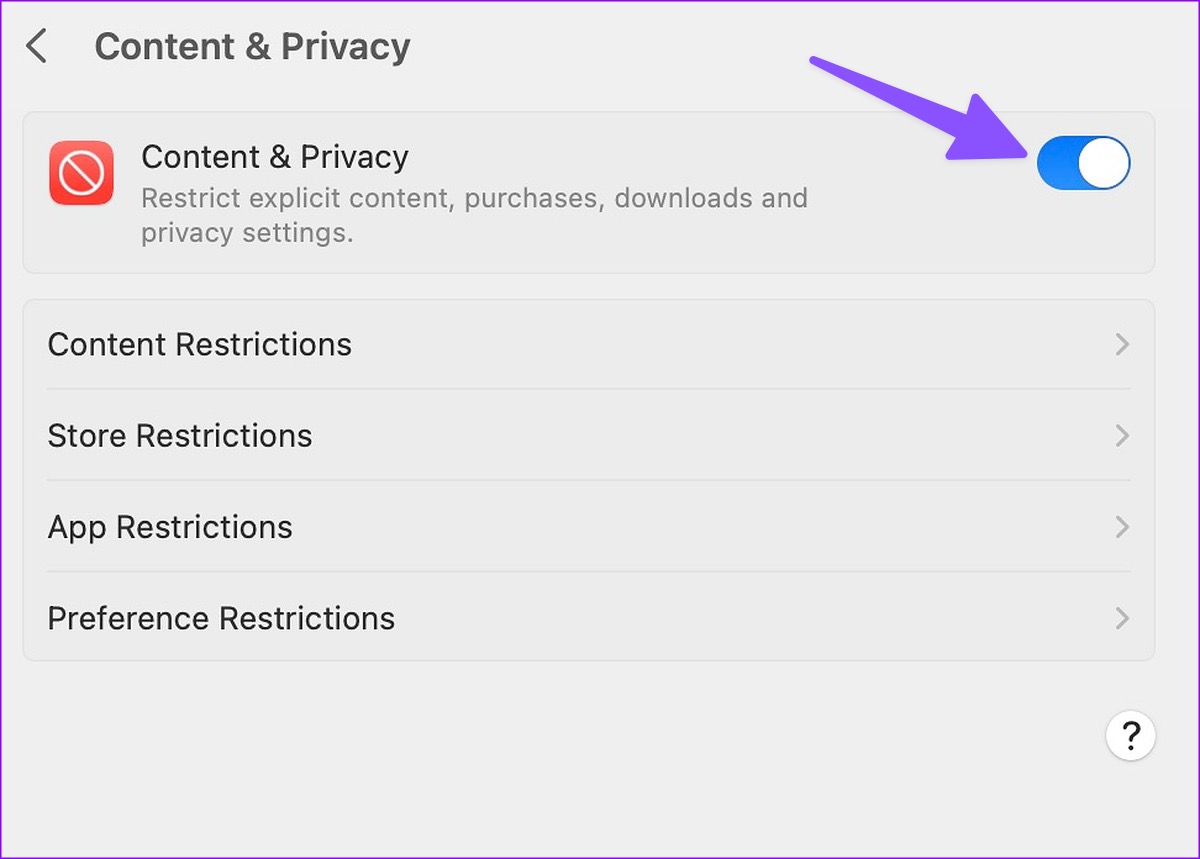
Step 2: Select Content & Privacy.

Step 3: Enable Content & Privacy.
Step 4: Now, make changes to content, store, app, and preference restrictions from the same menu.
How to Add Password to Screen Time on Mac
After making relevant changes in the Screen Time menu, you won’t want anyone to modify that. Hence, you can add a passcode to the Screen Time menu on Mac. Follow the steps below to add them.
On macOS Monterey and Earlier
Step 1: Click Screen Time in System Preferences.
Step 2: Select the Options button at the bottom left.
Step 3: Check the Use Screen Time Password box and set a password.

On macOS Venture and Later
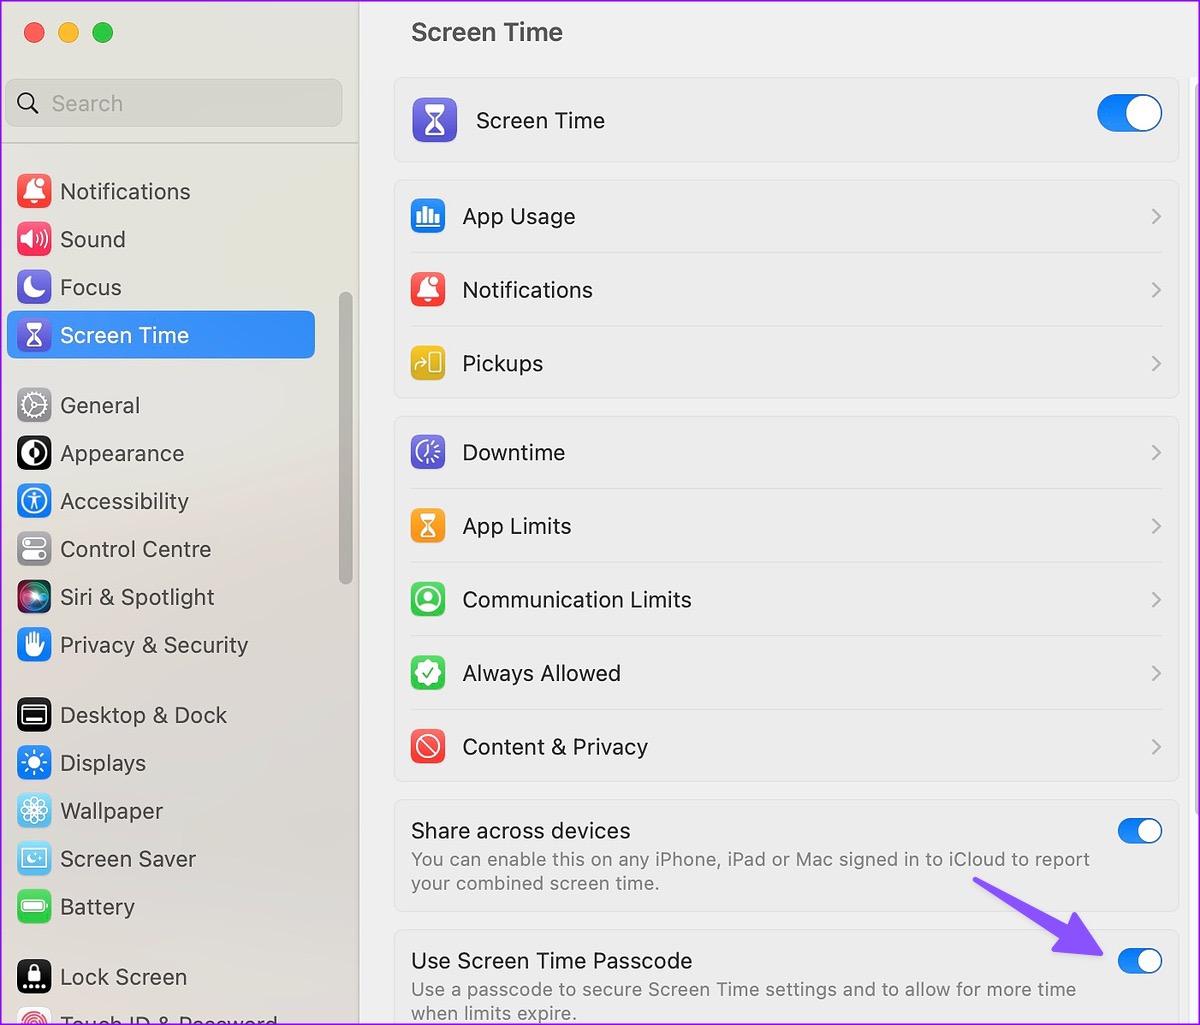
Step 1: Open System Settings and go to Screen Time.
Step 2: Enable the ‘Use Screen Time Passcode’ toggle and set a passcode.
Note: You can also reset Screen Time data on Mac if you don’t wish to use it anymore.
FAQ on Screen Time on Mac
You can check unanswered requests from a child account from Screen Time in Mac Settings.
Keep Track of Mac Usage
You can use Screen Time on Mac to boost your productivity or scale down on the extra time you might be spending on some unproductive apps. By default, the service sends the weekly stats at 9AM on Sunday. If you want a detailed Mac screen time report, check a third-party solution such as Timing.
Last updated on 20 April, 2023
The above article may contain affiliate links which help support Guiding Tech. However, it does not affect our editorial integrity. The content remains unbiased and authentic.
Read Next
 Mac: Quickly Get GIF of iOS or Android Screen Recording
GIFs are everywhere on the internet.
Mac: Quickly Get GIF of iOS or Android Screen Recording
GIFs are everywhere on the internet.
 How to Capture Any Text From Your Mac’s Screen
Taking screenshots is a convenient way to record and note an important message while watching videos, ads, or even video calls.
How to Capture Any Text From Your Mac’s Screen
Taking screenshots is a convenient way to record and note an important message while watching videos, ads, or even video calls.
 How to Remove or Reset a Forgotten Screen Time Passcode on iPhone and Mac
Screen Time is a phenomenal addition to the iPhone, iPad, and Mac.
How to Remove or Reset a Forgotten Screen Time Passcode on iPhone and Mac
Screen Time is a phenomenal addition to the iPhone, iPad, and Mac.
 Top 7 Ways to Fix Microsoft Teams Screen Sharing Not Working on Mac
Aside from frequent sign-in errors, Microsoft Teams’ other glaring weakness remains in the screen sharing department.
Top 7 Ways to Fix Microsoft Teams Screen Sharing Not Working on Mac
Aside from frequent sign-in errors, Microsoft Teams’ other glaring weakness remains in the screen sharing department.
 8 Best Ways to Fix FaceTime Screen Sharing Not Working on Mac
FaceTime received a massive overhaul with iOS 15, iPadOS 15, and macOS Monterey updates.
8 Best Ways to Fix FaceTime Screen Sharing Not Working on Mac
FaceTime received a massive overhaul with iOS 15, iPadOS 15, and macOS Monterey updates.
 How to Use VoiceOver Screen Reader on Mac
Apple's macOS included the VoiceOver Screen Reader to read the content on the screen out loud and help visually challenged folks browse the web and use the Mac.
How to Use VoiceOver Screen Reader on Mac
Apple's macOS included the VoiceOver Screen Reader to read the content on the screen out loud and help visually challenged folks browse the web and use the Mac.
 7 Best Fixes for YouTube Video Not Switching to Full Screen in Safari on Mac
YouTube app is fantastic for browsing the platform and streaming videos.
7 Best Fixes for YouTube Video Not Switching to Full Screen in Safari on Mac
YouTube app is fantastic for browsing the platform and streaming videos.
 How to Change Screen Resolution on Mac
Are you tired of squinting at your Mac's screen or wish to increase your screen's real estate?
How to Change Screen Resolution on Mac
Are you tired of squinting at your Mac's screen or wish to increase your screen's real estate?