All the games you own appear in the Library section in the Steam client on your computer. So you can easily click on the next game you want to install and play. But what if the Steam Library shows a black screen when you try to open it? That issue can one of the bizarre Steam issues. It’s difficult to pinpoint the exact reasons since it may occur due to a problem with your GPU, corrupt game files, or even the Steam client.

Luckily, you won’t have to go through massive changes to see the list of the games you own in the Steam Library. We’ll share working methods to fix the Steam library black screen issue on Windows 11. So, let’s begin.
1. Check Steam Server Status
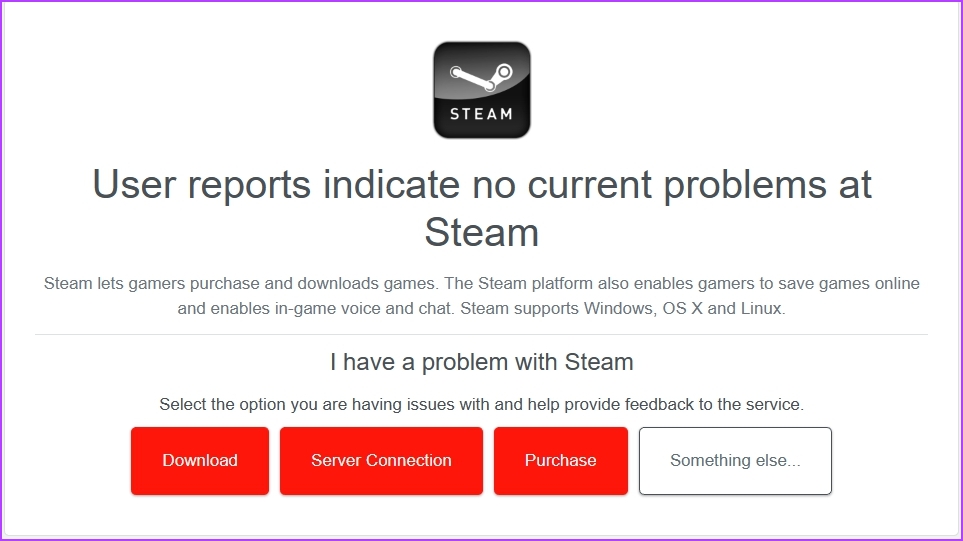
Before making any changes, it’s a good idea to check whether the Steam servers are online. Suppose Steam servers are under maintenance or facing any technical difficulties, the Steam client on your computer may experience issues. The client won’t show you the games library or let you install, remove, or download any games.
To check the Steam server status, visit the DownDetector website and search for Steam. There you will see any ongoing issues with the Steam client. Alternatively, you can visit Steam’s Twitter account and look for any updates related to server maintenance.
If Steam servers are down or facing any issues, you’ll need to wait until the servers are back online. However, if everything’s fine with the server, proceed with other solutions.
2. Launch Steam With Administrative Rights
Steam requires an internet connection to perform most of its operations, and you’ll need to run it with administrator rights. Granting administrator permissions allows the app to manage the network and access system files that are usually restricted.
Lack of administrative permissions can cause the app to not work properly and restrict some information. So, you can change the shortcut’s properties to make it launch Steam as an administrator every time you click on it. Here’s how to do that:
Step 1: Right-click on the Steam client shortcut on your computer and choose Properties from the context menu.

Step 2: Click the Advanced button.

Step 3: Check the Run as administrator option and click OK.

Step 4: Click Apply and then OK to save the changes.
Next, launch the Steam client and check if you can access the Library section.
3. Close Similar Applications From the Background
Steam may not work properly if another application like the Epic Games Launcher is active in the background. So, close any similar running applications from the background and check if it resolves the problem. Follow the below instructions to do that:
Step 1: Press the Control + Shift + Escape shortcut to open the Task Manager.
Step 2: Right-click on any games distribution service apps like the Epic Games Launcher or Origin, and choose End task from the context menu.

4. Clear Steam Web Browser and Cache Data
Steam has a built-in browser to show more details about games. Naturally, it also stores cache data that might go corrupt for various reasons. And when there is a mismatch between the cached data and actual game data on the games page, you might not see anything at all in the Steam client. To fix that, you may clear the cache data of the Steam browser. You can do that by following these steps:
Step 1: Launch the Steam client on your computer, click the Steam at the top-left corner, and choose Settings from the context menu.

Step 2: In the Settings window, choose Web Browser from the left sidebar.
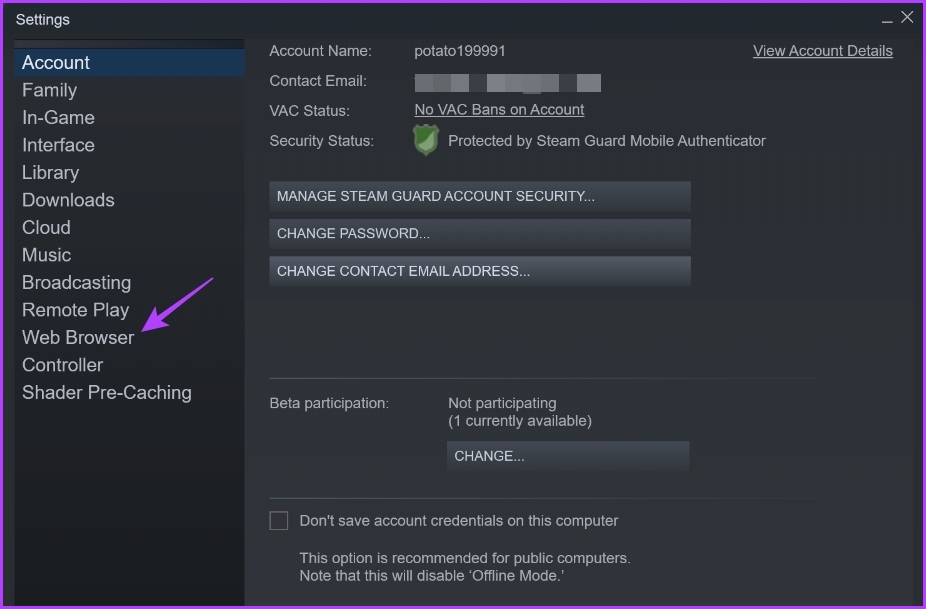
Step 3: Click the ‘Delete Web Browser Data’ button in the right pane.

Step 4: Click OK to confirm your selection.
Next, restart the Steam client and check for the issue. Besides removing the browser data, you may also remove the cache data of Steam. Similar to web data, Steam’s cache data can also get corrupt to cause the issue at hand.
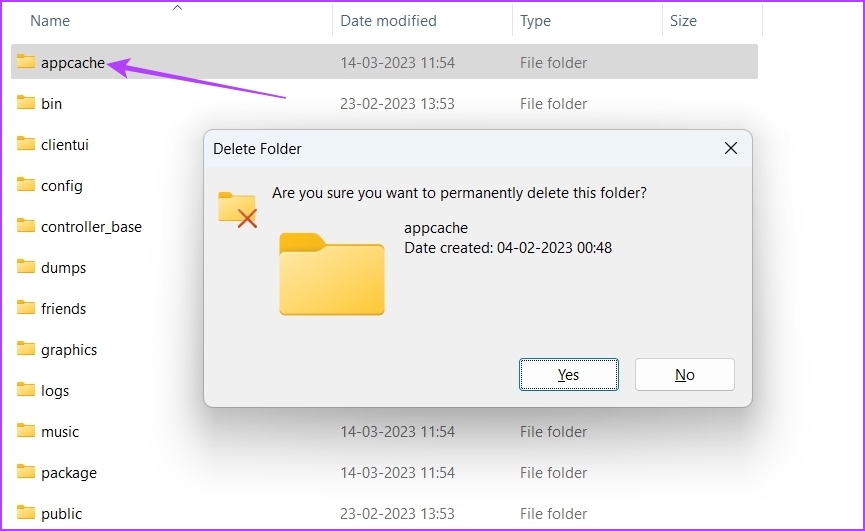
To clear Steam cache data, navigate to the Steam installation directory, select the appcache folder, and press Shift + Delete shortcut to remove it.
5. Update the Graphics Driver
At times, an older graphics driver may not play nice with the latest build of Steam client. It’s a good idea to download the latest graphics driver update on your computer, especially if you avoid updating those drivers often. Older Windows version users can refer to our guide on updating graphics drivers on Windows 10. For those who use Windows 11, here’s how you can easily update the graphics driver on your computer:
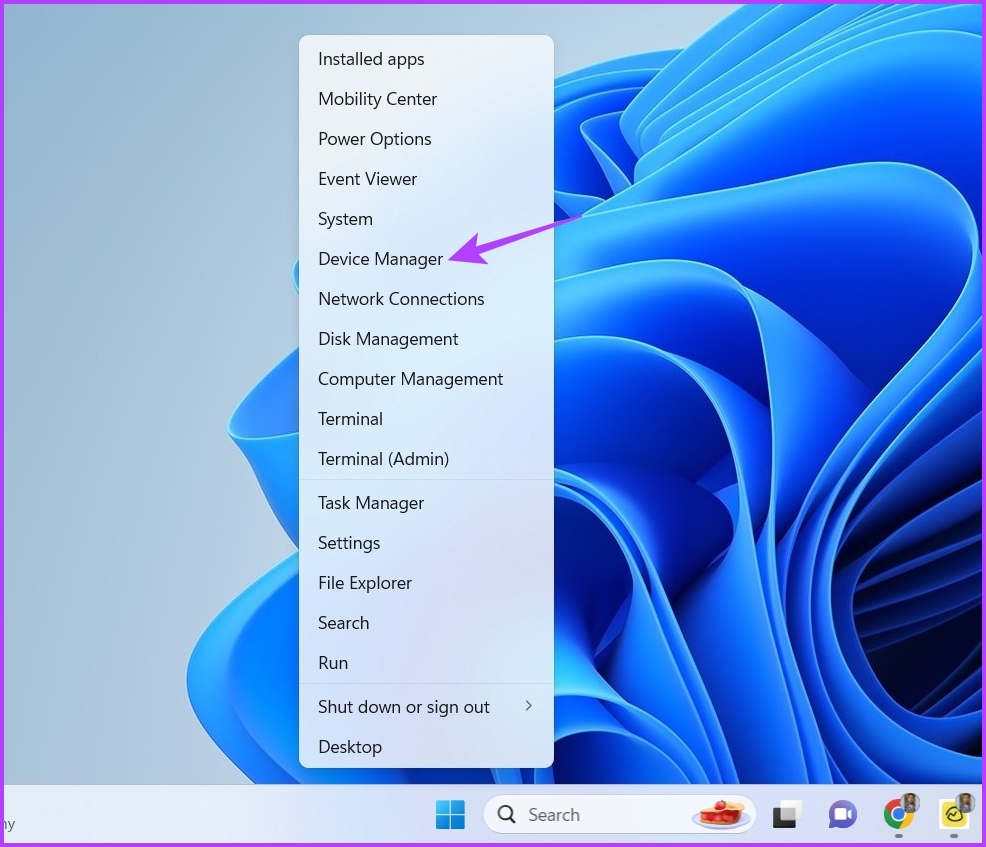
Step 1: Right-click on the Start button and choose Device Manager.
Step 2: Double-click on the Display adapters node to expand it.

Step 3: Right-click on the graphics driver and choose Update driver.

Step 4: Choose ‘Search automatically for drivers.’
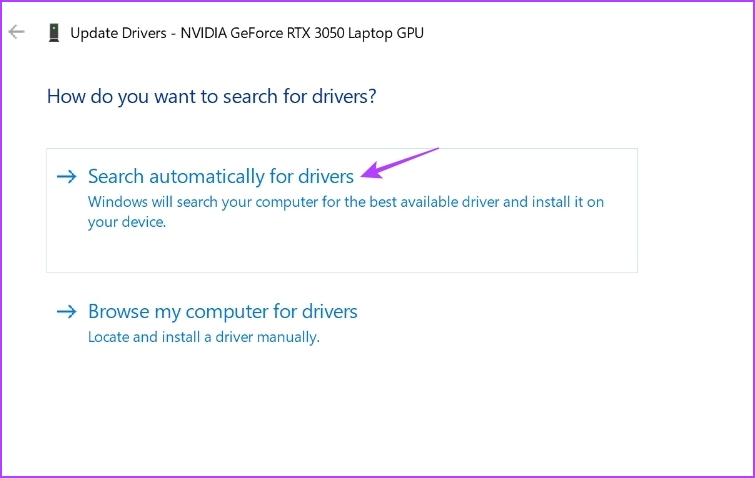
That will make Windows look for the latest graphics driver for your computer. If it finds any, it will automatically install it.
You can also visit the official website of your graphics card manufacturer (like NVIDIA, AMD, or Intel) and download the update from there.
6. Customize Steam Settings
Steam offers a plethora of settings that you can customize as per your preference. However, certain settings might not work well together and cause the black screen issue.
As a solution, make the following changes in the Steam settings and check if it makes any difference.
Step 1: Launch the Steam client on your computer, click the Steam at the top-left corner, and choose Settings from the context menu.
Step 2: Choose Library from the left sidebar.

Step 3: In the Library section, uncheck the box next to the Low Bandwidth Mode. Also, choose the radio button next to Automatic under the ‘Display size for Library user interface elements’ section.

Step 4: Choose Interface from the left sidebar.
Step 5: In the Interface section, use the drop-down under ‘Select the skin you wish steam to use’ option to select the default skin. Also, uncheck the boxes in front of these three options:
- Start Steam in Big Picture Mode
- Enable GPU accelerated rendering in web views
- Enable DirectWrite for improved font smoothing and kerning

Step 6: Click OK at the bottom-right corner to apply the changes.
7. Update the Steam Client
Using an older version of the Steam client can often cause a mismatch of details and not show you the latest Steam Library view. Updating the Steam client to the latest version can help eliminate the library black screen issue and also bring new features.
To update the Steam client, click the Steam option at the top-left corner and choose the Check for Steam Client Updates option. After that, let Steam download and install updates automatically.

Access Games In the Library
Steam’s Library section is the go-to place to view all the games you own, have played, downloaded, and are available through Steam. However, the Library screen might turn black due to various reasons. Luckily, you can troubleshoot this issue by following the above fixes and carry on gaming.
Last updated on 16 March, 2023
The above article may contain affiliate links which help support Guiding Tech. However, it does not affect our editorial integrity. The content remains unbiased and authentic.
Read Next
 10 Ways to Fix Windows 11 Black Screen Issue
It can be terrifying if the screen of your Windows 11 computer goes black all of a sudden, especially when you're in the middle of an important task.
10 Ways to Fix Windows 11 Black Screen Issue
It can be terrifying if the screen of your Windows 11 computer goes black all of a sudden, especially when you're in the middle of an important task.
 Top 9 Ways to Fix the Black Screen Issue in Amazon Prime Video on Windows
Like any streaming service, Prime Video can run into some issues from time to time.
Top 9 Ways to Fix the Black Screen Issue in Amazon Prime Video on Windows
Like any streaming service, Prime Video can run into some issues from time to time.
 Top 8 Ways to Fix YouTube Black Screen Issue on Android TV
Watching YouTube videos is a favorite past-time for many people.
Top 8 Ways to Fix YouTube Black Screen Issue on Android TV
Watching YouTube videos is a favorite past-time for many people.
 Top 11 Ways to Fix iPhone Screen Goes Black During Call Issue
You get a few options whenever you are on an active call on your iPhone.
Top 11 Ways to Fix iPhone Screen Goes Black During Call Issue
You get a few options whenever you are on an active call on your iPhone.
 Top 9 Ways to Fix Netflix Black Screen With Sound Issue on Mobile and Desktop
Imagine launching the Netflix app on your mobile or PC to catch up with the latest episode of the favorite show, but the app throws black screen.
Top 9 Ways to Fix Netflix Black Screen With Sound Issue on Mobile and Desktop
Imagine launching the Netflix app on your mobile or PC to catch up with the latest episode of the favorite show, but the app throws black screen.
 8 Best Ways to Fix Android Auto Black Screen Issue
Using your phone while driving is a terrible idea which is why interfaces like Android Auto and Apple CarPlay exist.
8 Best Ways to Fix Android Auto Black Screen Issue
Using your phone while driving is a terrible idea which is why interfaces like Android Auto and Apple CarPlay exist.
 8 Best Tips to Fix Spotify Web Player Black Screen Issue
Nobody hates black despite being the darkest.
8 Best Tips to Fix Spotify Web Player Black Screen Issue
Nobody hates black despite being the darkest.
 How to Fix the Black Folder Background Issue in Windows 10
Do you have black squares show up all of a sudden behind certain folders in Windows 10?
How to Fix the Black Folder Background Issue in Windows 10
Do you have black squares show up all of a sudden behind certain folders in Windows 10?