Although Steam is primarily known as a marketplace for purchasing video games, it also offers a means to connect with fellow gamers through Steam Chat. With Steam voice chat, you can communicate with friends during and outside games. However, you can’t do that if the Steam voice chat stops working on your Windows 10 or Windows 11 PC.

Fixing the issue may be simple as unmuting your microphone or involve resetting Steam configurations. If you cannot determine the exact cause, work through the following tips to resolve the issue.
1. Check the Default Audio Device and Volume Level
The first you need to check the default audio input device on your Windows computer and its volume level. If there are multiple audio devices connected, you may be using the wrong one.
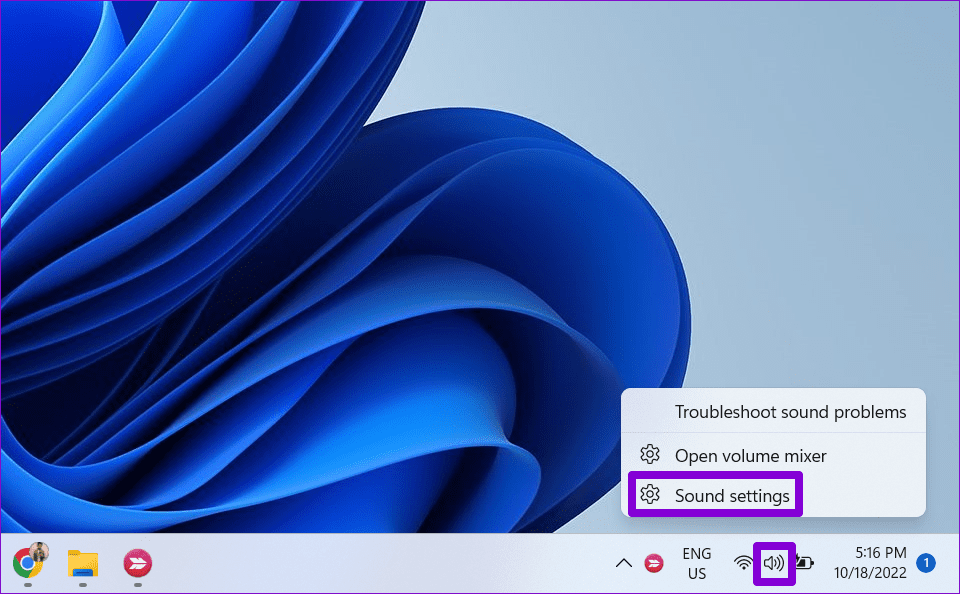
Step 1: Right-click on the speaker icon on the taskbar and select Sound settings.
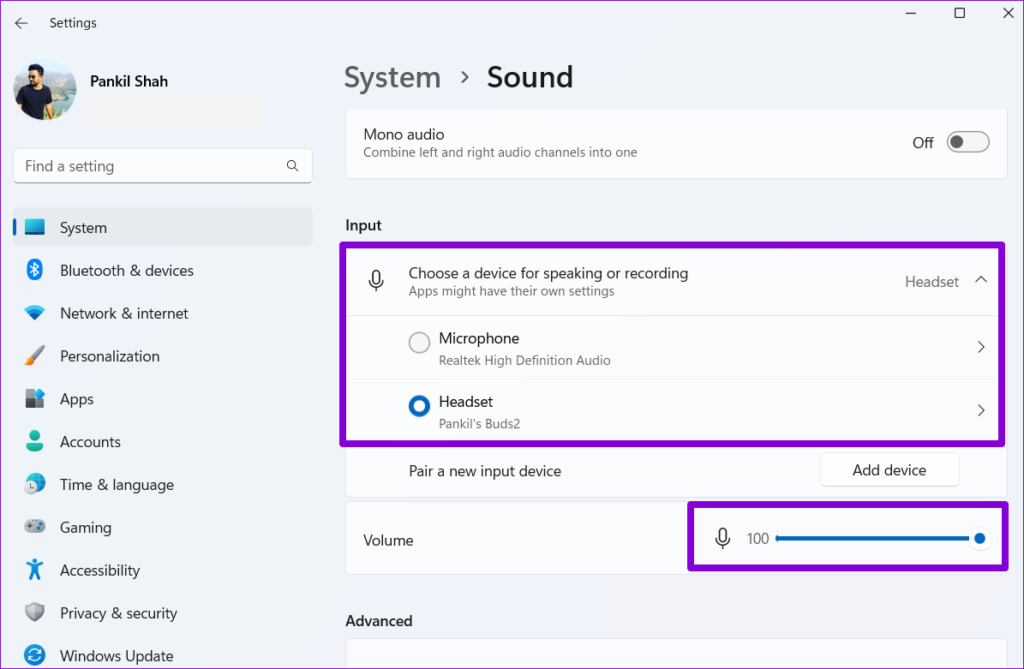
Step 2: Under Input, select the correct audio device. Then, use the slider next to Volume to increase the volume level.
2. Check Voice Settings in Steam
Next, you need to check the voice settings in Steam and make sure you have configured them correctly. Here are the steps for the same.
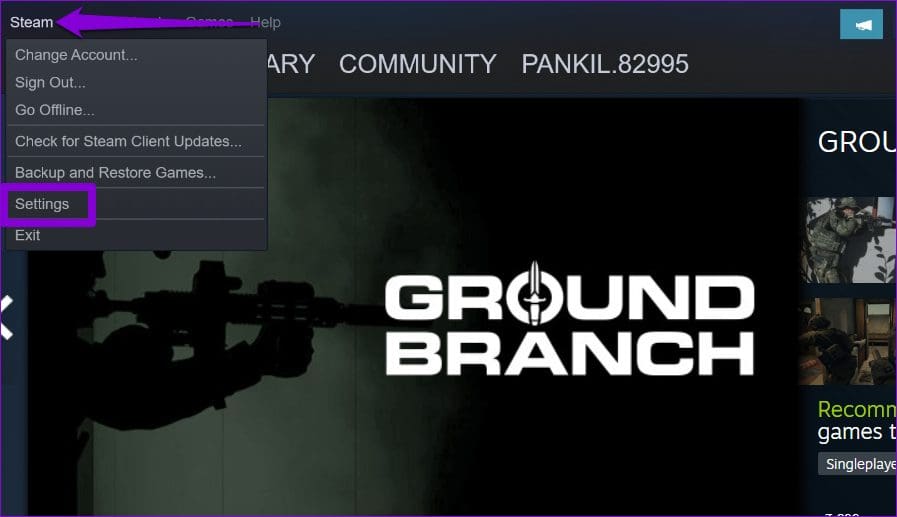
Step 1: Open the Steam app on your PC. Click the Steam menu at the top-left corner and select Settings.
Step 2: In the Steam Settings window, switch to the Voice tab. Then, select Default in the Voice Input Device drop-down menu.

Step 3: Move the slider under Input volume/gain to your right and select Medium under Voice Transmission Threshold.

After completing the above steps, check whether your mic works in Steam voice chat.
3. Disable Audio Enhancements on Windows
Although Windows’ built-in audio enhancement features can help improve the sound quality, they can sometimes cause problems too. To double check if that’s causing trouble, you can temporarily disable audio enhancements in Windows.
Step 1: Right-click on the speaker icon and select Sound settings.

Step 2: Under Input, select your audio device.

Step 3: Click the drop-down menu next to Audio enhancements and select Off.

4. Sign Out of Steam on Other Devices
Steam voice chat may not connect on your PC if your Steam account is active on another device. You need to log out of Steam on your other devices to avoid any potential conflicts.
To log out of Steam on all the devices at once, use these steps:
Step 1: Open the Steam app on your PC. Click the Steam menu in the top left corner and select Settings.

Step 2: In the Security tab, click the Manage Steam Guard button.

Step 3: Click the Deauthorize all devices option.

Sign back into the Steam app on your PC. Following this, Steam voice chat should work as expected.
5. Repair the Steam Client Service
Issues with the Steam Client Service can also cause the voice chat to keep closing or become unresponsive. If that’s the case, repairing the Steam Client Service should help.
Step 1: Right-click on the Start icon and select Terminal (Admin) from the list.

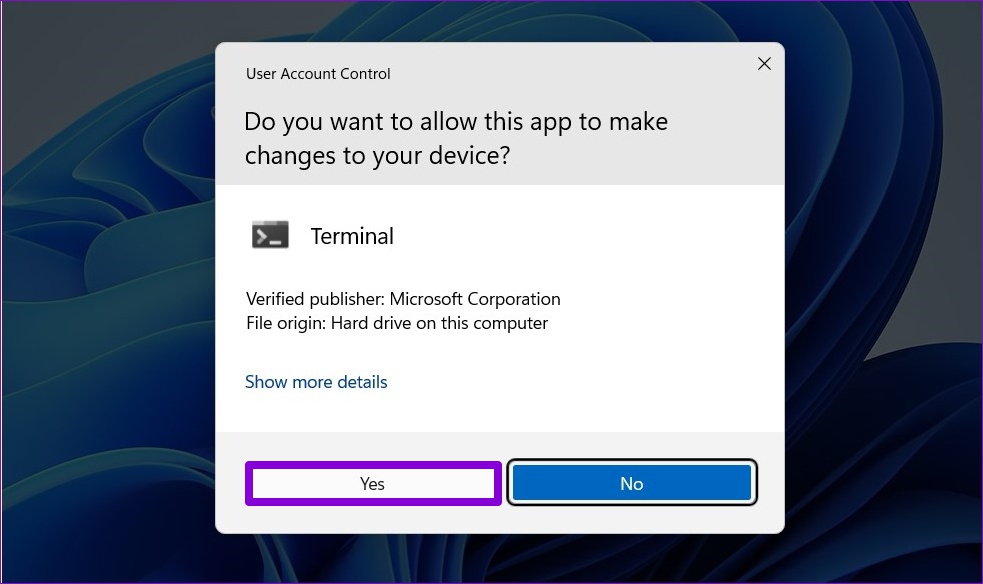
Step 2: Select Yes when the User Account Control (UAC) prompt appears.
Step 3: Paste the following command in the console and press Enter.
"C:\Program Files (x86)\Steam\bin\steamservice.exe" /repair

Restart Steam after that to check if the issue persists.
6. Allow Steam to Run Through Windows Firewall
You are likely to encounter such connection issues in Steam if the app isn’t allowed to run through the Windows Firewall. Here’s how you can change that.
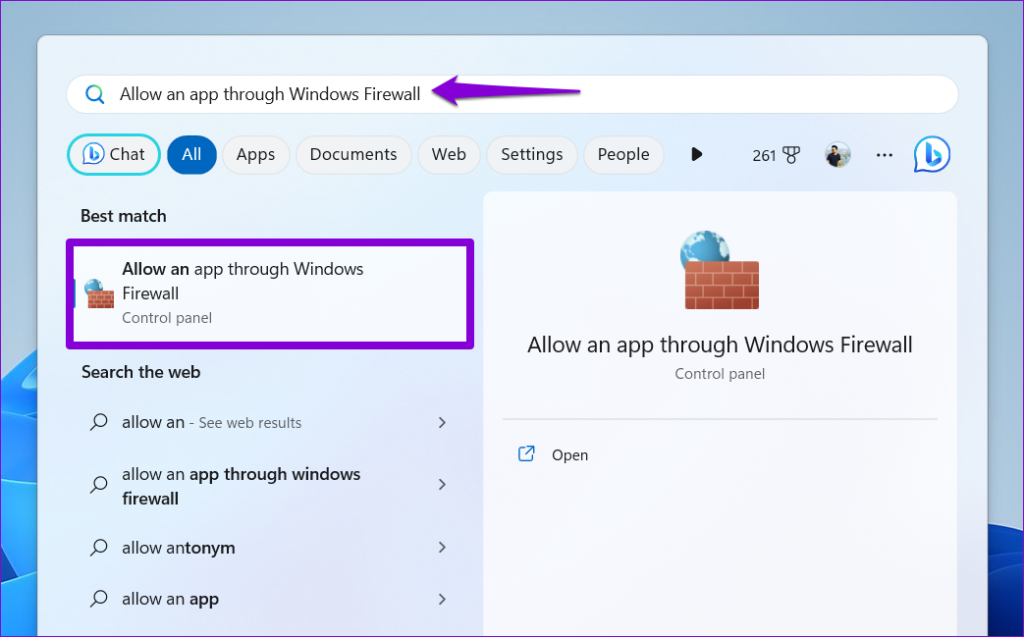
Step 1: Press the Windows + S keyboard shortcut to open the search menu, type in allow an app through Windows firewall and press Enter.
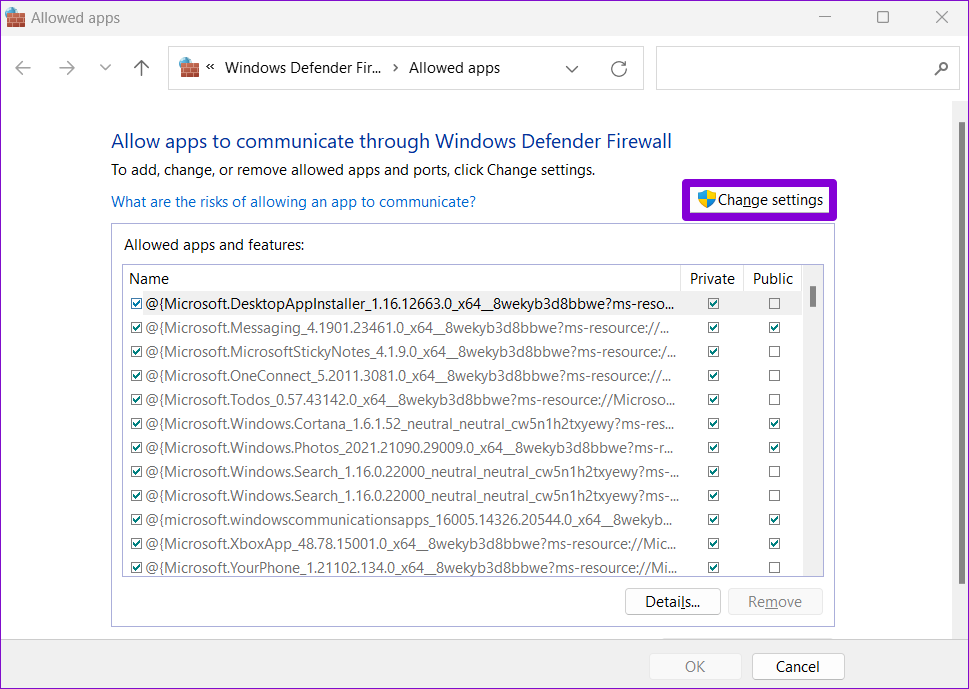
Step 2: Click the Change settings button.
Step 3: Select Yes when the User Account Control (UAC) prompt appears.

Step 4: Scroll down to locate Steam on the list and tick the Public and Private checkboxes next to it. Then, click OK.

After updating the firewall settings, restart the Steam app and try using voice chat again.
7. Reset Steam Configuration Settings
If all else fails, you can reset Steam’s configuration settings as a last resort. That will restore Steam’s settings to their default values, resolving any issues.
Step 1: Click the Show hidden icons arrow on the taskbar. Right-click on the Steam icon and select Exit Steam.

Step 2: Press Windows + R keyboard shortcut to open the Run dialog box.
Step 3: Type steam://flushconfig in the box and press Enter. Then, click OK to confirm.

Silencing the Glitch
If you are an avid gamer, encountering such issues with Steam voice chat on your Windows 10 or 11 PC can be annoying. Hopefully, one of the above tips has proven useful and you are able to interact with your friends as before.
Last updated on 24 July, 2023
The above article may contain affiliate links which help support Guiding Tech. However, it does not affect our editorial integrity. The content remains unbiased and authentic.


