Steam offers a vast collection of games to play on your PC. Apart from that, Steam also offers easy ways to connect with fellow gamers with features like Steam Broadcast. It lets you broadcast your gaming sessions on Steam Community. However, if you’re facing issues using it, here’re a few ways to fix Steam Broadcast not working on Windows 11.
Several factors can cause Stream Broadcast to suddenly stop working on Windows 11. This includes issues with the network, lack of necessary hardware resources, etc. However, fixing these issues isn’t difficult, as you’ll see in this troubleshooting guide. Let’s begin.
1. Check if Steam Broadcast is Enabled
To live stream your gameplay sessions using Steam Broadcast, you need to have the feature enabled in Steam Settings. If you’re unsure whether Steam Broadcast is enabled on your computer, you may follow these steps to check that:
Step 1: Press the Windows + S keys to open Windows Search and type Steam in the search bar. From the result for Steam, click on Open.

Step 2: Click on Steam in the top-left corner. Then, select Settings from the context menu.

Step 3: In the Settings dialog box, click on Broadcasting.

Step 4: Under Broadcasting, click on the drop-down for Privacy setting and select ‘Anyone can watch my games’. Then, click on OK to save the changes.

2. Lower the Stream Settings
Steam Broadcast may cease to work if you’ve turned the stream setting to broadcast at the highest quality. This may occur if your computer lacks the necessary hardware resources to support that or because your network doesn’t offer the high upload speeds required for higher-quality streams.
If you want to prevent these issues, follow the steps listed below to lower the stream settings so that your computer and network can support them.
Step 1: Press the Windows + S keys to open Windows Search and type Steam in the search bar up top. Then, from the result for Steam, click on Open.

Step 2: Click on Steam in the top-left corner and select Settings.

Step 3: In the Settings dialog box, click on Broadcasting.

Step 4: Click on the drop-down for Video Dimensions, Maximum Bitrate, and Optimize encoding for, and select an option lower than the configured one.
Step 5: Click on OK to save these changes.

3. Check for Network Related Issues
You need a high-speed internet connection to broadcast your Steam gameplay. So, one of the first things to do before moving on to more advanced solutions is to check your PC for network-related issues. You can do this quickly by running a simple speed test using free online tools like Speedtest by Ookla or Fast.com.
If the speed test runs as expected, and you’re getting good download and upload speeds with lower ping, your internet is probably fine. However, there may be other issues that prevent stream broadcasting from working on your Windows computer.
Meanwhile, if running the speed test didn’t return the results you expected, you may want to check our guide to fix the Wi-Fi connected but not working issue on Windows 11 or if the ethernet network stops working.
4. Disable VPN or Proxy Servers
VPN and proxy servers are useful to mask your identity and information from the websites you visit. However, using these tools can introduce unnecessary latency on your network that may interfere with Steam Broadcast.
If you can’t stream your gameplay sessions using Steam Broadcast, follow the steps listed below to try turning the VPN or Proxy servers off on your computer.
Step 1: Open your VPN client and check that it’s disconnected. If it’s not, click on the Disconnect button.
Note: The location of the disconnect button may differ depending on the VPN client you’re using. For this example, we have used ProtonVPN.

If you’ve configured your VPN manually, disable the VPN toggle found under Action Center. Then, move on to the next step to check if you’re connected to a Proxy Server.
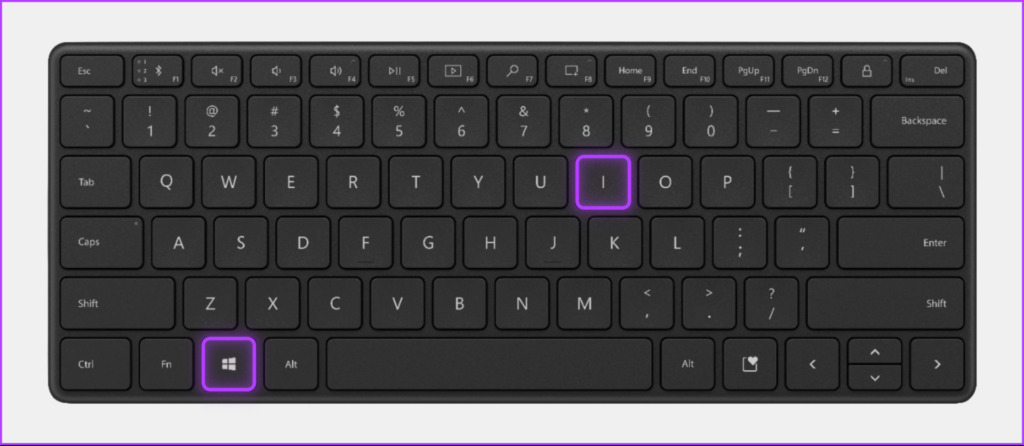
Step 2: Press the Windows + I shortcut to open the Settings app.
Step 3: Click on Network & internet in the left sidebar and select Proxy from the right side.

Step 4: Under Proxy settings, ensure that the ‘Use a proxy server’ option is off.

Step 5: If the proxy server is on, click on it, turn the toggle off for ‘Use a proxy server’, and click on Save.

5. Allow Steam Through the Firewall
Windows Defender Firewall is a built-in security feature that permits or denies programs on your computer from creating outgoing or incoming connections with the internet. Given its nature, the Windows Defender Firewall can sometimes cause Steam Broadcast not to function as expected.
If you think that’s the case with your PC, you can easily fix this by manually allowing Steam through the Windows Defender Firewall, as shown in the steps listed below.
Step 1: Click the Start button on the Taskbar and type Windows Defender Firewall. Then, click on Open next to the Windows Defender Firewall search result.

Step 2: In the Windows Defender Firewall window, click on the ‘Allow an app or feature through Windows Defender Firewall’ option on the left.

Step 3: Now, click on the Change Settings button. When a User Account Control prompt appears, select Yes.
Step 4: Look for an entry called Steam. If you can’t find the entry for Steam, click on the ‘Allow another app…’ button at the bottom.

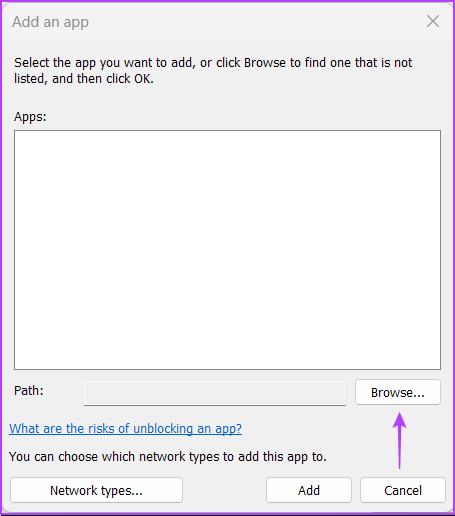
Step 5: When the Add an app window opens, click the Browse button.
Step 6: Copy and paste the given path into the Address bar of the Browse (File Explorer) window:
C:\Program Files (x86)\Steam
Step 7: When you reach the specified folder, select the Steam.exe file and click Open.

Step 8: Once you select Steam, click on the Add button.

Step 9: Steam will appear in the Allowed apps and features list. Ensure that the checkboxes for Private and Public options are checked.
Step 10: Now, click OK to save the changes.

6. Update or Reinstall Network Drivers
Often obsolete or corrupt network drivers on your computer can cause unexpected network issues preventing Steam Broadcast from working. Hence, we recommend you update or reinstall the Network drivers to see if that fixes the issue for you.
To update or reinstall the network drivers on your computer, follow these steps:
Step 1: Right-click the Start button and select Device Manager from the list.

Step 2: Look for the Network adapters entry in the Device Manager window, and double-click to expand it.

Step 3: Under Network adapters, right-click on your PC’s Wireless adapter (Qualcomm Atheros in this case) and select Update driver.
Note: If you’re facing issues with a wired ethernet connection, update your PC’s Ethernet or LAN adapter (Realtek PCIe GbE Family in this case).

Step 4: On the Update Drivers window, click on ‘Search automatically for drivers.’
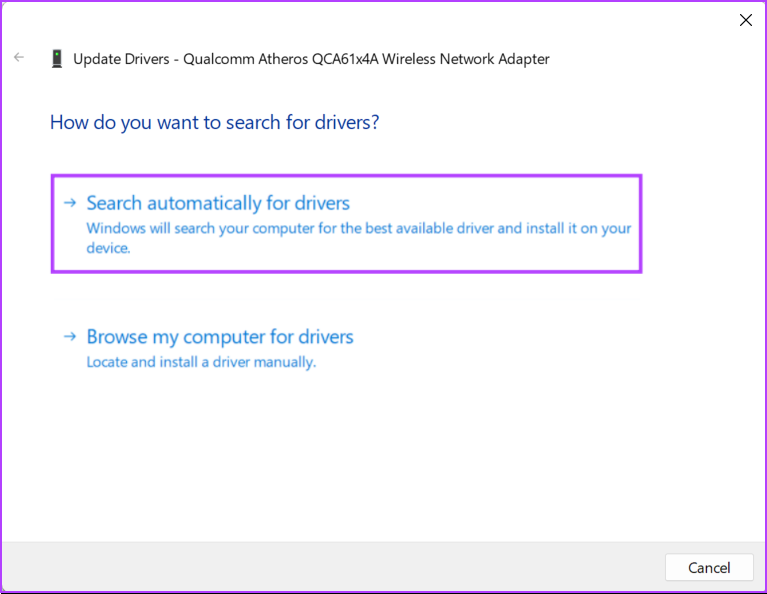
Step 5: Let it search for the latest network drivers compatible with your PC. If any drivers are found, it will install them for you.
If you see a message saying your computer has the best drivers installed, you can scan for drivers through Windows Update. Otherwise, click on the Close button in the bottom-right corner and proceed with the next step.

Step 6: If you can’t find any new network drivers, right-click on the network adapter and click on Uninstall device.

Step 7: When an Uninstall Device dialog appears, click Uninstall. Then, restart your computer.

After you restart your computer, Windows 11 will automatically search for the relevant network drivers and install them on your PC. While you’re at it, we also recommend you update the graphics drives on your computer to phase out the possibility of issues caused due to outdated graphics drivers.
7. Reinstall Steam on Your PC
If none of the previous solutions works, the last thing you can do is remove Steam and reinstall it from scratch, as detailed in the steps listed below. Reinstalling Steam will clear out any bugs that may prevent Steam Broadcast from working as expected.
Note: If you uninstall Steam from your computer, all your games, their downloadable content (DLCs), and saved files will also be deleted. You may want to create a backup of Steam game files before you proceed any further.
Step 1: Press the Windows + I keys to open the Settings app.

Step 2: When the Settings app opens, click on the Apps option in the left sidebar.

Step 3: On the Apps page, click on the Installed apps option from the right pane.

Step 4: Type Steam in the search bar at the top.

Step 5: From the search results, click the horizontal three dots menu next to Steam. Then, select Uninstall.

Step 6: After removing Steam, click the download button below to download the Steam installer on your PC.
Step 7: When the download completes, click on the SteamSetup.exe file and follow the on-screen instructions to install Steam on your PC.

If you need additional help while installing or setting up Steam on your computer, take a look at our guide on downloading and using Steam on Windows.
FAQs on Steam Broadcast
No, Steam Broadcast only works with games you purchase and access through Steam.
Steam will automatically start to live stream your games whenever you start playing them as long as the broadcasting feature is enabled in Steam settings. You can press Shift + Tab and click on Settings to configure any broadcasting settings while playing a game.
You can browse and watch live streams of other Steam players via the Steam Broadcast page on the Steam client for desktop, the Steam website, or the Steam mobile app for iOS and Android. Do note you need to log in to your Steam account before you can watch the broadcast.
No, it’s not possible to share Steam Broadcasts on Twitch. Steam Broadcasts can only be shared on the broadcast tab of Steam Community.
Start Broadcasting Your Gameplay Sessions
That’s pretty much it. You can employ any of the above-listed solutions to fix Steam Broadcast when it unexpectedly stops working on Windows 11. Once it’s fixed, you can start broadcasting your gameplay sessions on the broadcast tab of Steam Community and show off your gaming prowess to fellow gamers.
Last updated on 10 February, 2023
The above article may contain affiliate links which help support Guiding Tech. However, it does not affect our editorial integrity. The content remains unbiased and authentic.

