Having a Google account means you’re entitled to 15GB of free Google Drive storage limit. This is helpful to store your photos and files on the cloud. However, services like Gmail and Google Photos also use the same 15GB quota which means your Drive storage can fill up rather quickly.

Sometimes, Google Drive shows your storage is full, but you may not have any files on it. If that’s the case or you’re on the verge of filling up your cloud storage on Google, here are 5 ways you can free up storage on Google Drive to store more files and make way for incoming emails.
What Happens if My Google Account Storage Is Full
Google Drive offers all Gmail users 15GB of storage space by default. With time, this 15GB quota fills up as and when you save files. Once the quota fills up, you will not be able to save more files and Google Drive will start saying your storage is full. This will also impact other features like Google Photos backup, which uses your Drive’s storage space.
Furthermore, you may not even receive emails since all your Gmail data is a part of your Google Drive storage quota. This is why it’s best to free up storage on Google Drive regularly and maintain some free space. You can follow these simple steps mentioned below to free up your Google Drive storage.
How to Check the Available Storage Space in Google Drive
Wondering how much storage space you have left in the bank? Here’s a simple way to check.
Step 1: Head over to the Google Drive website on a computer using the link below.
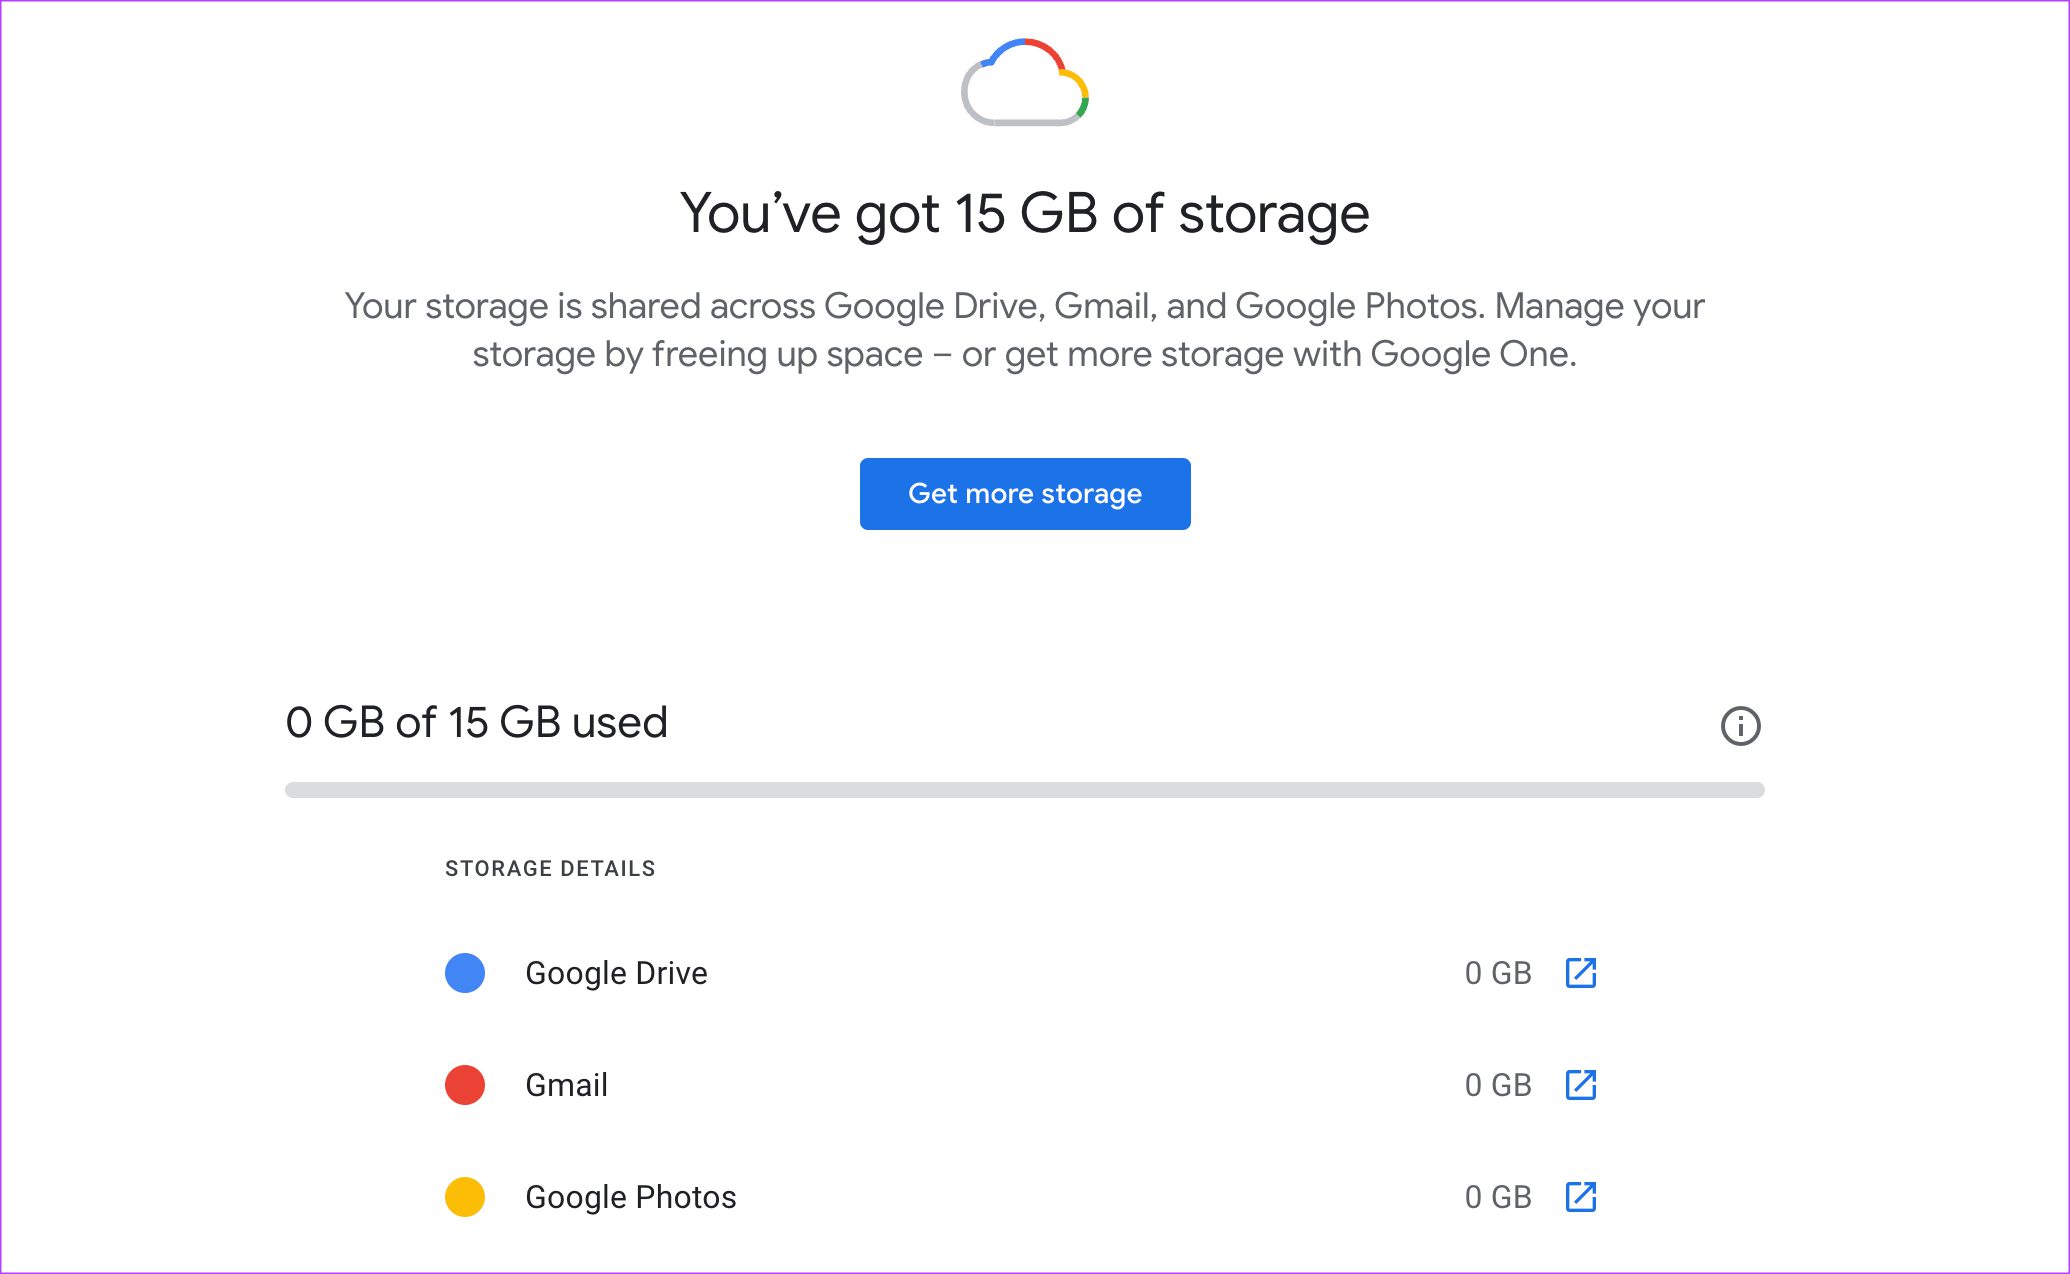
Step 2: Look to the left of your screen. You should see the total storage along with the available capacity. Click on the storage will give you a detailed rundown of what’s occupying your Drive storage.
How to Free Storage on Google Drive
1. Delete Large Files
At times, you may not be aware that you have stored large files on your Google Drive a while back. You can arrange the list of files on your Google Drive in descending order of storage to view all the large files. If you don’t need those files, it’s best to delete them.
Step 1: Open Google Drive in your web browser.

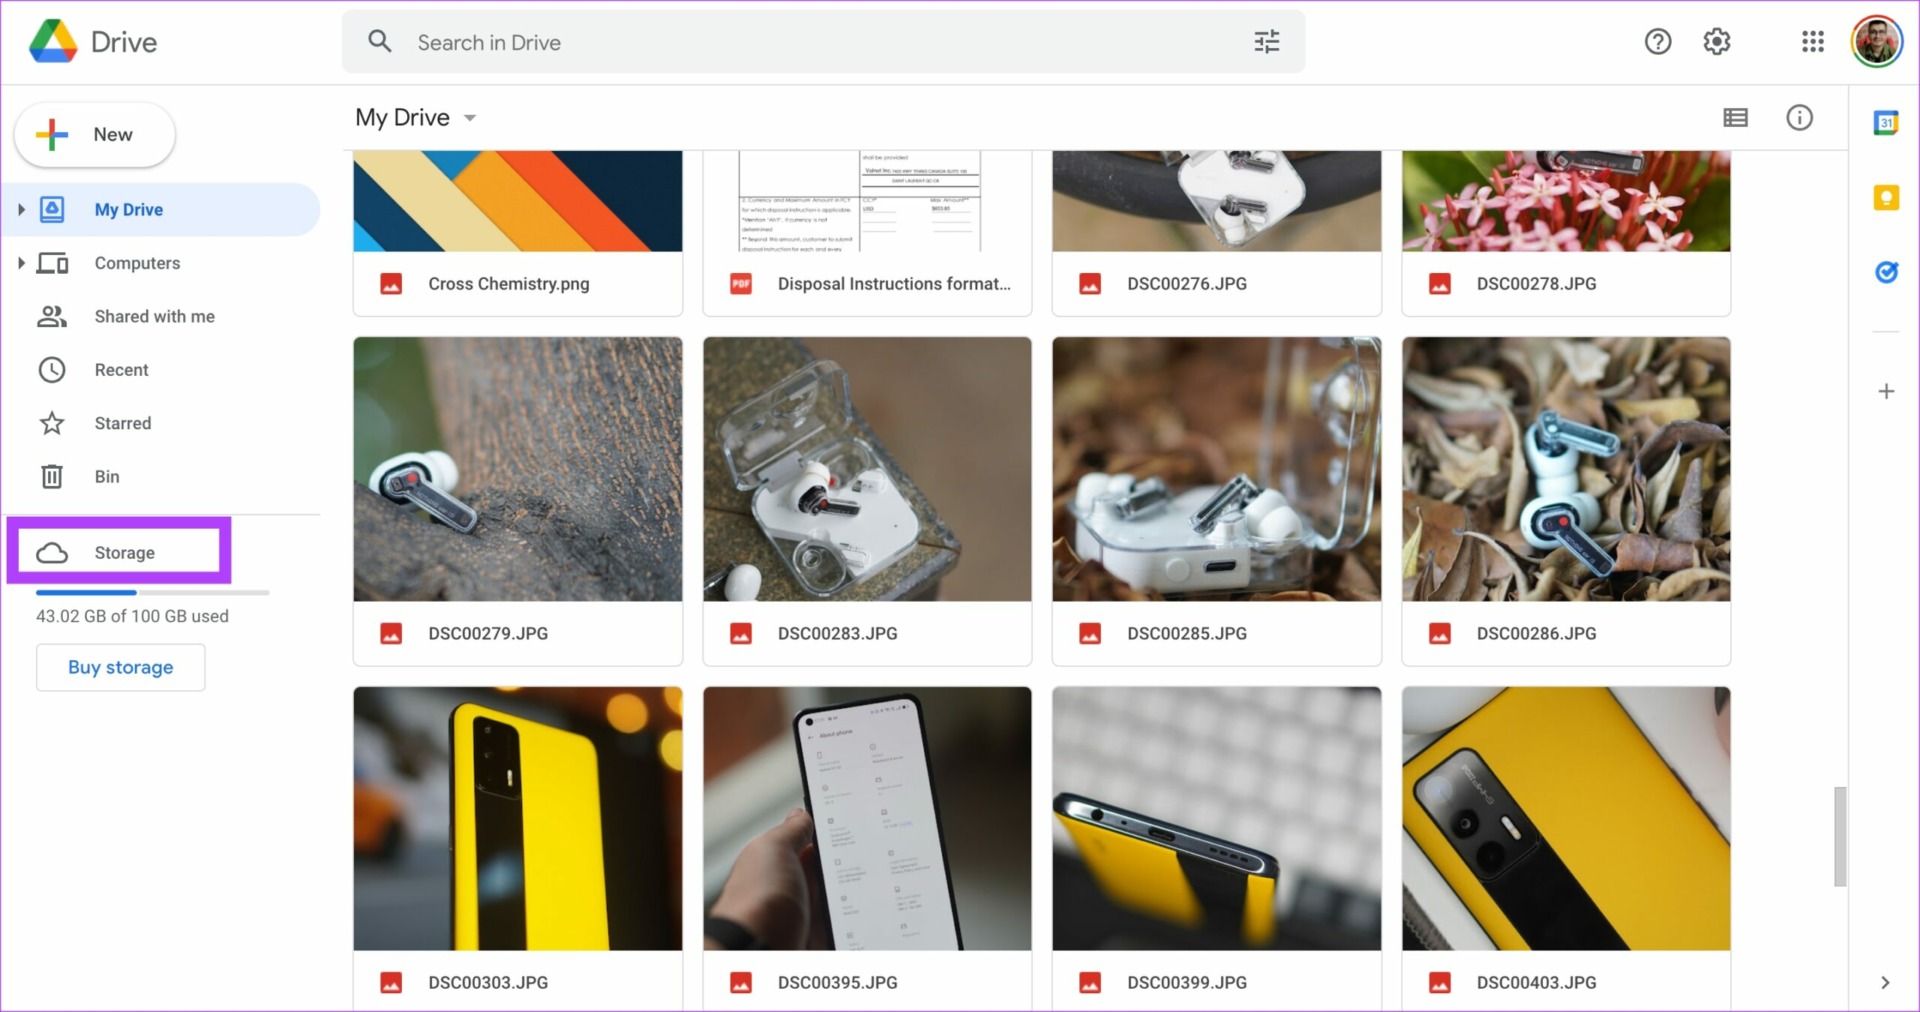
Step 2: Click on the Storage option. You can find it in the left pane.
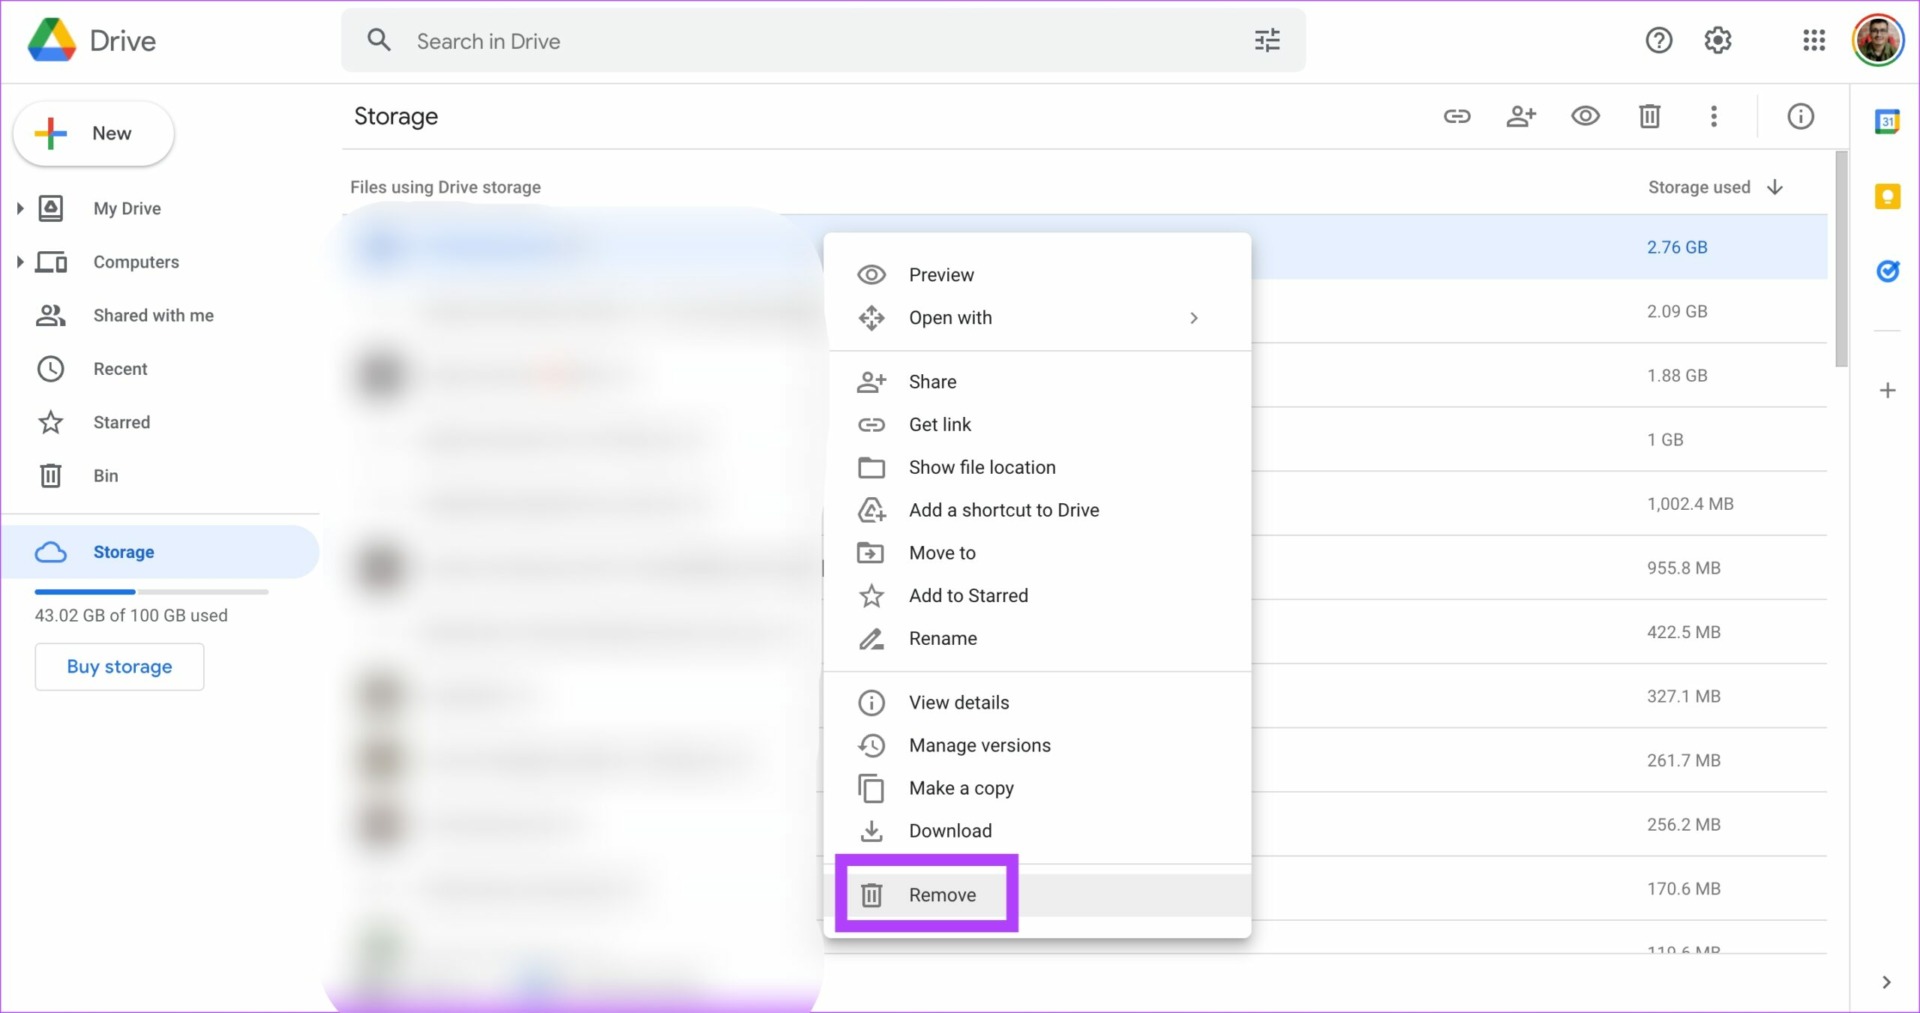
Step 3: This is where you will see all your files on Google Drive listed in descending order. The largest file will be listed at the top.

Step 4: Take a look at the files listed here. If you do not want them anymore, right-click the file and select Remove.
Step 5: Repeat it for all the files you don’t need. If the large files are important, you can also download them onto your computer’s local storage and delete them from Google Drive.
2. Clear Bin Regularly
Google Drive also has a Trash Bin just like the one on Windows. So, whenever you delete files on Drive, make sure to empty the Bin.
Step 1: Open Google Drive in your web browser.
Step 2: Click on the Bin option. You can find it in the left pane.

Step 3: Select the Empty Bin option on the right of your screen.

Step 4: Confirm by clicking on Delete Forever. That’ll clear Google Drive’s Bin.

3. Change Google Photos Backup Settings
If you have enabled Google Photos auto-backup on your phone, there’s a good chance it occupies a lot of storage on Google Drive. This is because the backup includes photos and videos. Until last year, backing up in the Storage Saver resolution didn’t take up any storage on Drive. But, that has changed.
If your backup of Photos and Videos is set to Original Quality, the storage occupied would be much larger. This is why it’s best to change the backup quality to Storage Saver and also convert all existing images from Original Quality to Storage Saver. Here’s how you can do it.
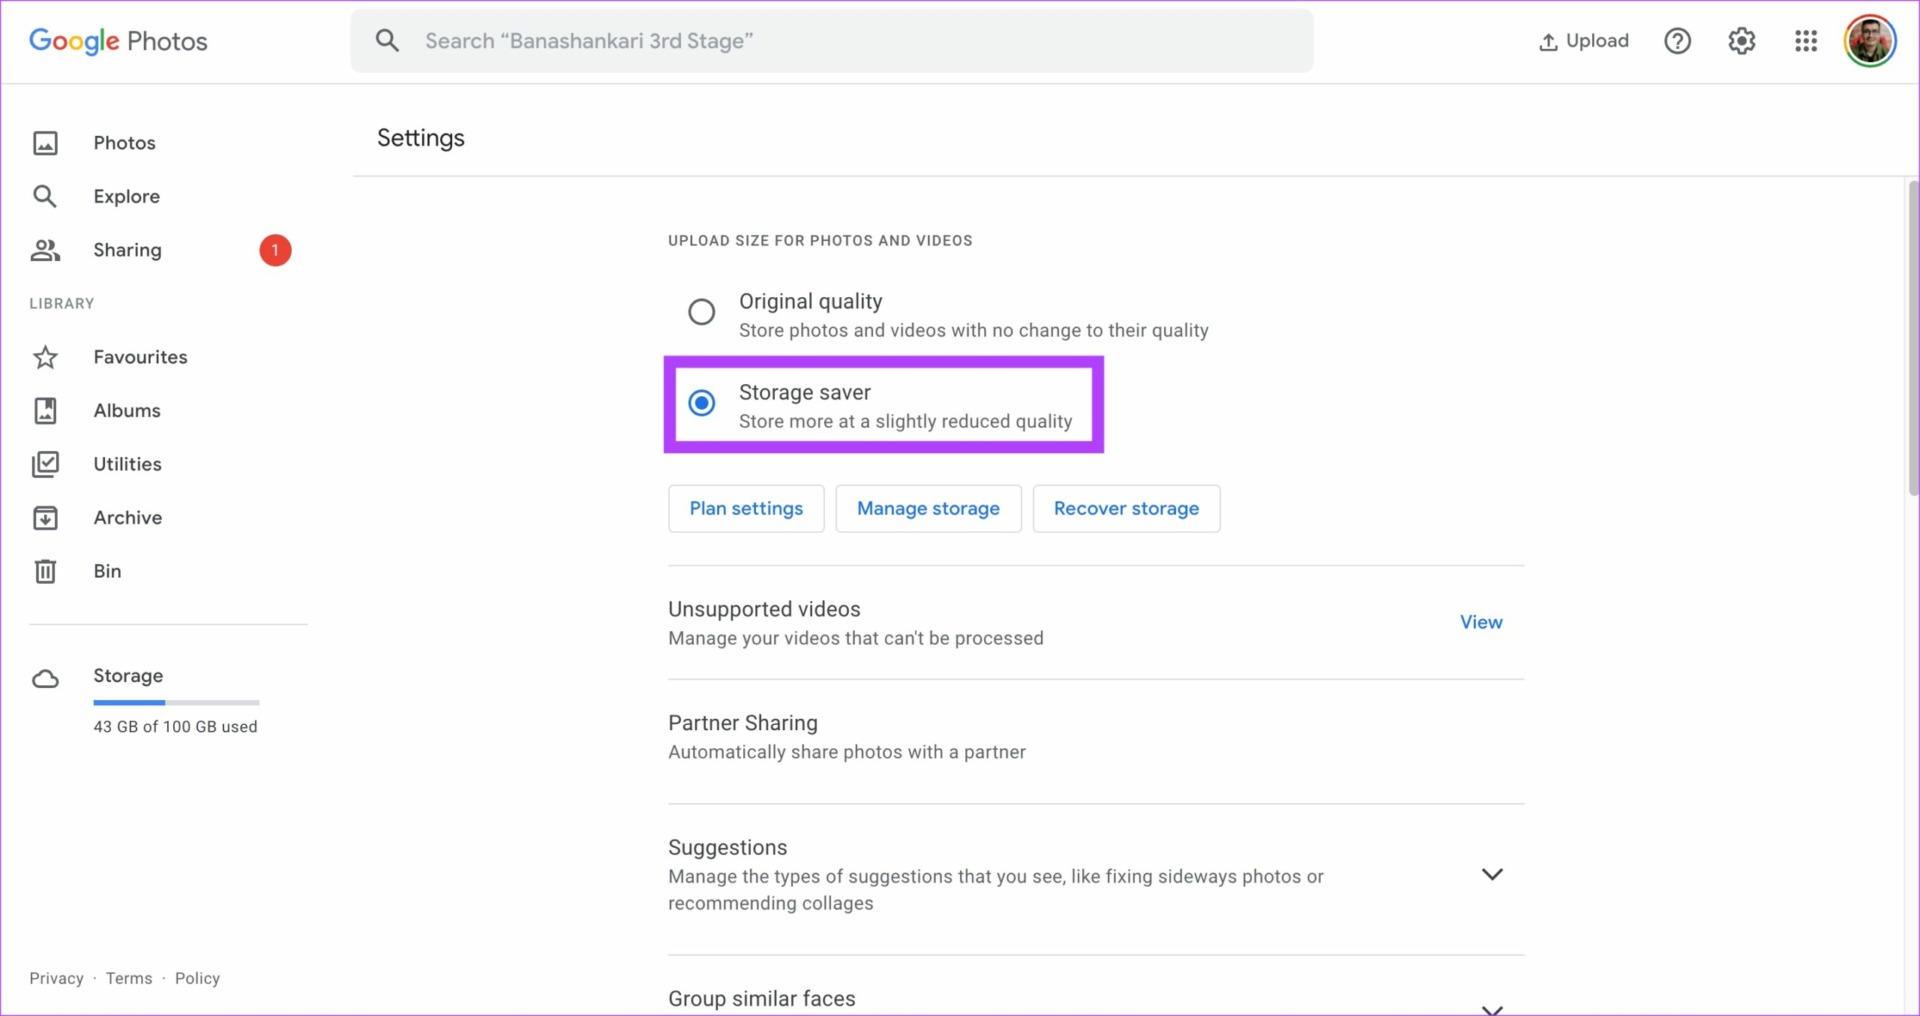
Step 1: Open the Google Photos Settings page on your computer using the link below.
Step 2: If your upload quality is set to Original Quality, change it to Storage Saver. This will change the quality of all future uploads.
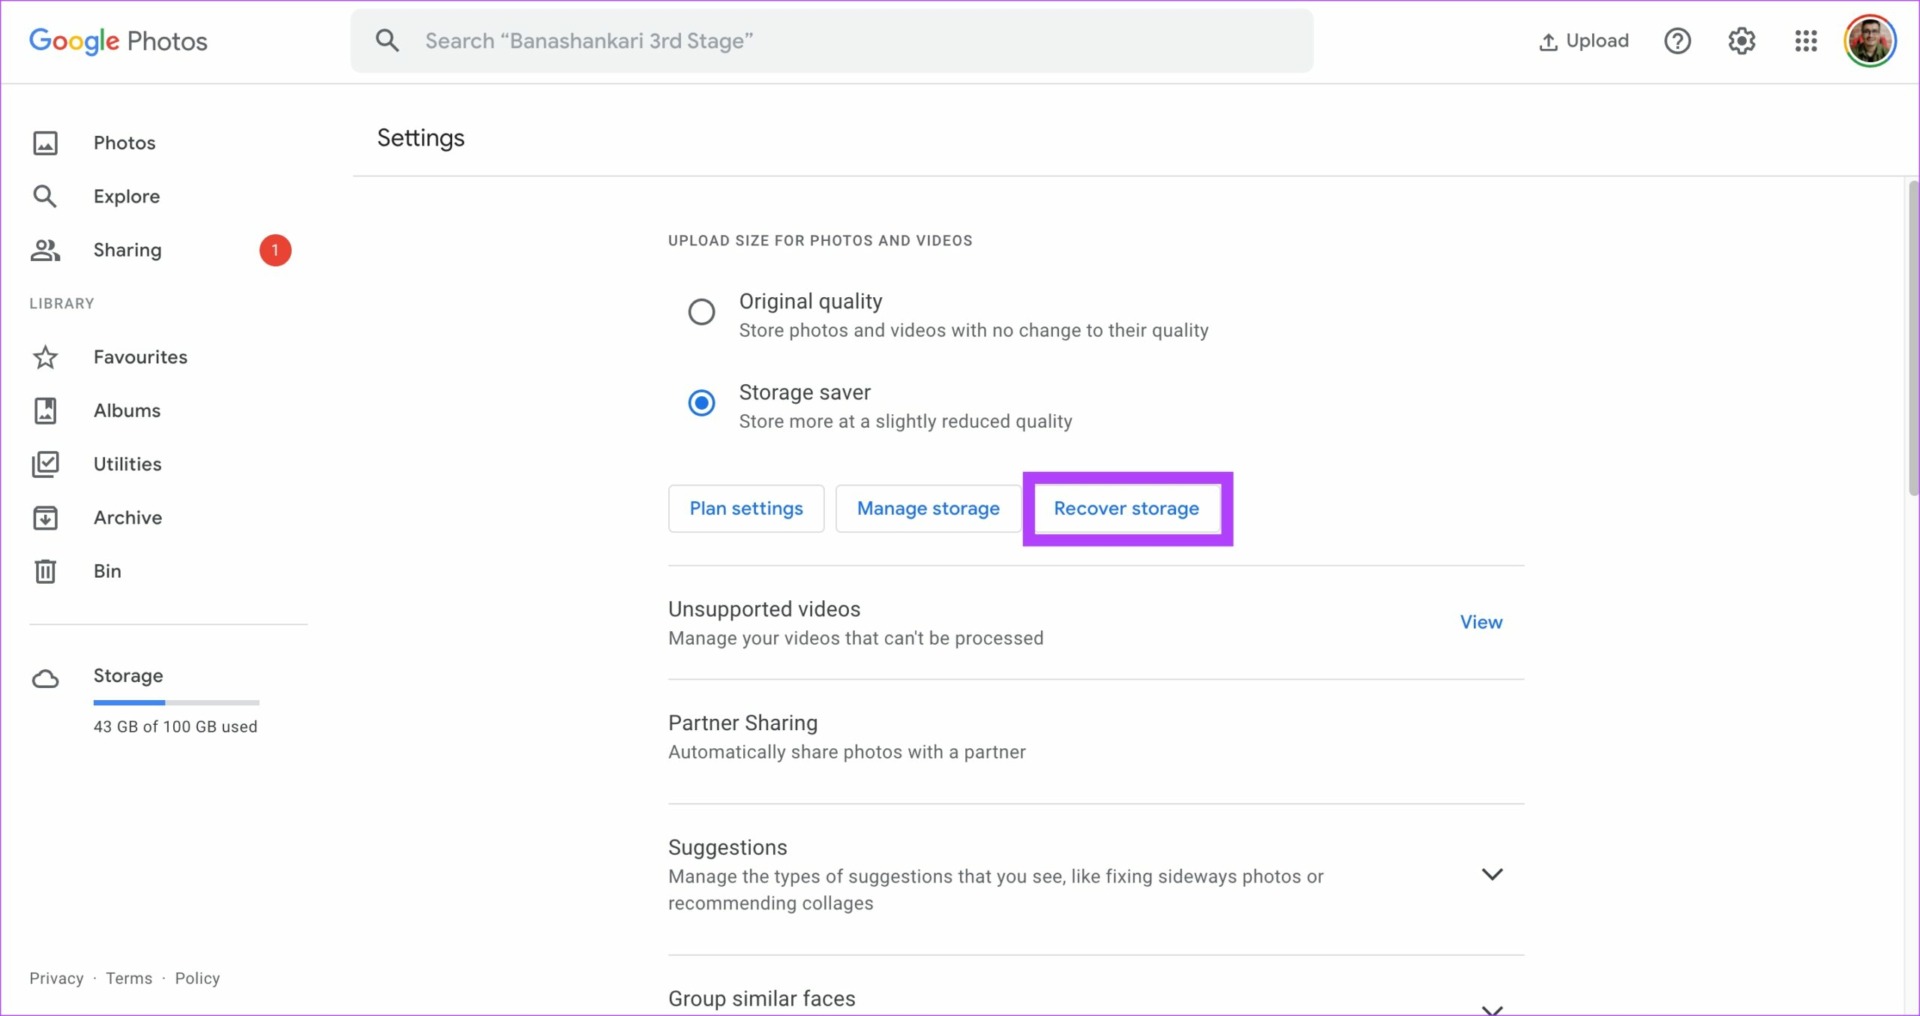
Step 3: To change the quality of existing photos, click on Recover Storage.
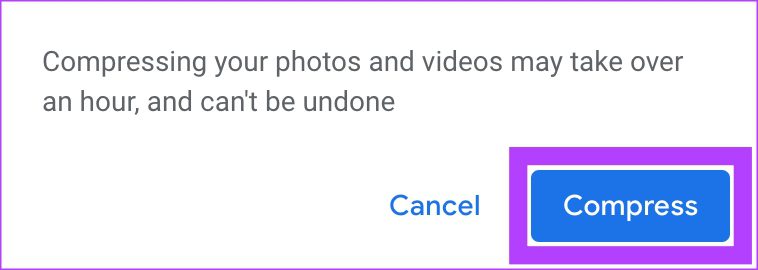
Step 4: Click on Compress to confirm the action. Note that compressing the images will reduce their quality a bit.

Step 5: You will see another warning saying your photos will be compressed and the action cannot be undone. Click on Compress once again.
Wait for Drive to compress your photos and videos. After that, Google Photos will occupy less storage space.
4. Delete Spam Emails and Attachments
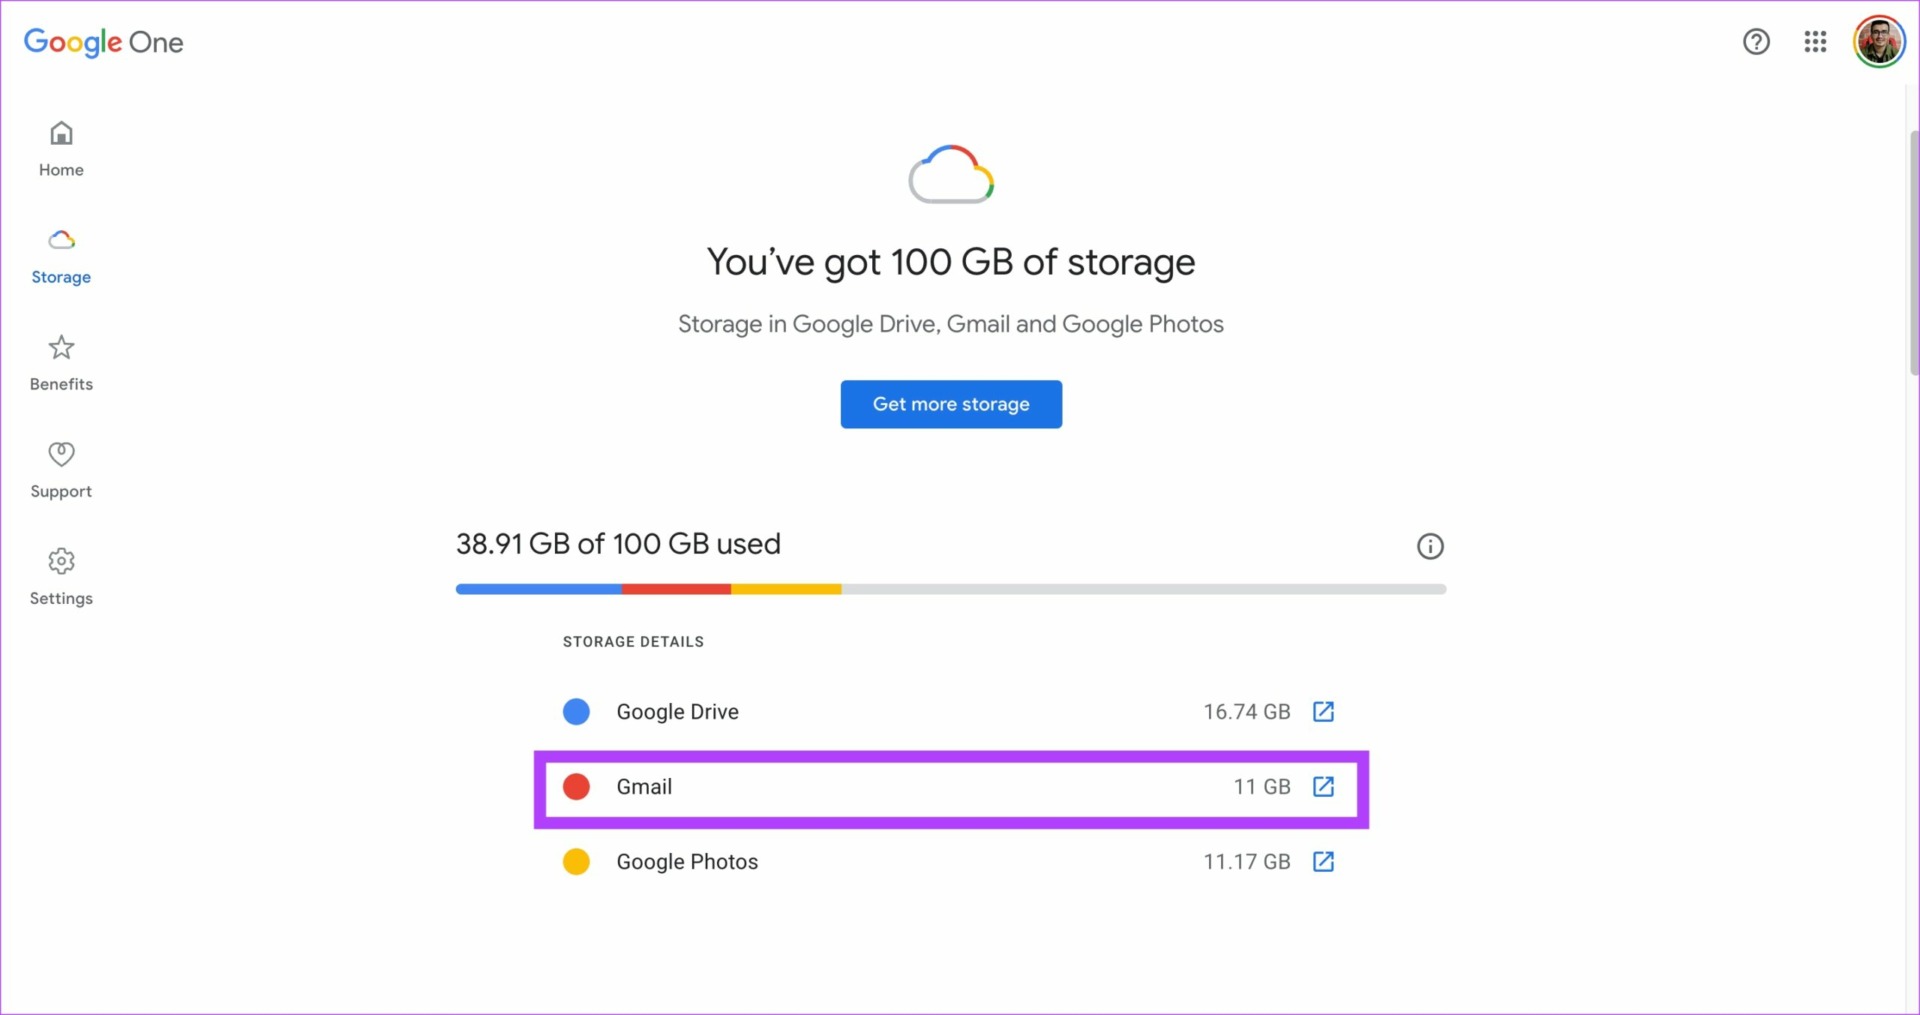
You wouldn’t believe it, but Gmail occupies a huge chunk of your storage if you have lots of old emails accumulated in your inbox. You can check the exact storage occupied by Gmail by going to the Storage Settings page.
The only way to free up this storage is by deleting all your old and spam emails from Gmail. If you do not require your old emails, you can go to the beginning of your inbox and start deleting emails in bulk. You can also delete all the emails in your Spam folder.
Once you have deleted your existing emails, you can set up auto-delete on Gmail to automatically delete spam emails in the future. This will prevent your Gmail from getting cluttered.
5. Delete Social and Promotional Emails
Gmail has a neat little feature to segregate emails received by social media platforms or ones that are promotional in nature. You can use this feature to specifically delete emails that may not be useful to you. Here’s how it works.
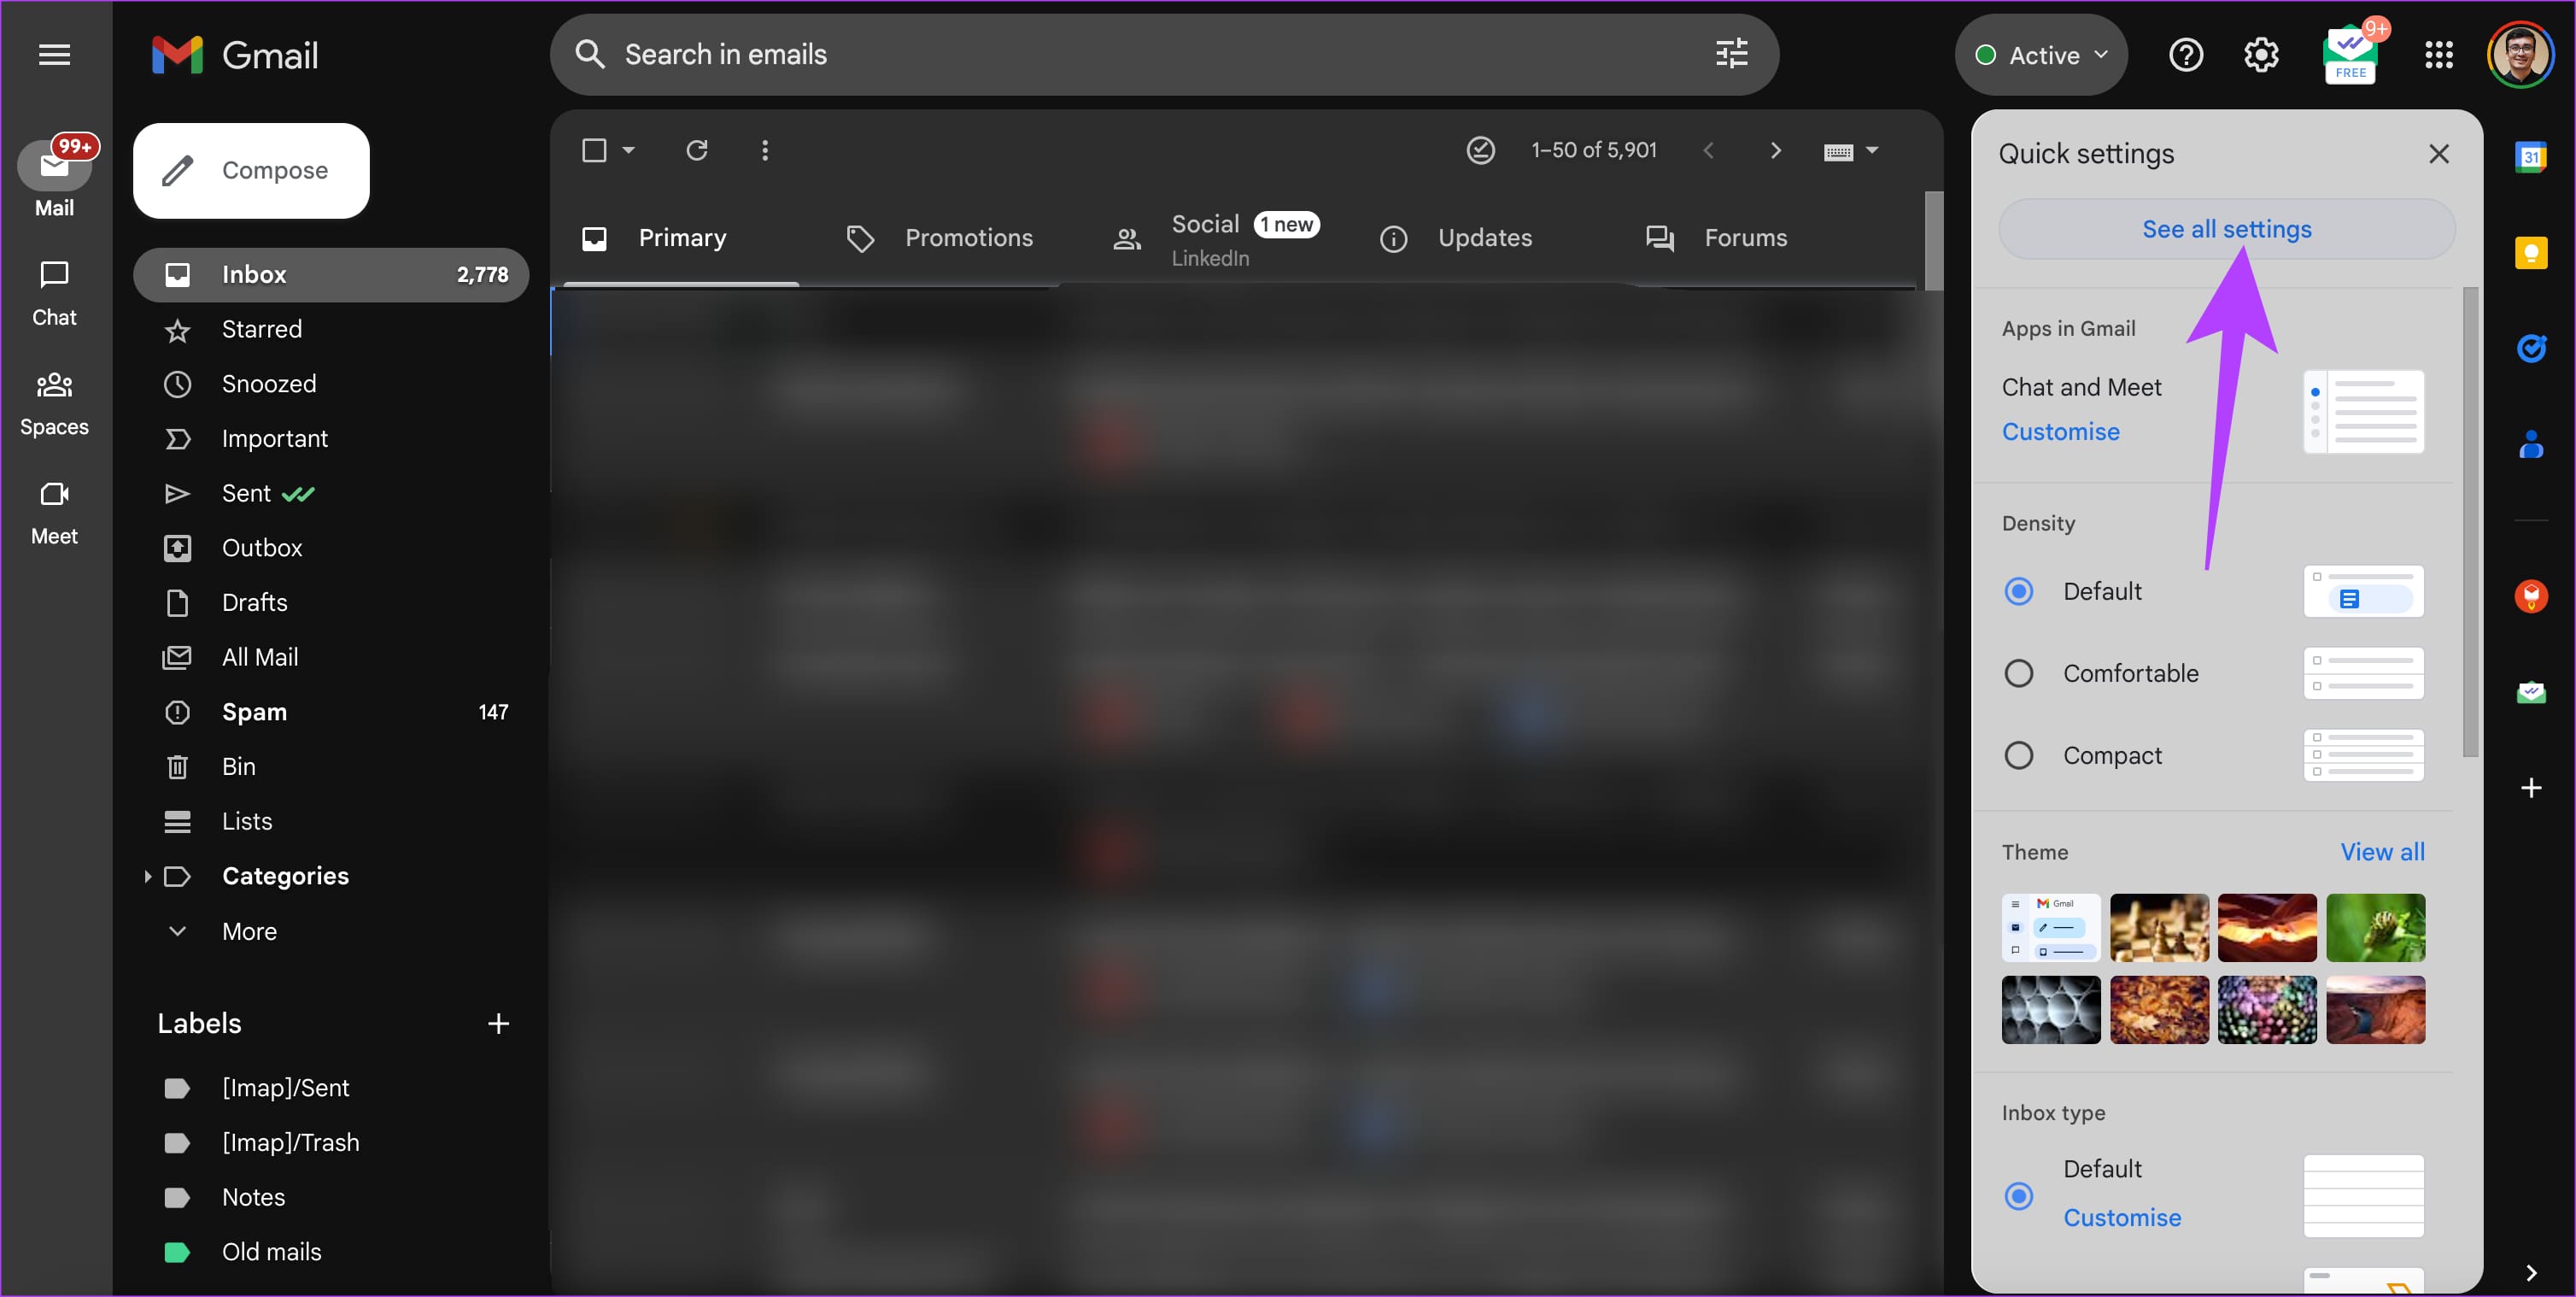
Step 1: Open Gmail on your computer. Click on the Settings icon in the top-right corner.

Step 2: Select ‘See all settings’ at the top.
Step 3: Navigate to the Inbox tab. You’ll find it at the top of the Settings screen.
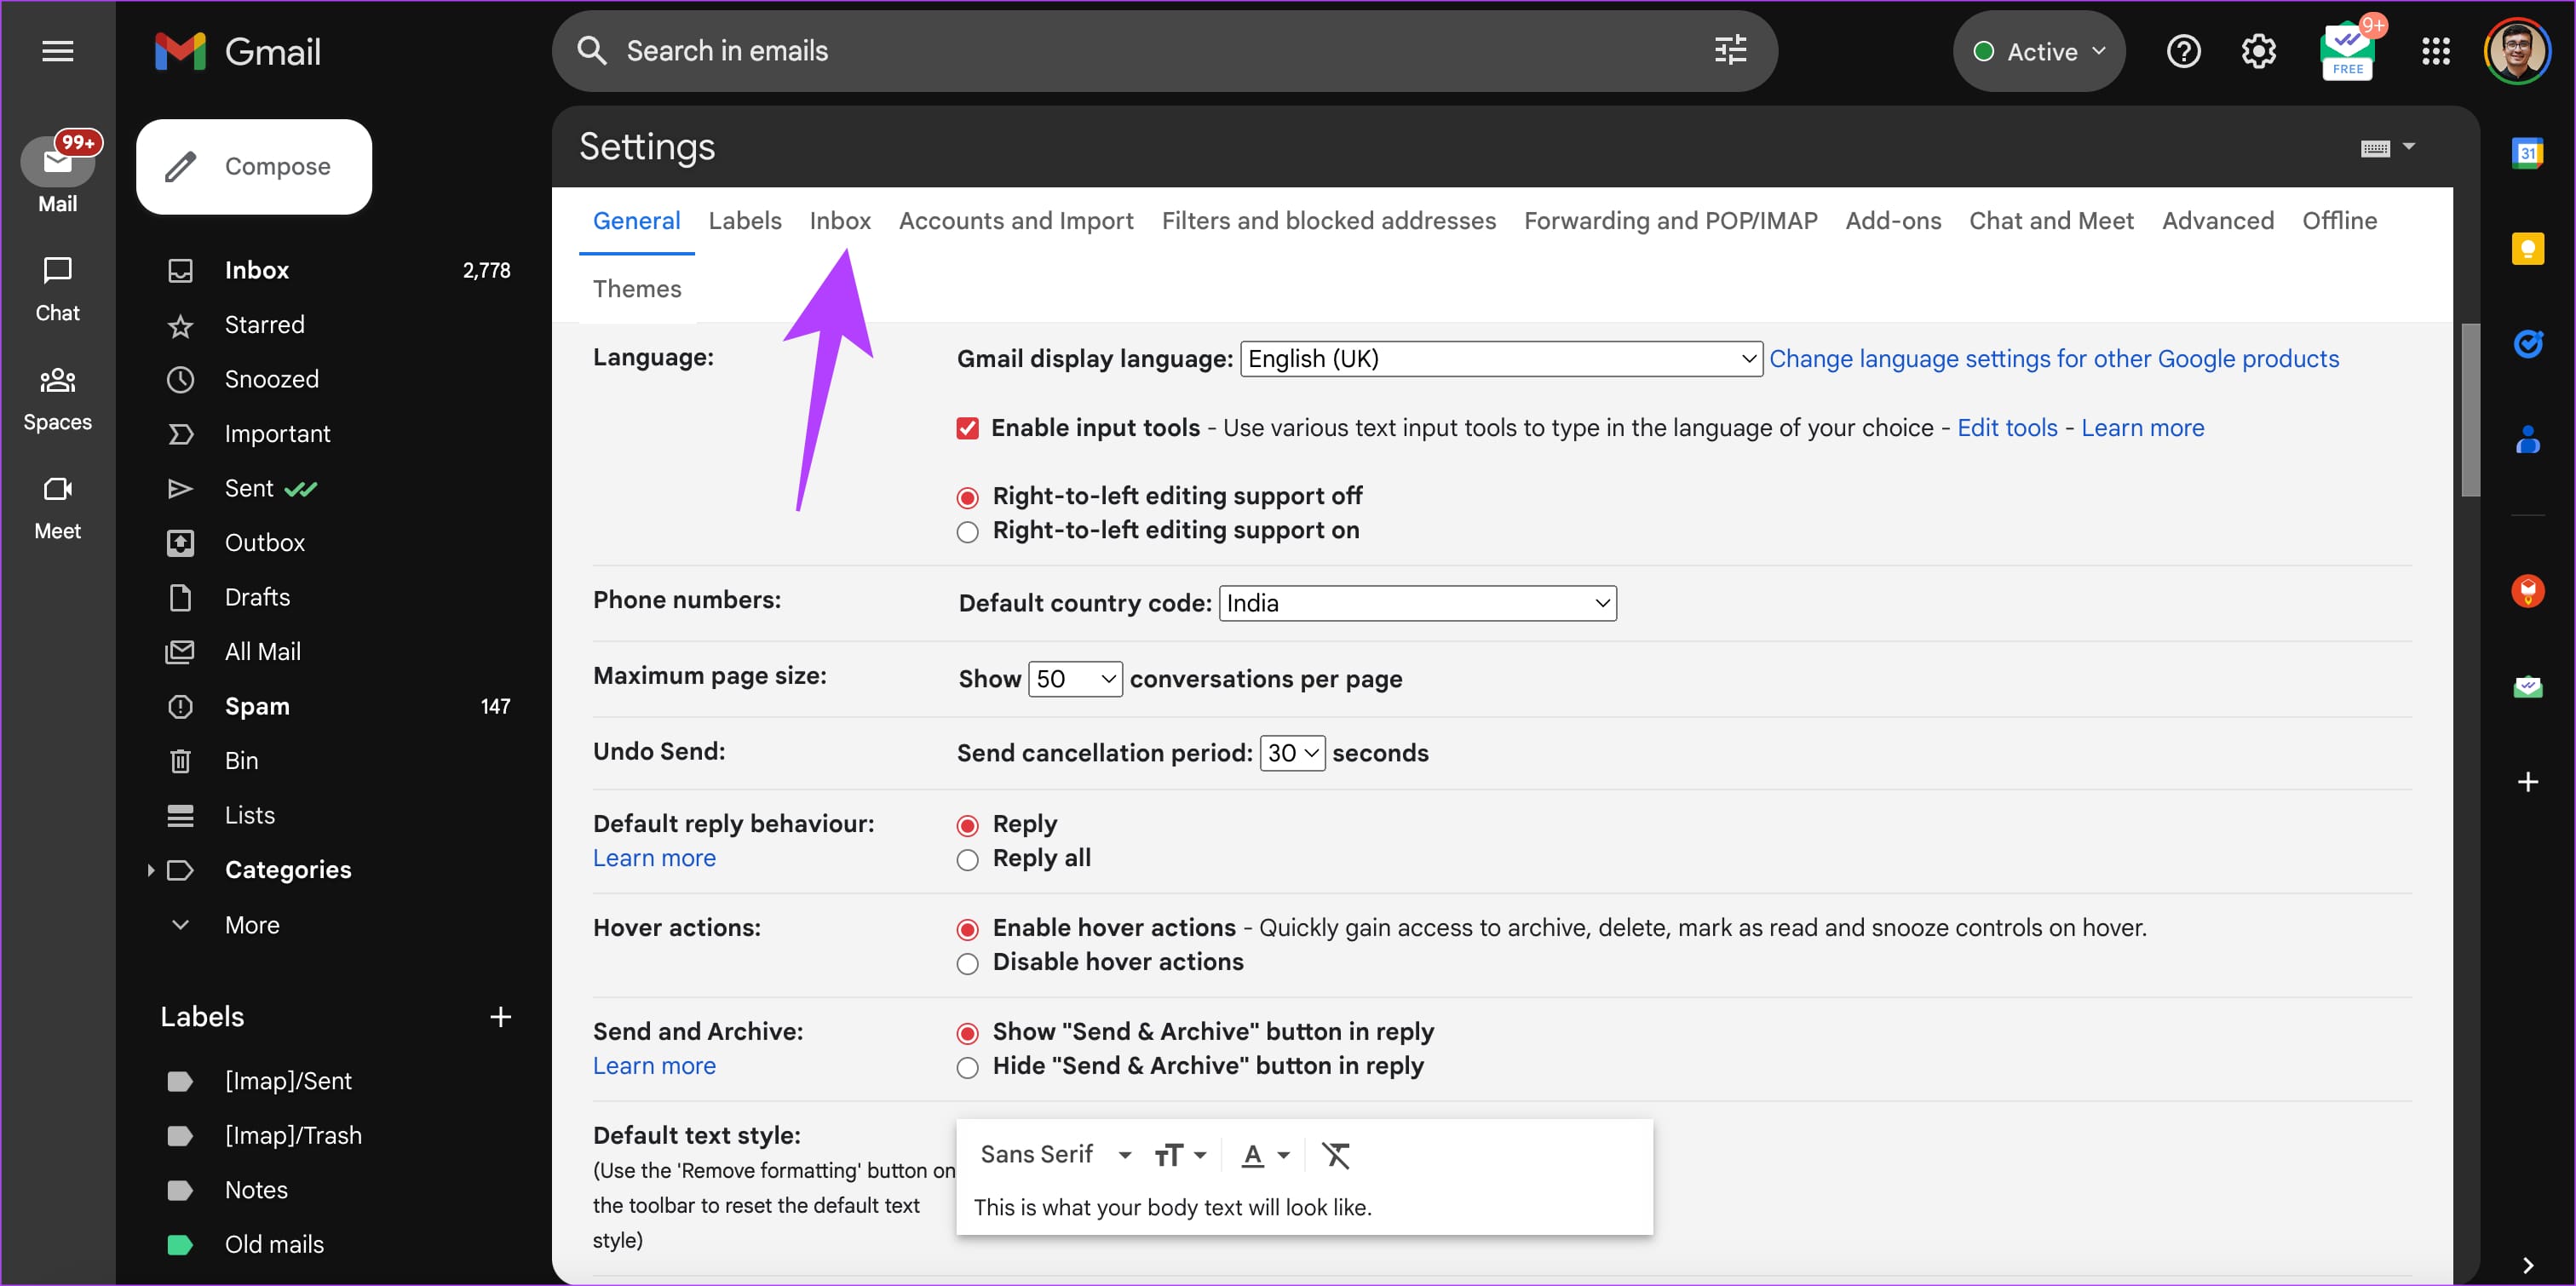
Step 4: Check the boxes next to Promotions and Social.

Step 5: Head back to your Inbox. Switch to the new Promotions tab.

Step 6: Select all the mails by clicking on the checkbox right at the top. This will, however, only select the emails on this page. Click on the ‘Select all conversations in Promotions’ button to choose all the emails at once.

Step 7: Press the Delete button. All your promotional emails will be deleted.

Repeat the same procedure for Social emails. Once done, don’t forget to clear the Bin on Gmail.
6. Find Emails With Large Attachments and Delete Them
You may have received several emails in the past with large attachments. However, you may not need them anymore. So, it’s best to find those emails and delete them. Here’s how.
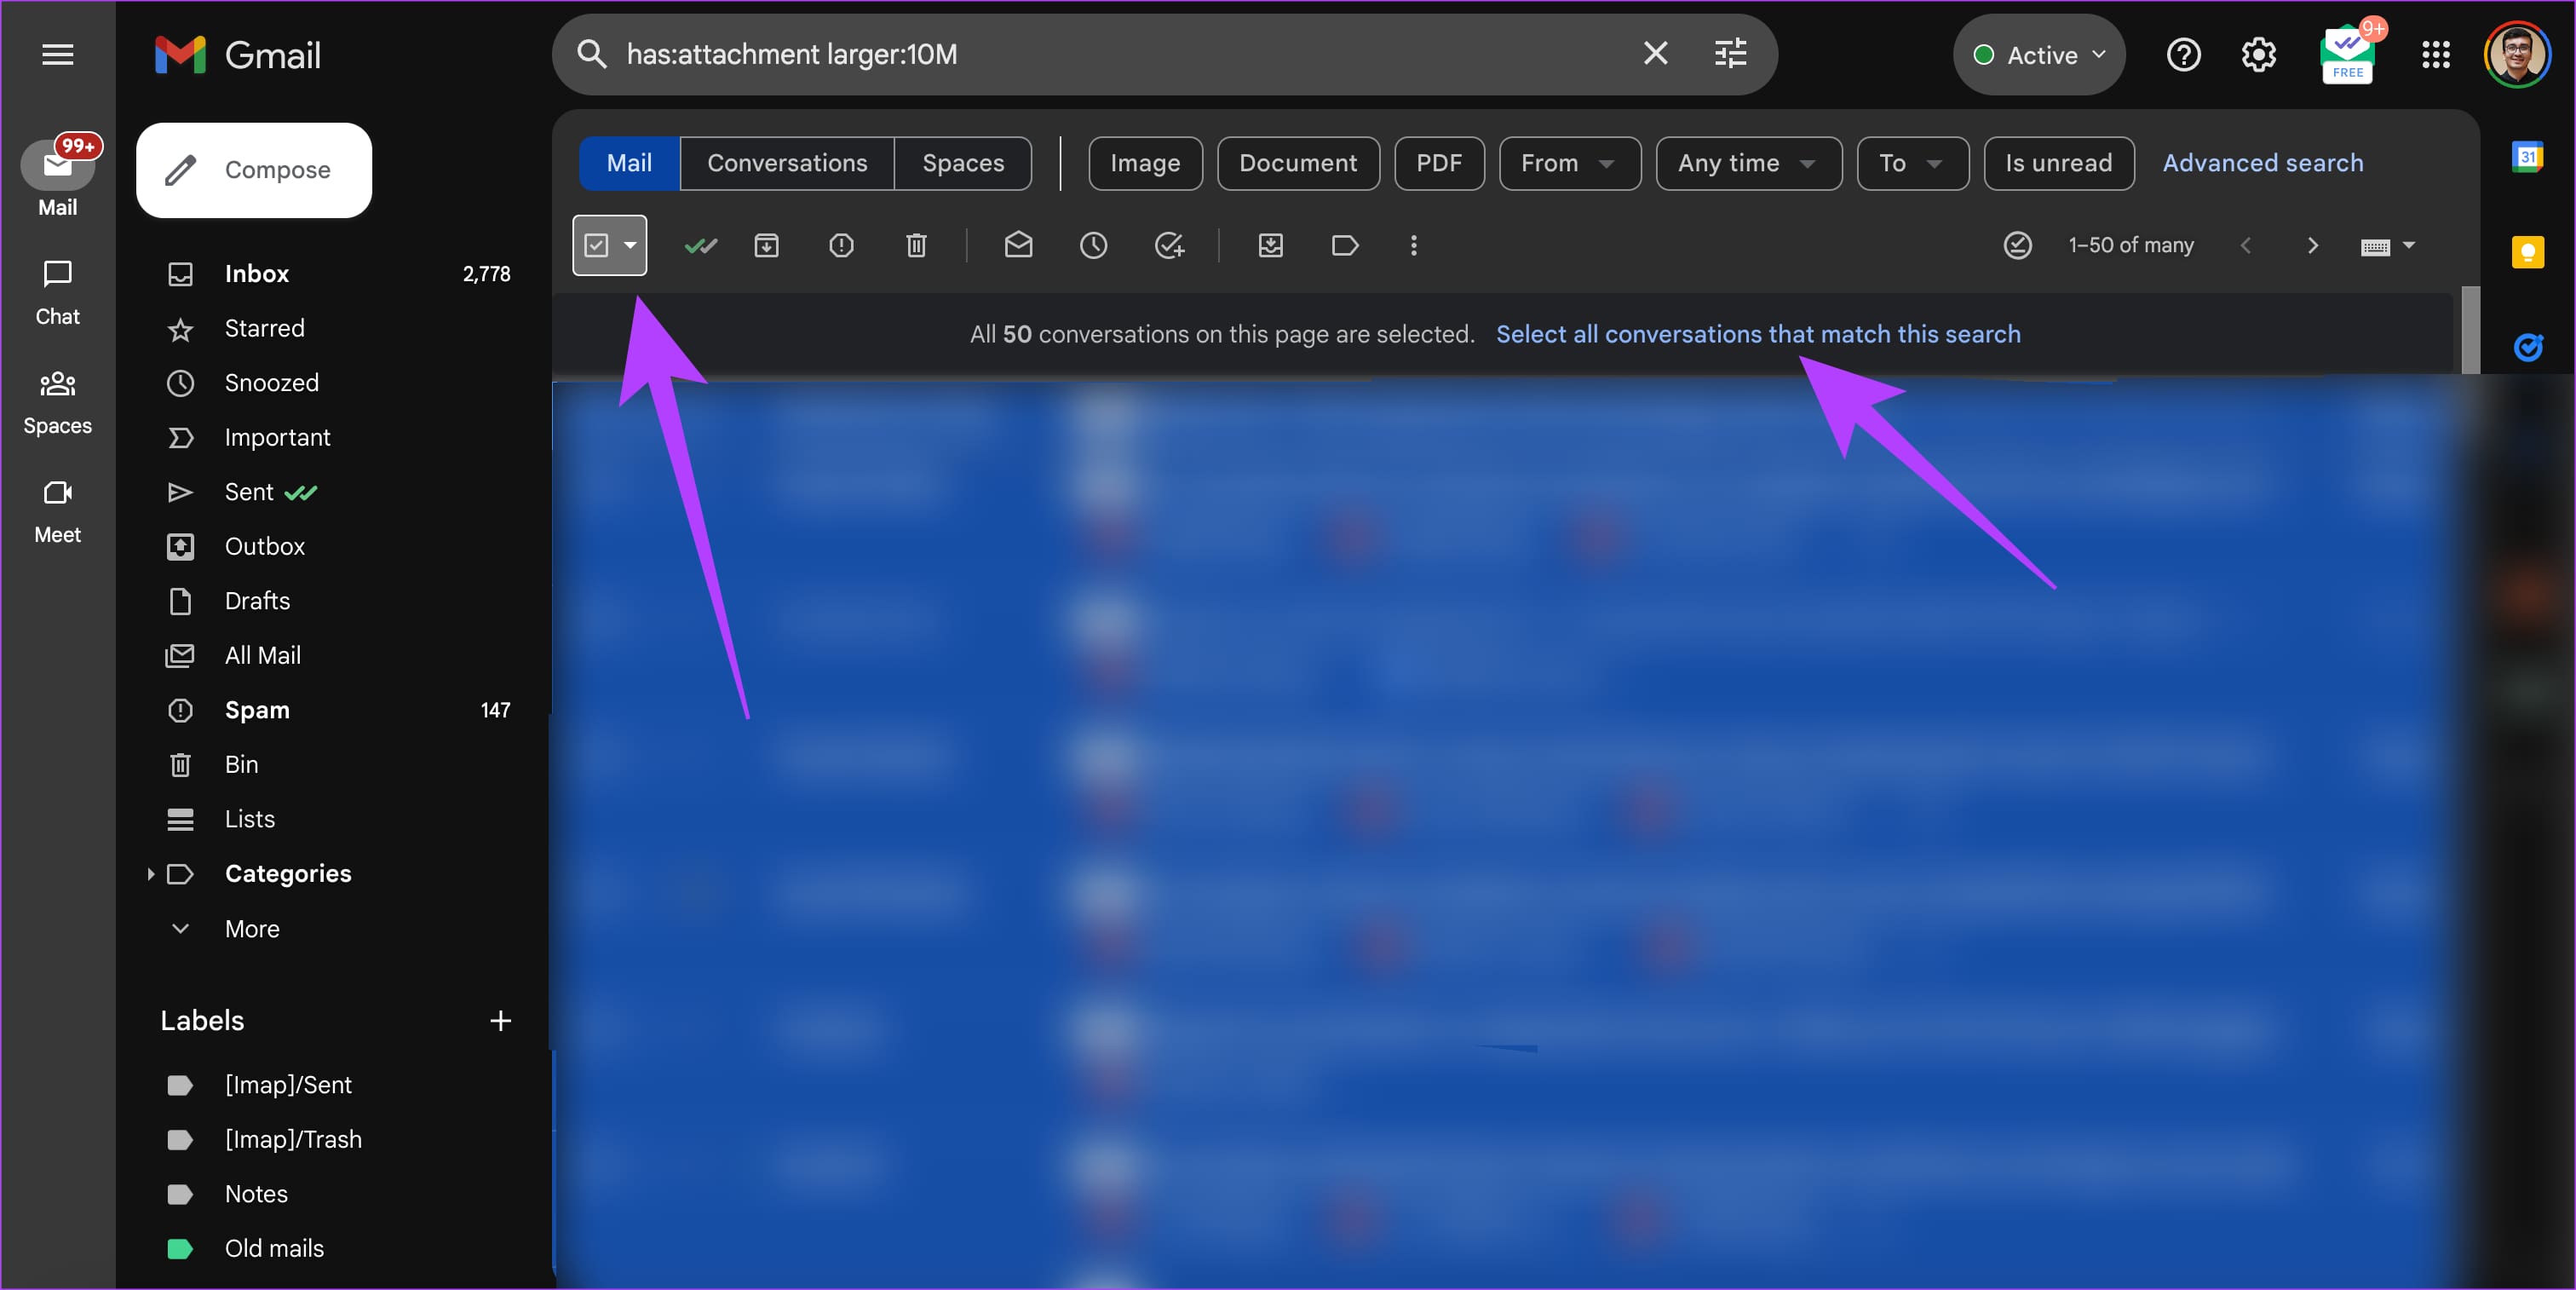
Step 1: Open Gmail on your computer. Use the search bar at the top to enter this particular text: has:attachment larger:10M. Then, hit the enter key.

Note: You can enter any attachment size in place of 10M.
Step 2: Gmail will now display all your emails with attachments above the entered size. Select all the mails by clicking on the checkbox right at the top. This will, however, only select the emails on this page. Click on the ‘Select all conversations in Promotions’ button to choose all the emails at once.
Step 3: Press the Delete button. All the selected emails will be deleted.

Once done, don’t forget to clear the Bin on Gmail.
7. Delete Android Backups
If you use multiple smartphones or have used a few of them in the past, Google takes a cloud backup of your smartphone’s data and saves it on Drive regularly. This occupies some extra storage on Drive, depending on the amount of data backed up. You can delete these backups if they are not important to you or are from older devices.
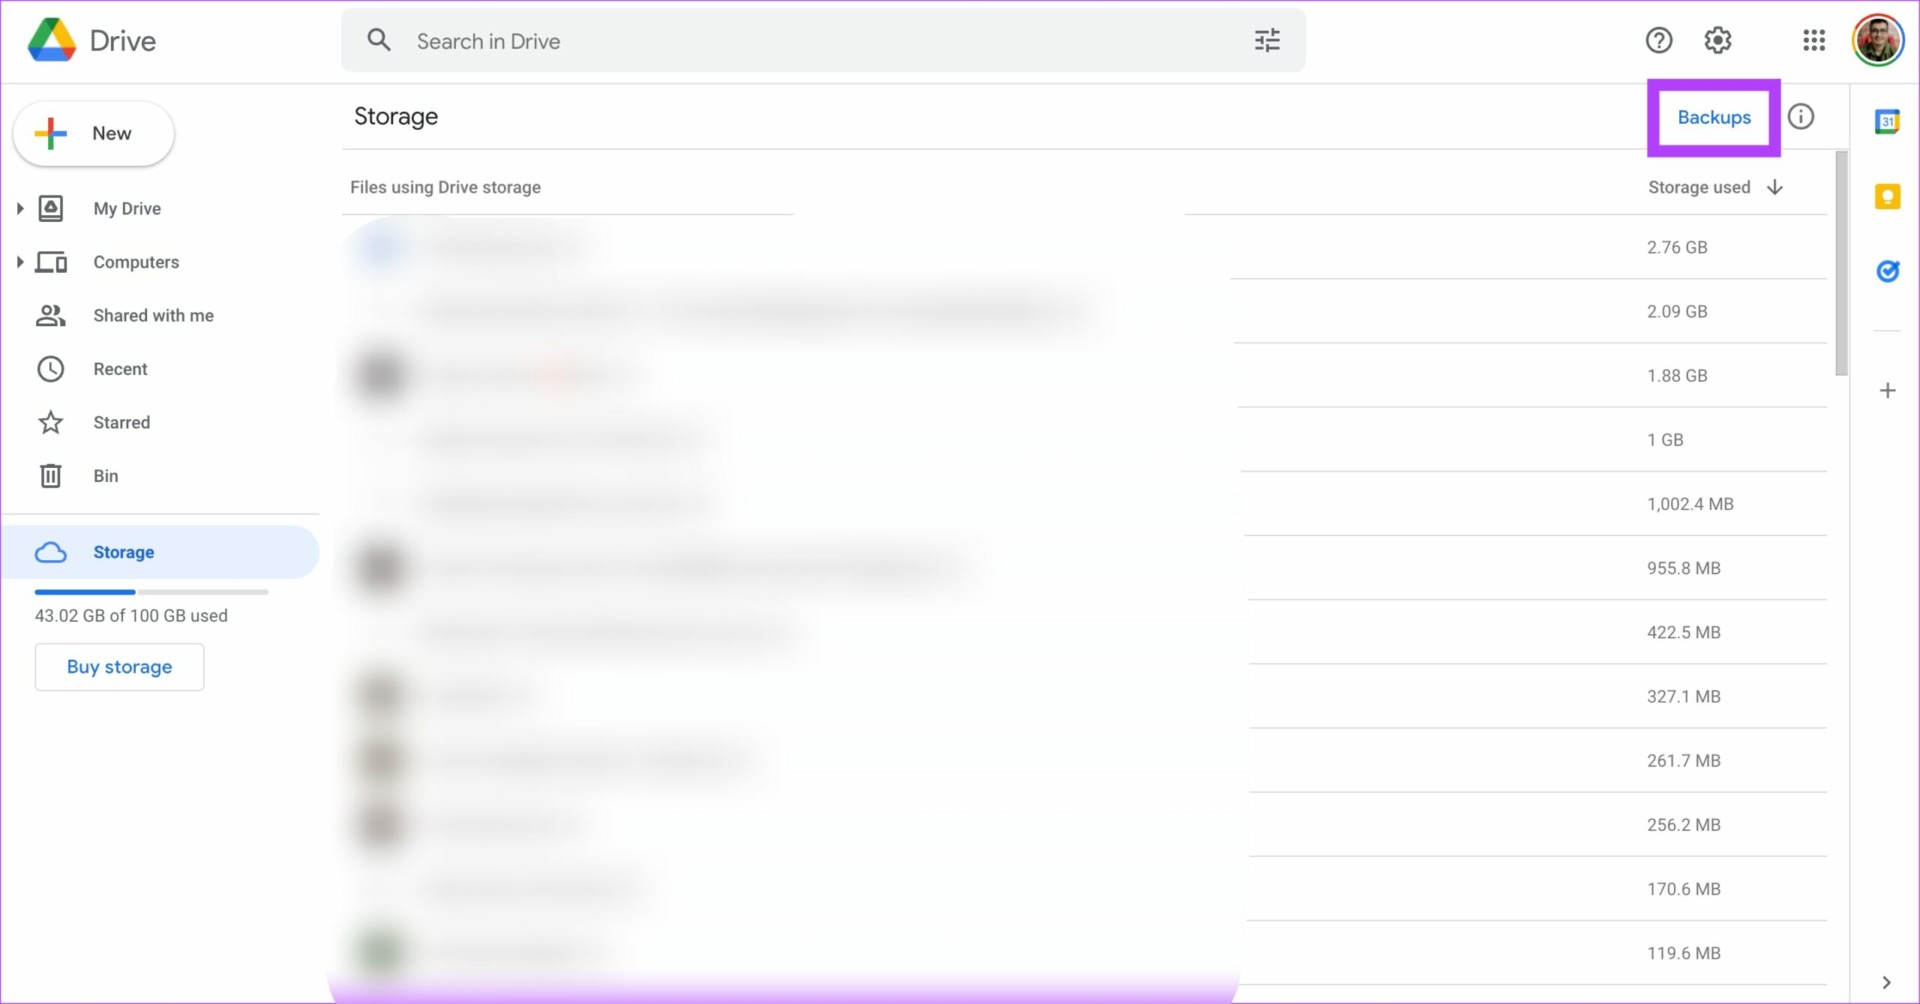
Step 1: Open Google Drive in your web browser.
Step 2: Click on the Storage option. You can find it in the left pane.
Step 3: Select the Backups option. It’s listed in the top-right corner.
Step 4: You will now see a list of all the backups.

Step 5: Select the backup you don’t need. Right-click on it and select Delete Backup.
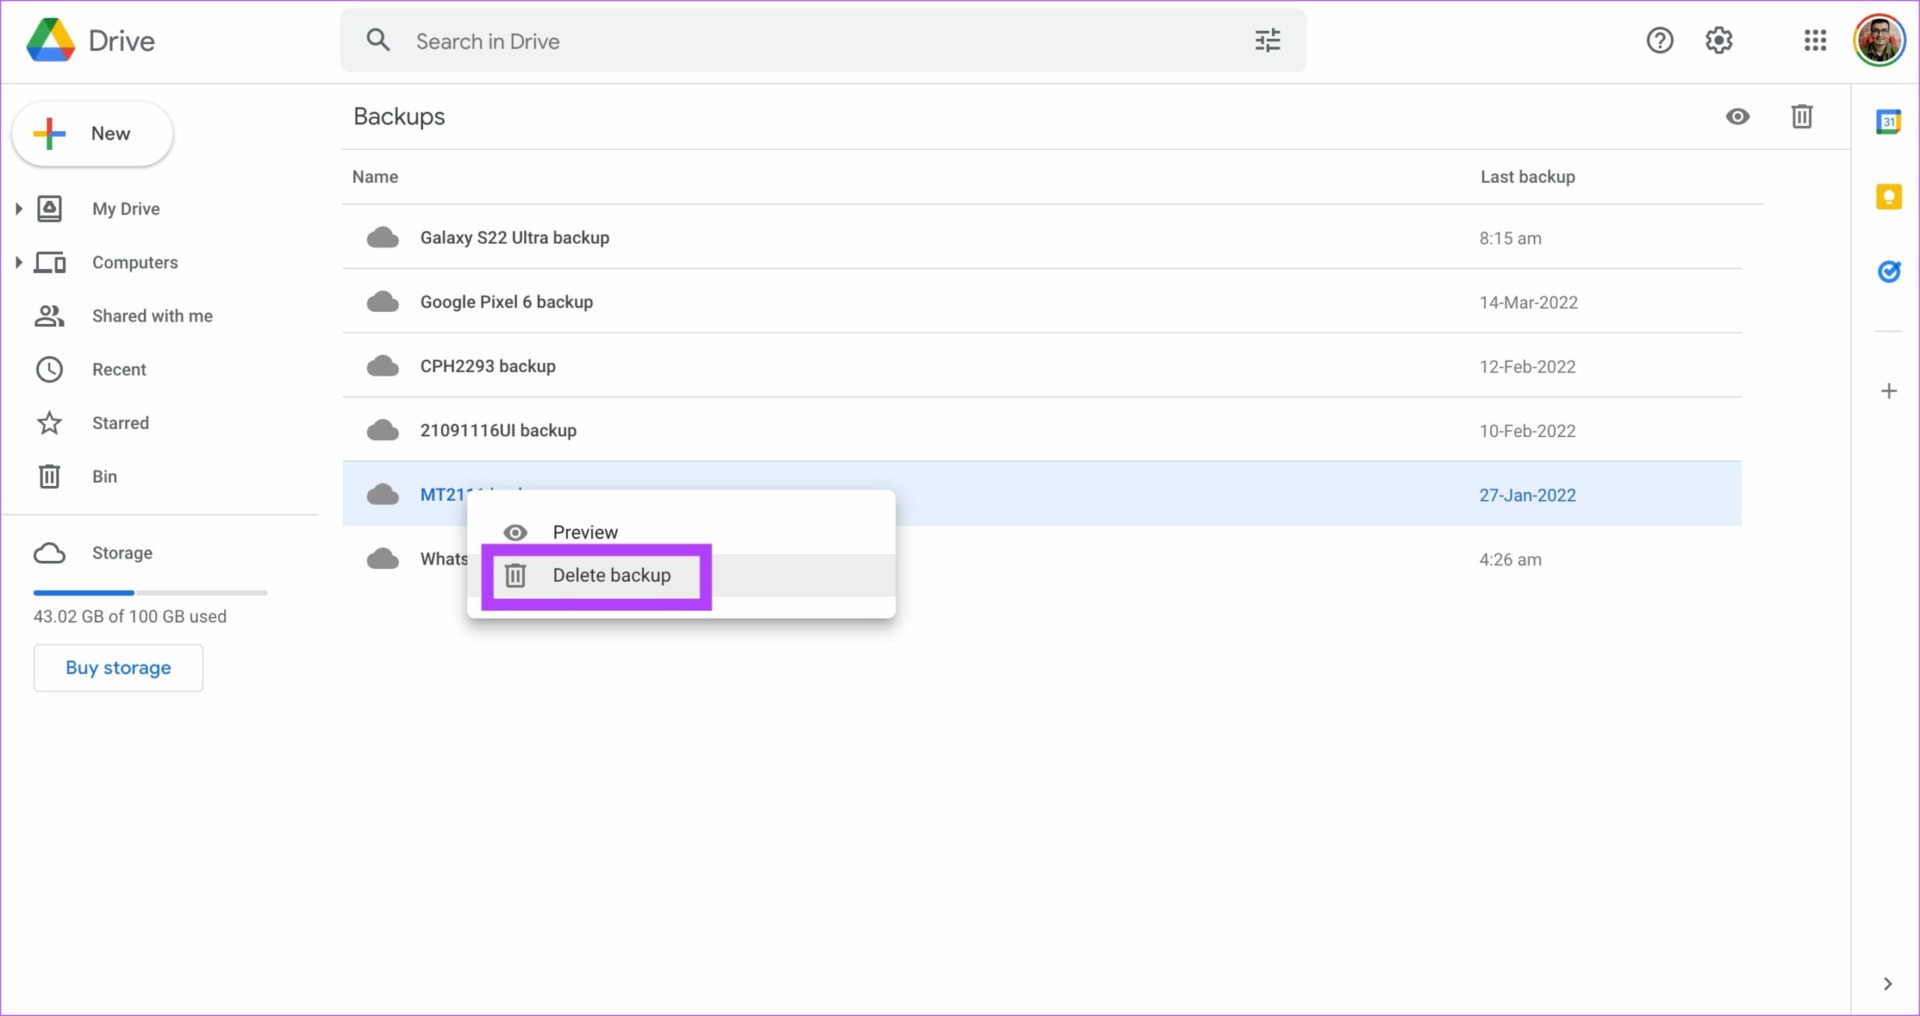
Step 6: Click on Delete again when the prompt appears. Repeat it for all the backups you want to delete.

8. Download Files Offline and Delete Them From the Cloud
A lot of us store important files and media on Google Drive that we can’t afford to lose. If that’s the case with you and you can’t delete some files, download them to your computer or phone’s local storage and then delete them from Drive.

This way, you won’t have to let go of the files plus you will have some free storage on Drive for new files. Later, if you can delete some other files and make space for the one you downloaded offline, you can upload it back to Drive.
If there are absolutely no files you can delete and you can’t download the files offline, you’re left with no option but to subscribe to Google One. Google One offers a host of benefits like extra photo editing tools and priority customer support along with more storage. So if you don’t mind spending, consider purchasing a Google One subscription.
FAQs for Freeing Up Google Drive Storage
Let’s face it, the 15GB storage feels like peanuts with prolonged usage. If you use your Google account for back-ups and securely storing your photos, the Google One subscription plan seems optimal. Google has storage plans starting from 100 GB and extending to 2TB. You can get a plan based on your needs. Interestingly, you can extend the plan to your family members as well.
You should note though that if you decide to cancel your Google One subscription, the storage will return to 15GB at the end of the billing cycle. it’s not a one-time fee. This can cause an issue if you have stored data beyond the customary 15GB.
The answer to this depends on whether you’re more reliant on Google’s ecosystem or that of Apple’s. If you’re enthusiastic about Apple products such as iPhone, iPad, Mac, etc. the iCloud storage would be an ideal option. You can back up all data into one platform. However, if you predominantly use Google Docs, Google Slides, etc., go for Google’s storage.
When you delete files from Google Drive, the deleted files go to the Bin section. This means that despite being deleted, the file is stored in the bin. So, technically your storage has not been reduced. If you face the issue even after clearing the bin, check out our dedicated guide to fix Google Drive Storage full but no files.
Manage Your Google Account Storage
Following these steps would have cleared a good chunk of your Google Drive storage, so you can now save more files on the cloud. Make sure you clean up your Google Drive from time to time to avoid files from clogging up your storage.
Last updated on 31 August, 2023
The above article may contain affiliate links which help support Guiding Tech. However, it does not affect our editorial integrity. The content remains unbiased and authentic.
Read Next
 Top 9 Ways to Free up Storage Space on iOS 12
iPhones and iPads come in different storage size.
Top 9 Ways to Free up Storage Space on iOS 12
iPhones and iPads come in different storage size.
 Top 10 Ways to Free Up iCloud Storage on Mac
You must take the time to manage your iCloud storage quota.
Top 10 Ways to Free Up iCloud Storage on Mac
You must take the time to manage your iCloud storage quota.
 8 Ways To Free Up Storage Space on Android – Guiding Tech
Oh, the irony.“I’ve made a huge mistake“.
8 Ways To Free Up Storage Space on Android – Guiding Tech
Oh, the irony.“I’ve made a huge mistake“.
 11 Best Ways to Free Up Storage on Samsung Phones and Tablets
Android phones come with two different types of storage spaces – internal and external.
11 Best Ways to Free Up Storage on Samsung Phones and Tablets
Android phones come with two different types of storage spaces – internal and external.
 3 Best Ways to Free Storage on Fire TV Stick
By default, the new Fire TV Stick or Fire TV Stick 4K comes with 8GB of internal storage.
3 Best Ways to Free Storage on Fire TV Stick
By default, the new Fire TV Stick or Fire TV Stick 4K comes with 8GB of internal storage.
 Microsoft No Longer Gives Free Storage in Office 365
Although Microsoft wasn’t exactly at the forefront for cloud storage, when it did go big, it did so while making a lot of heads turn.
Microsoft No Longer Gives Free Storage in Office 365
Although Microsoft wasn’t exactly at the forefront for cloud storage, when it did go big, it did so while making a lot of heads turn.
 3 Ways How Google Photos Will Count Against Google Drive Storage
All Google account users should know what is counted toward Google Drive's storage quota so that they don't fill it up with unnecessary junk.
3 Ways How Google Photos Will Count Against Google Drive Storage
All Google account users should know what is counted toward Google Drive's storage quota so that they don't fill it up with unnecessary junk.
 How to Keep Getting 25 GB Free Storage Space in New SkyDrive
Windows Live SkyDrive, Microsoft’s cloud storage solution, has undergone a major overhaul and Microsoft has just introduced paid SkyDrive storage plans, new SkyDrive apps for Windows, Macs and mobile operating
How to Keep Getting 25 GB Free Storage Space in New SkyDrive
Windows Live SkyDrive, Microsoft’s cloud storage solution, has undergone a major overhaul and Microsoft has just introduced paid SkyDrive storage plans, new SkyDrive apps for Windows, Macs and mobile operating