Mails from several web services, apps, and newsletters often crowds your Gmail Inbox. Despite unsubscribing from a few, the quantity of promotional emails and newsletters doesn’t reduce. That leaves you with no option but to block emails in Gmail.

In this guide, we’ll show you how to block and unblock email addresses in Gmail. Since Gmail mobile app looks identical on iPhone and Android, we’ll cover them in a single section. Let’s get started.
1. Block Emails in Gmail on the Web
The default Gmail filters can recognize and block irrelevant emails from your Inbox. The service sends such emails directly to the Spam folder. However, some of the emails might escape the filter and still land in the Inbox.
So when you want to stop emails from specific senders completely, here are the steps to make the necessary changes.
Step 1: Visit Gmail on the web and sign in with your account details.
Step 2: Open an email sender from which you no longer want to receive emails in the future.
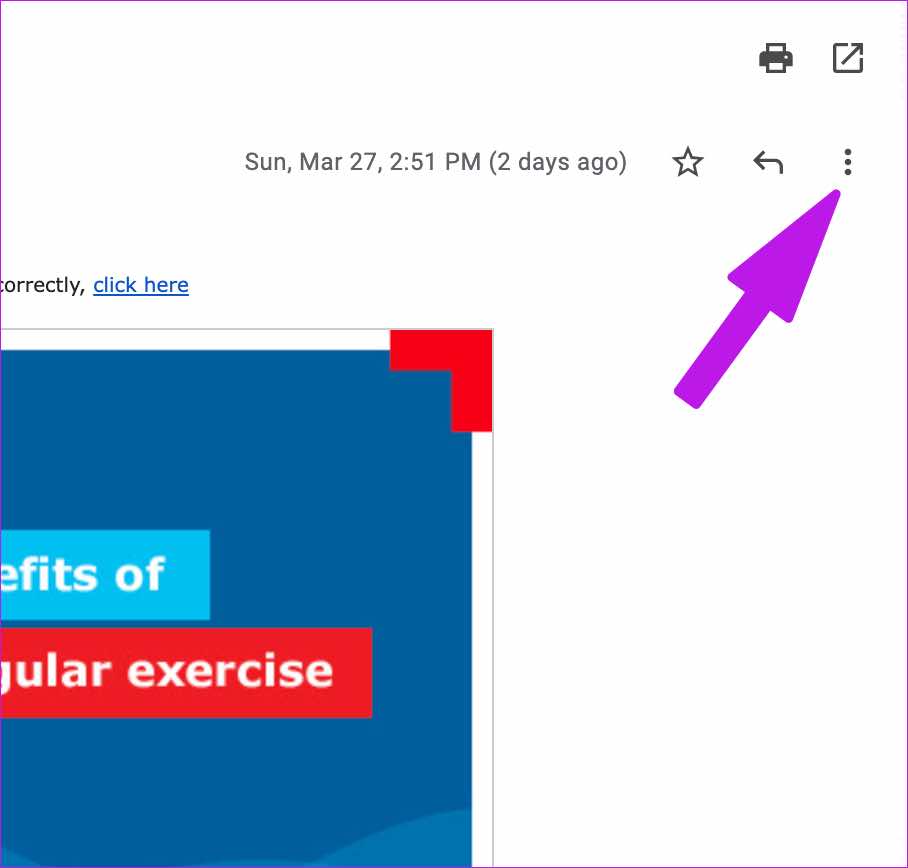
Step 3: Click on the three-dot menu in the top-right corner of the email.
Step 4: Select Block “(sender)” and Gmail will ask for confirmation.
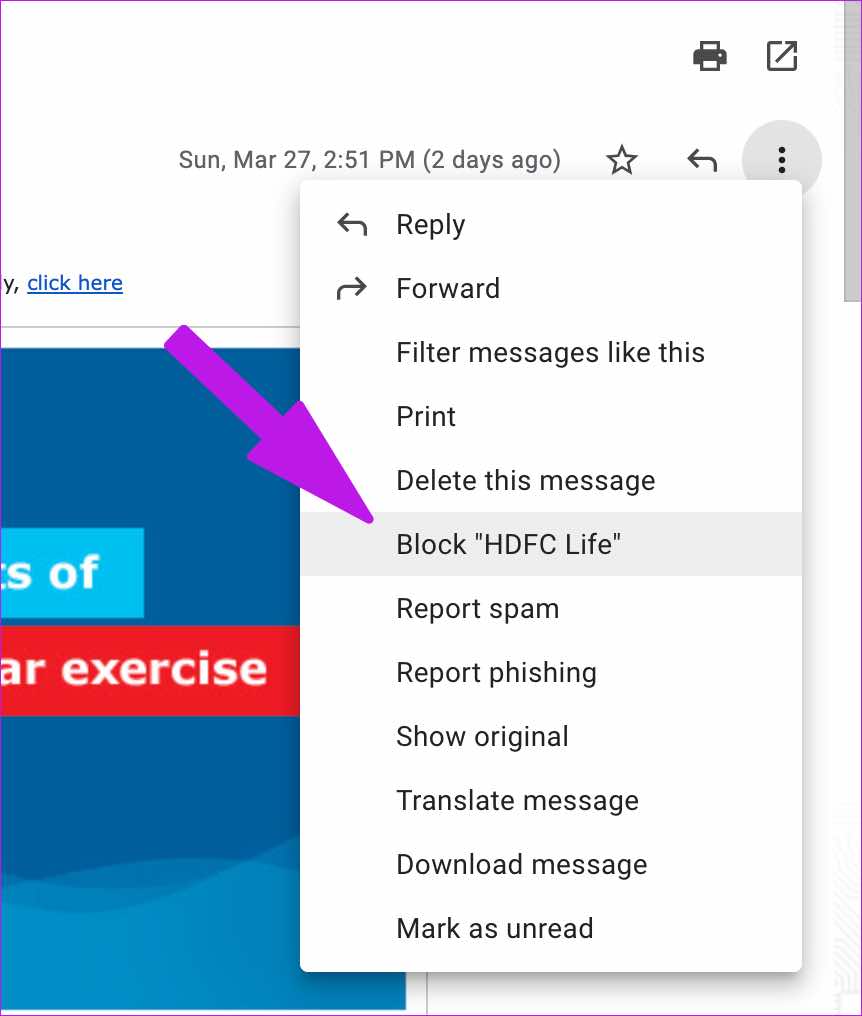
Hit Block and all the future messages from that email address will be marked as Spam. They won’t appear in the primary Inbox.
Create a Rule in Gmail
The solution mentioned above works only with specific email addresses. If the company uses another email address to send marketing emails, then you’ll need to keep repeating that solution. But instead, you can create a rule in Gmail and block all future emails with a specific sender name and multiple email addresses.
Rules are also useful when you want to filter out selective words, or any other event through which companies try to bombard your Inbox. Here’s how to create a rule to directly delete emails and send them to spam.
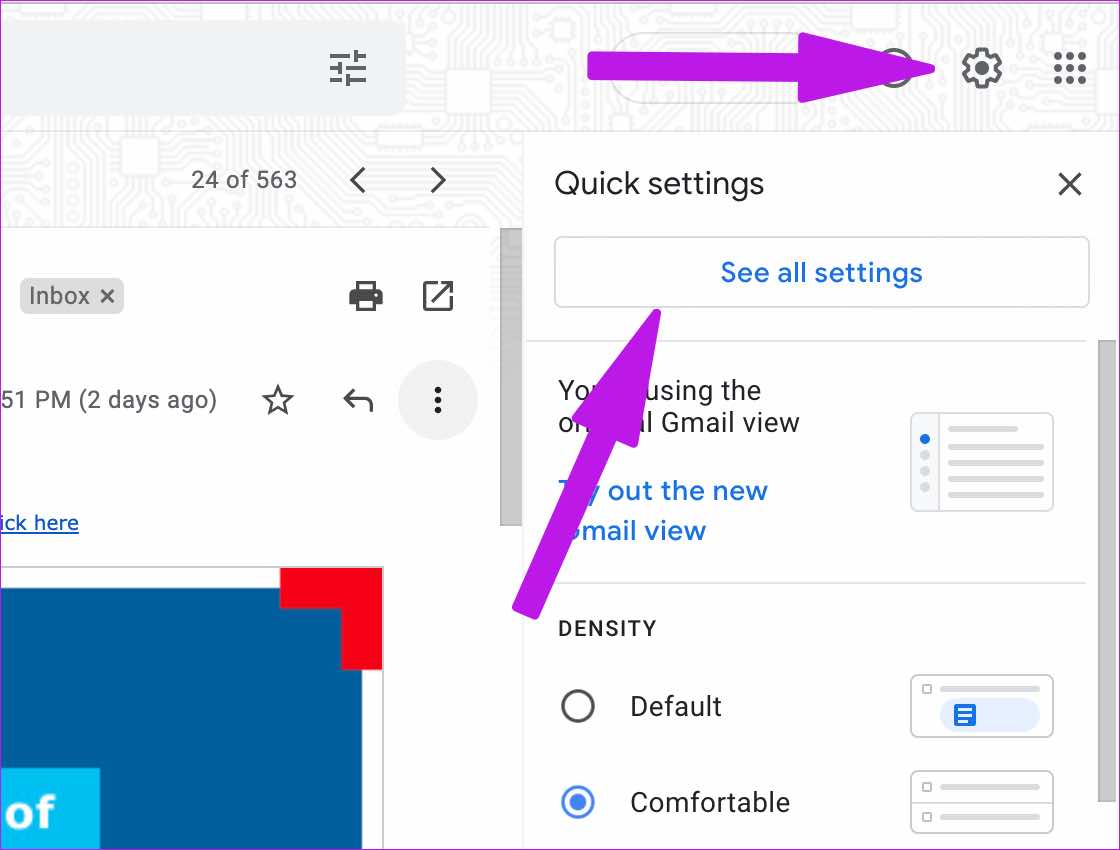
Step 1: Launch Gmail on the web and click on the Settings menu with a gear icon on the top-right corner. Select See all settings menu.
Step 2: Go to ‘Filters and Blocked Addresses’ tab.
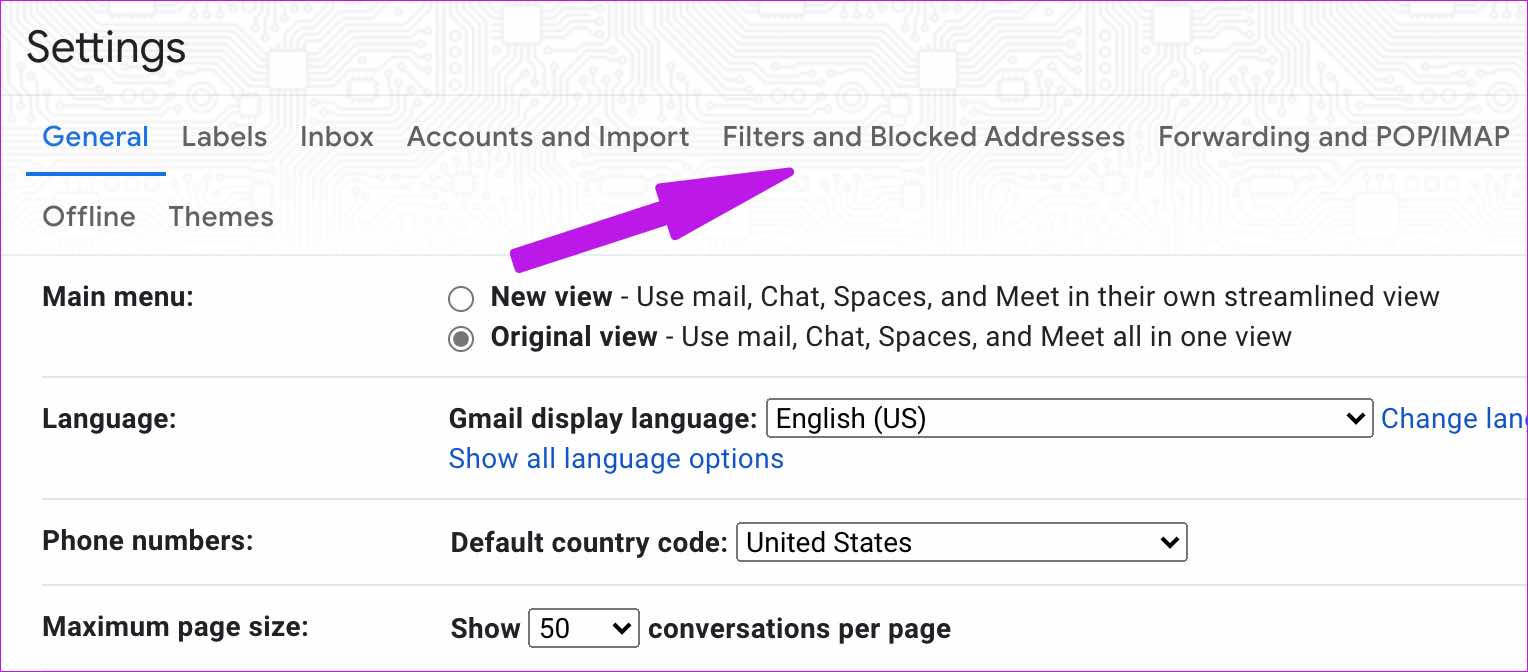
Step 3: Scroll down and select Create a new filter.
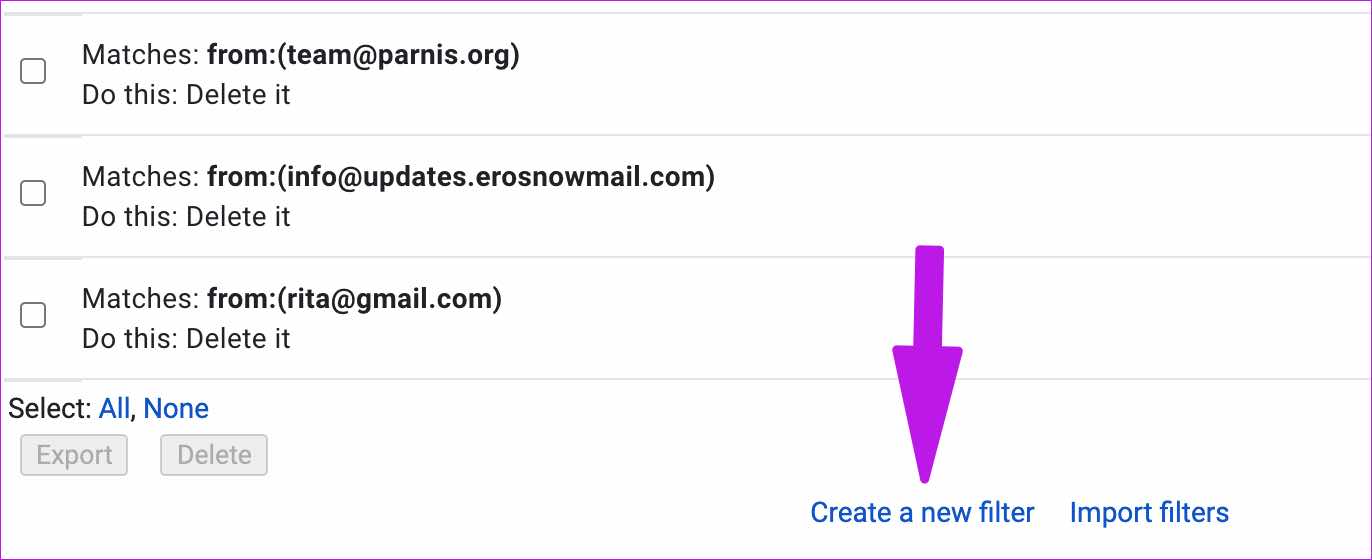
Step 4: Add an email address, type subject, or enter words that you want to block on Gmail.
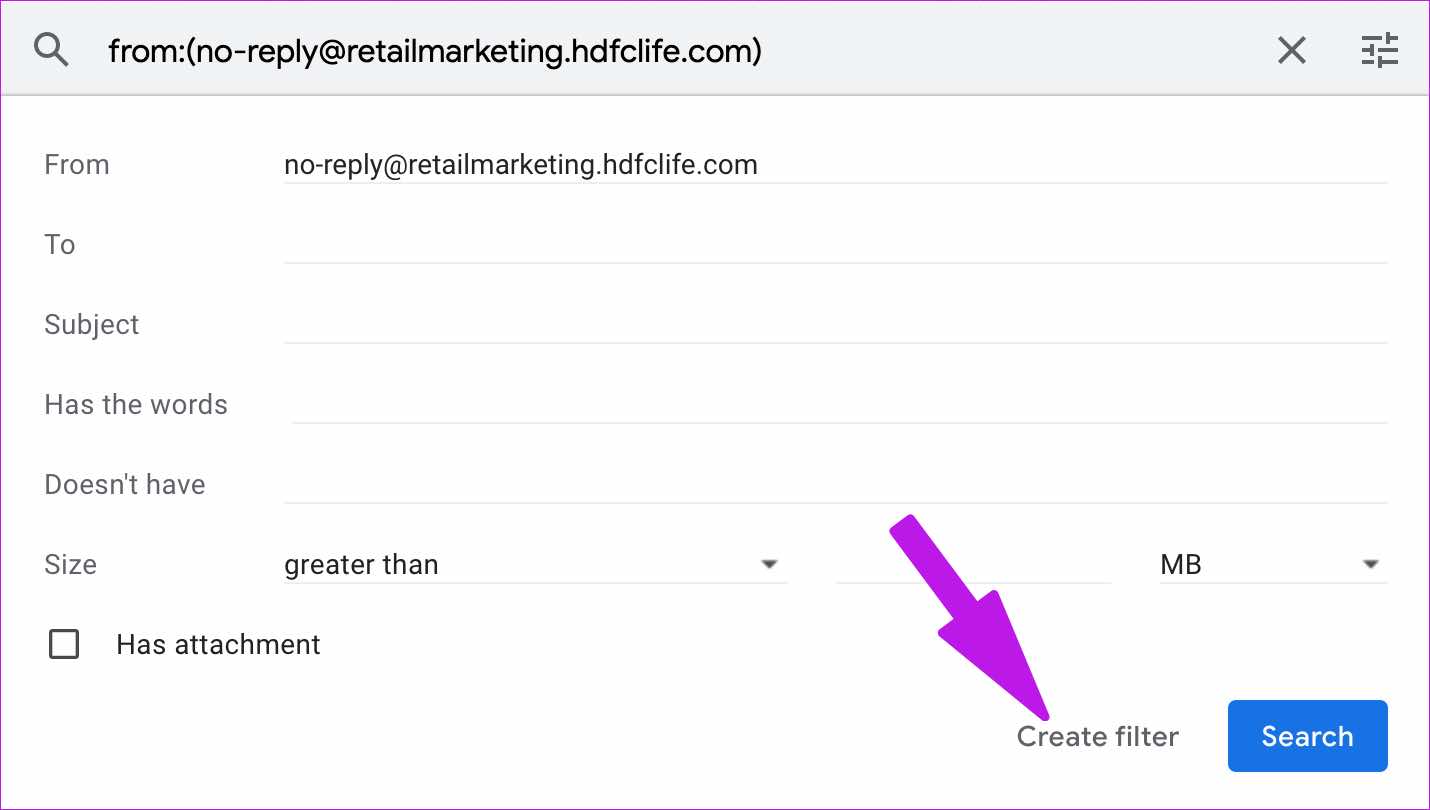
Step 5: Click on Create filter and enable the checkbox next to Delete it.
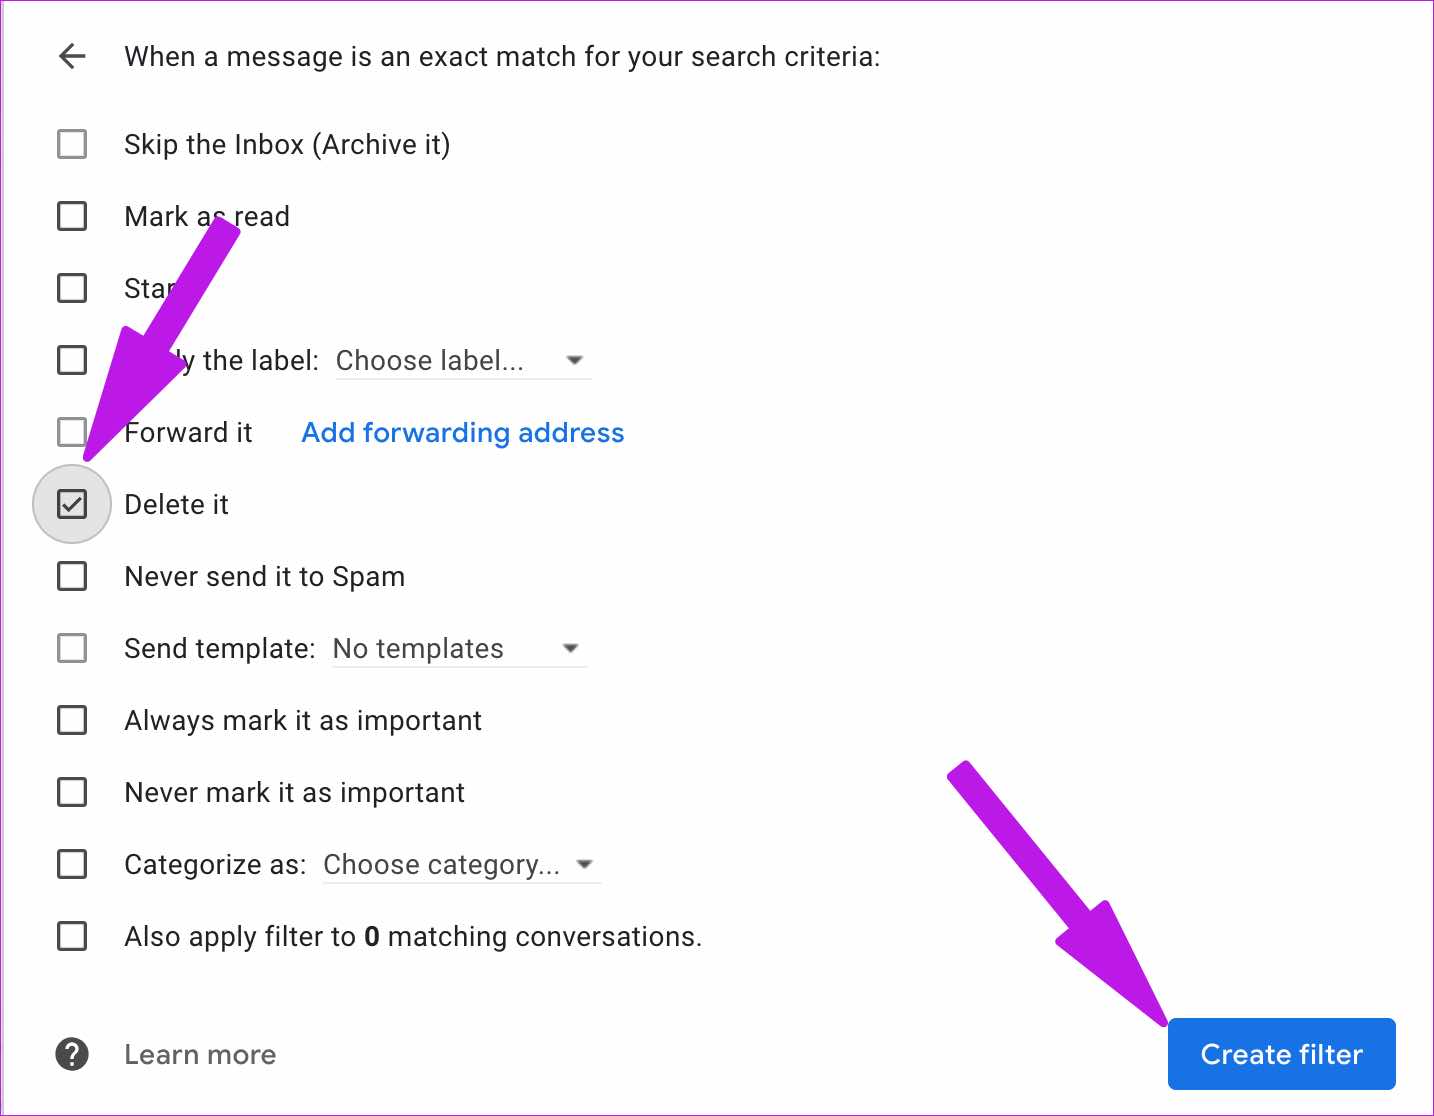
Select Create filter and Gmail will automatically run it once it receives emails that match the filter criteria.
Alternatively, you can create a filter right from the email.
Step 1: Open an email in Gmail and click on the three-dot menu in the top-right corner.

Step 2: Select Filter messages like this, add relevant conditions and steps to take from the following menu.
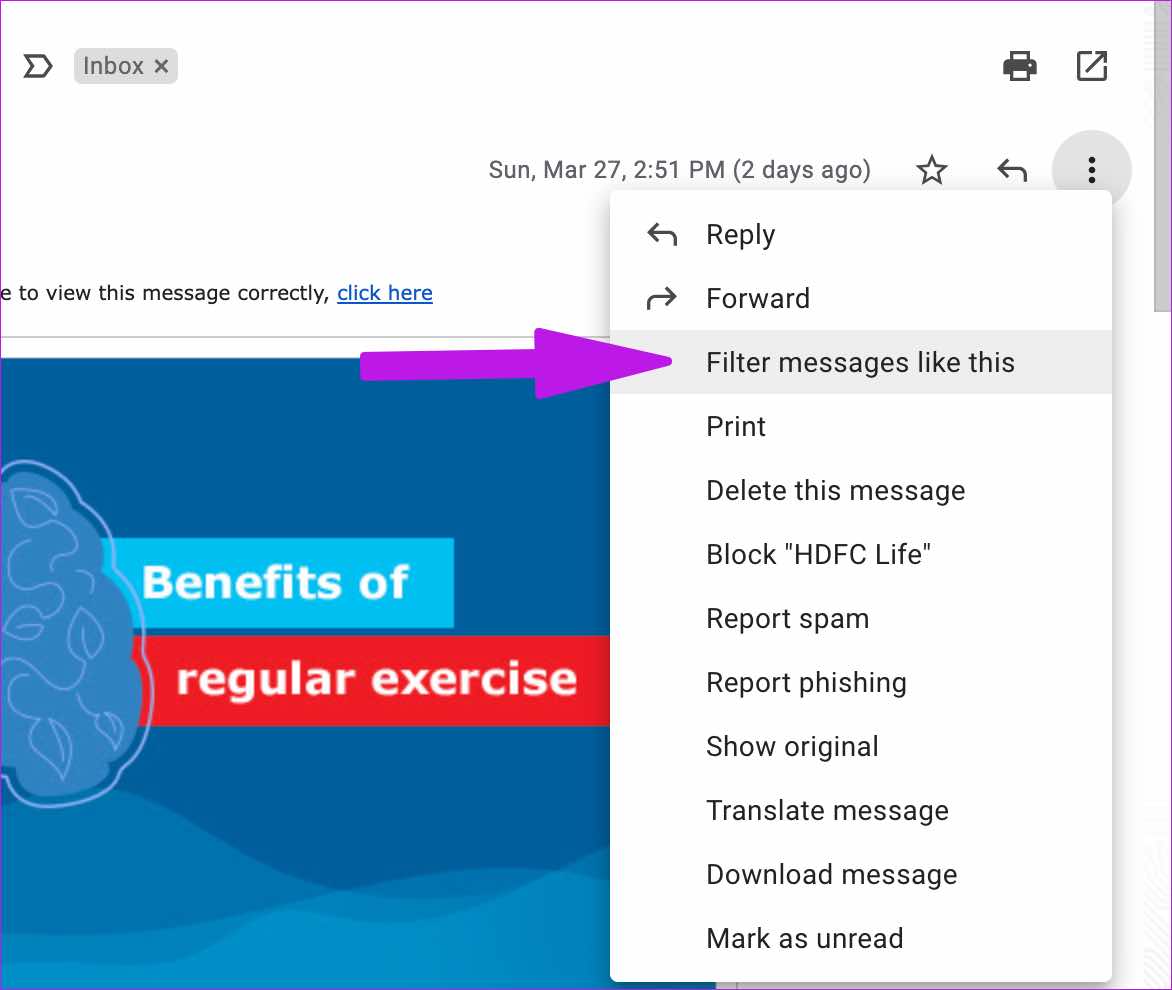
That’s much easier to block and delete emails from a prolific sender.
Unblock Emails in Gmail
If you have a change of heart, you can easily unblock emails in Gmail. Here’s how.
Step 1: Go to Gmail Settings (refer to the steps above).
Step 2: Open Filters and Blocked Addresses.

Step 3: Scroll down and find all the blocked email addresses. Select unblock beside an email ID and confirm your decision.

2. Block Emails in Gmail Mobile
Gmail has an identical interface on iPhone and Android. For this guide, we’ll use the Gmail iPhone app’s screenshots. You can follow the same process on Gmail for Android to block emails.
Step 1: Open Gmail on iPhone.
Step 2: Tap on an email that you want to block.
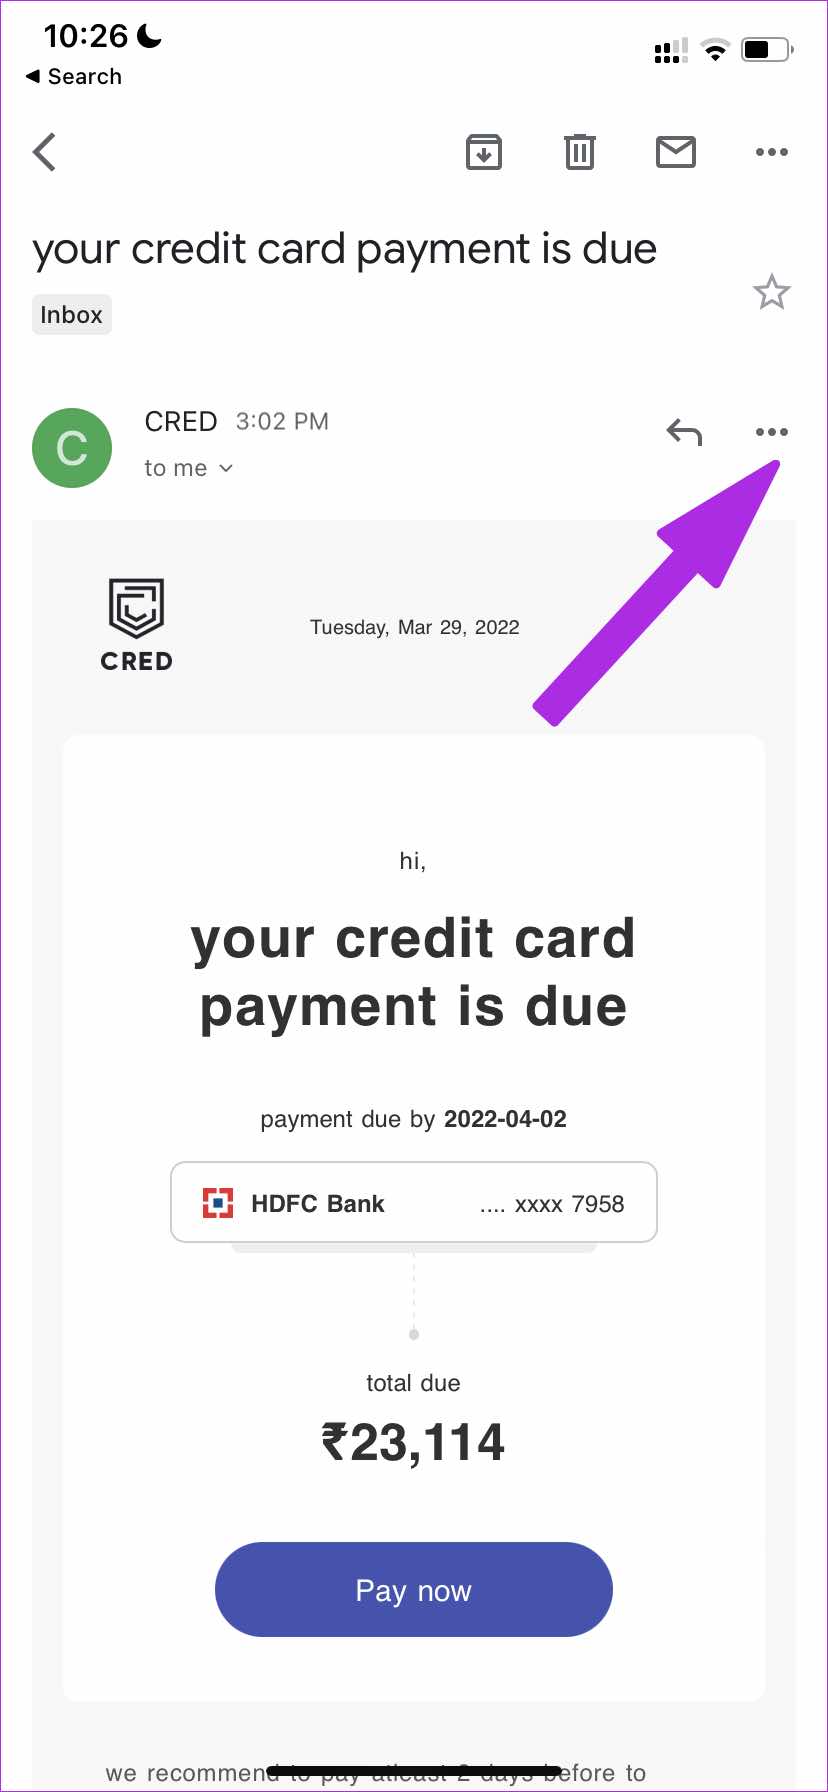
Step 3: Select the three-dot menu at the top and tap on Block “sender” at the bottom.
Unlike Gmail desktop, the mobile apps won’t ask for any confirmation and immediately blocks the sender from making a mess in your Inbox. Unfortunately, you can’t set Gmail filters from mobile apps.
Unblock Emails in Gmail Mobile
You can unblock a sender in Gmail mobile apps as well.
Step 1: Open Gmail on your phone.
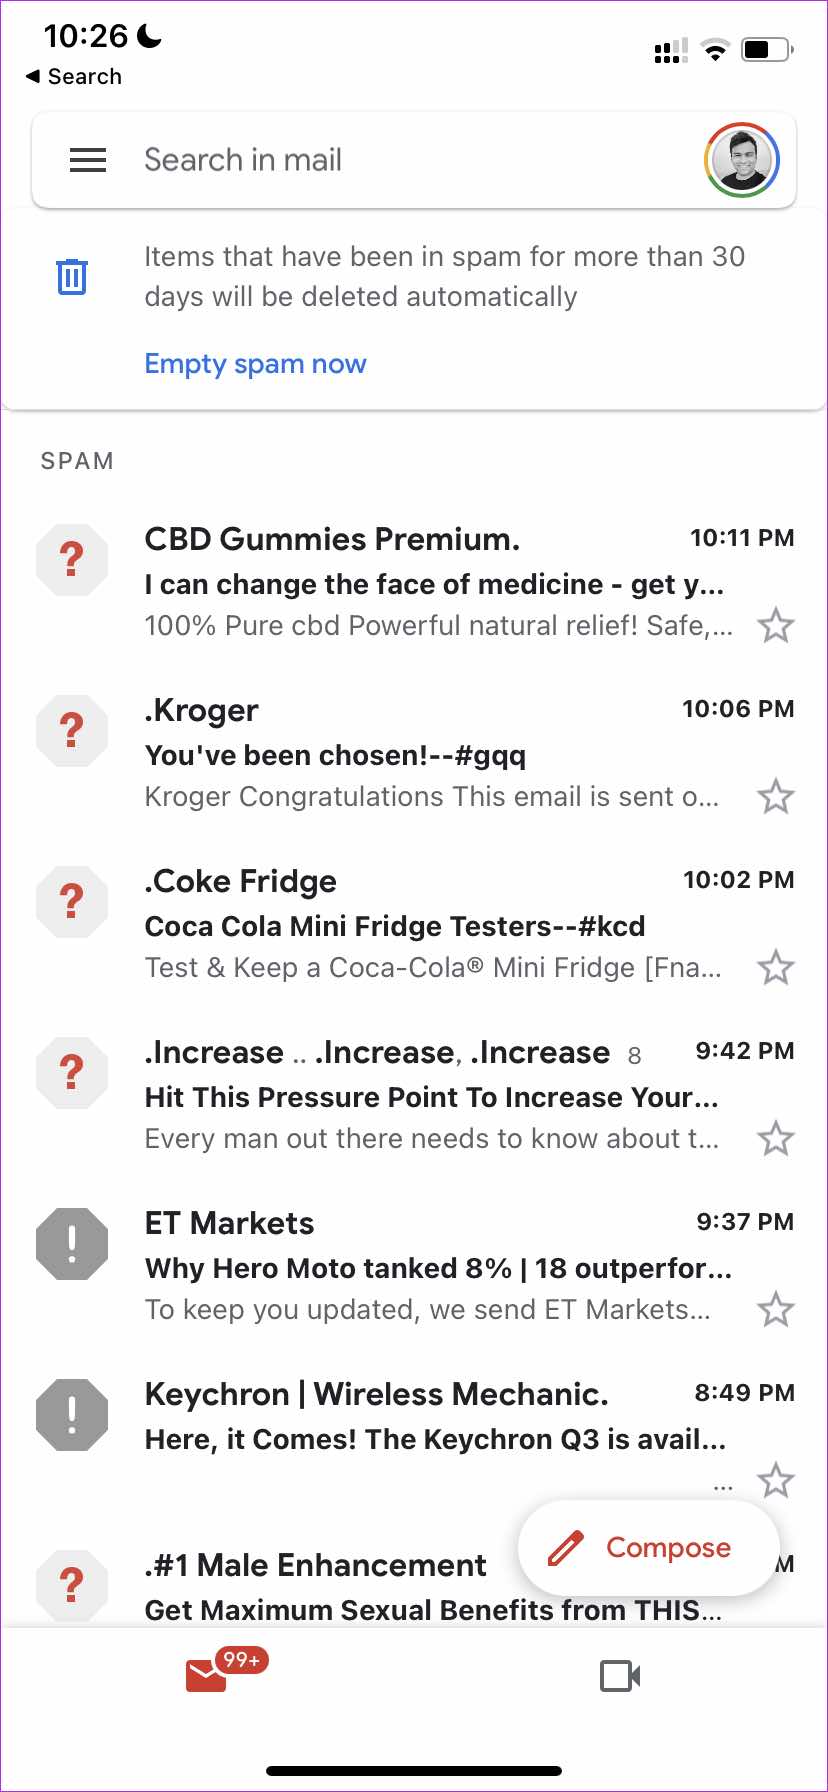
Step 2: Tap on the hamburger menu at the top left corner and open Spam.
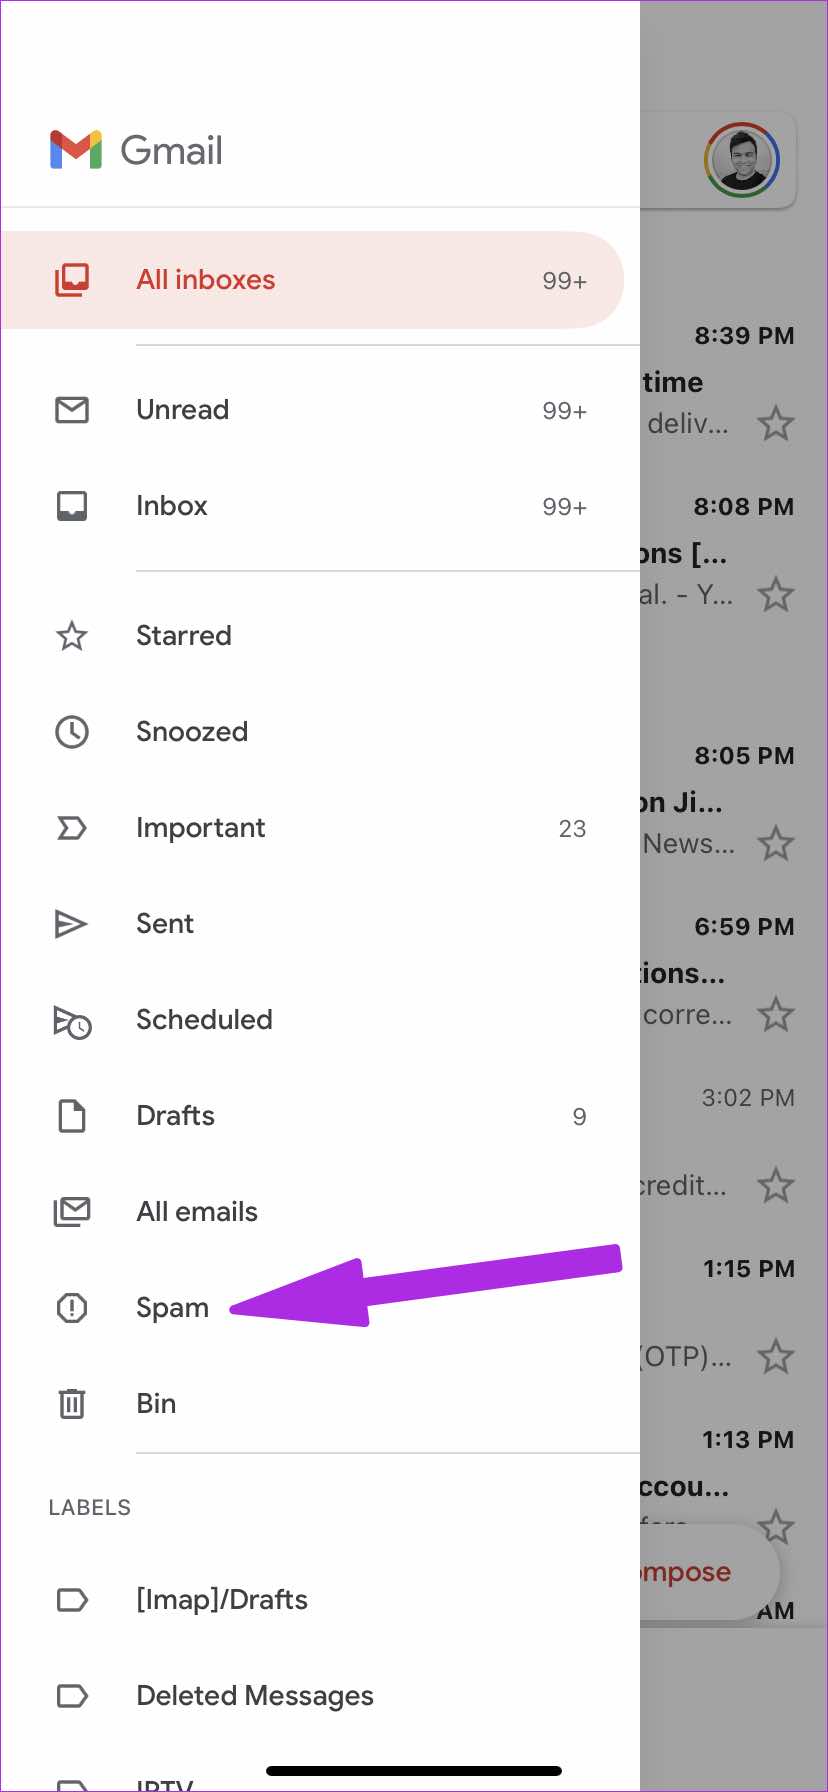
Step 3: You will find all the blocked senders here. Tap on a relevant email and open it.
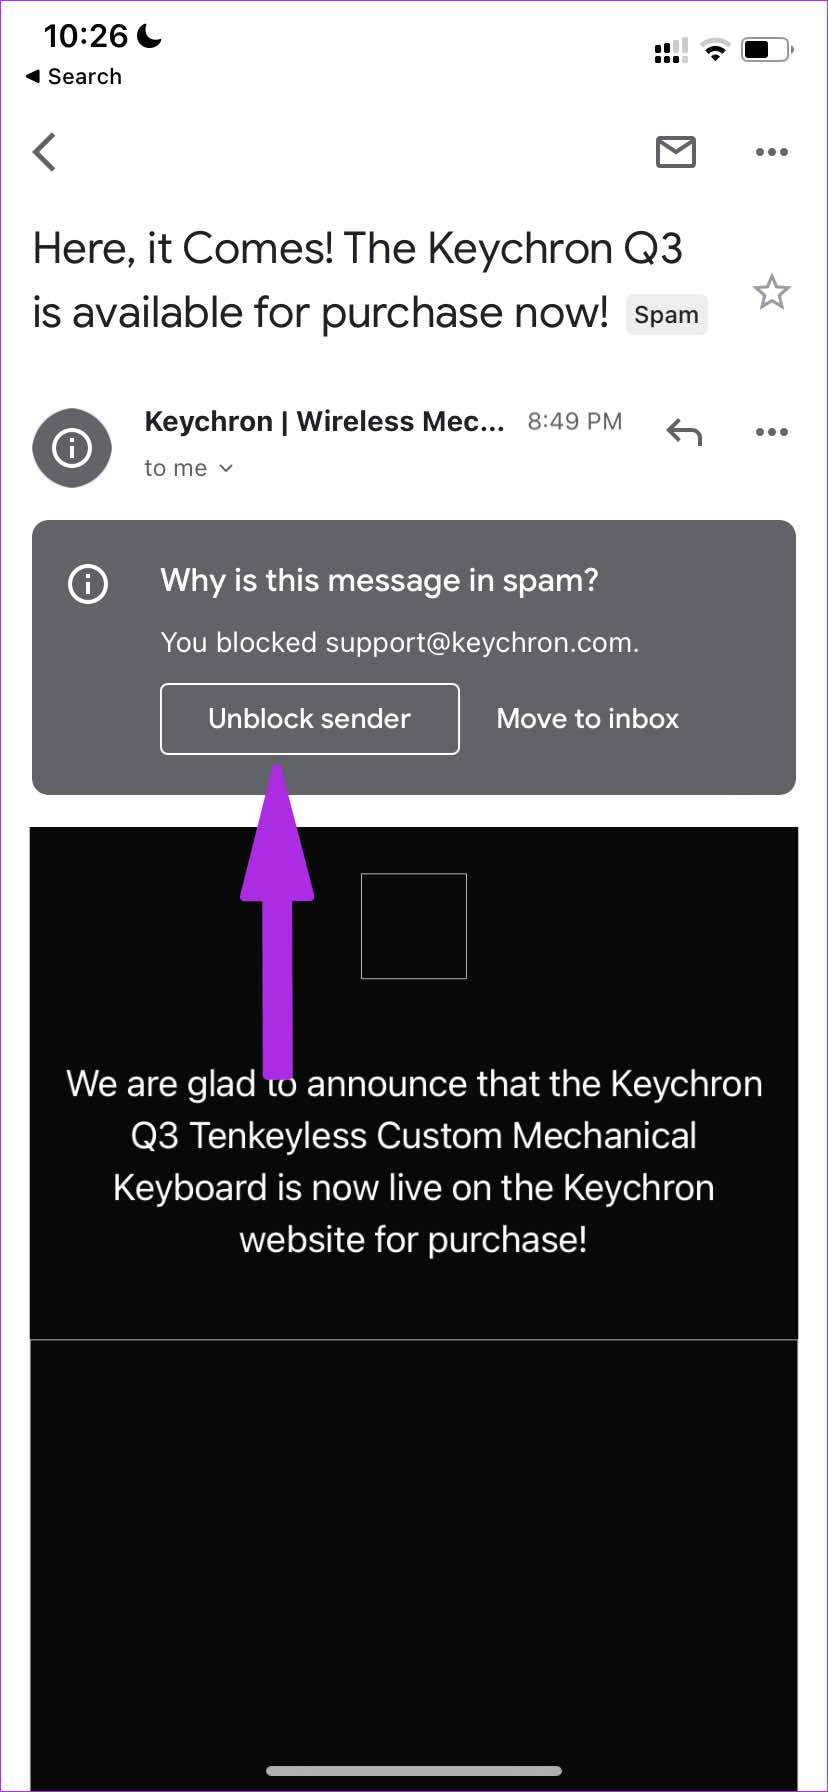
Step 4: Select Unblock sender in the grey box and Gmail will start allowing the sender to reach your main inbox.
Manage Emails in Gmail Like a Pro
Before you miss out on important emails in a sea of spammy emails in your Gmail Inbox, use the tricks above and start blocking unknown and irrelevant senders.
Last updated on 01 April, 2022
The above article may contain affiliate links which help support Guiding Tech. However, it does not affect our editorial integrity. The content remains unbiased and authentic.

